1. Register for Linode
Linode Registration Address1. Open the link above to enter the Linode official website. The default account registration can be done using Google, GitHub, or Email. Here we choose Email.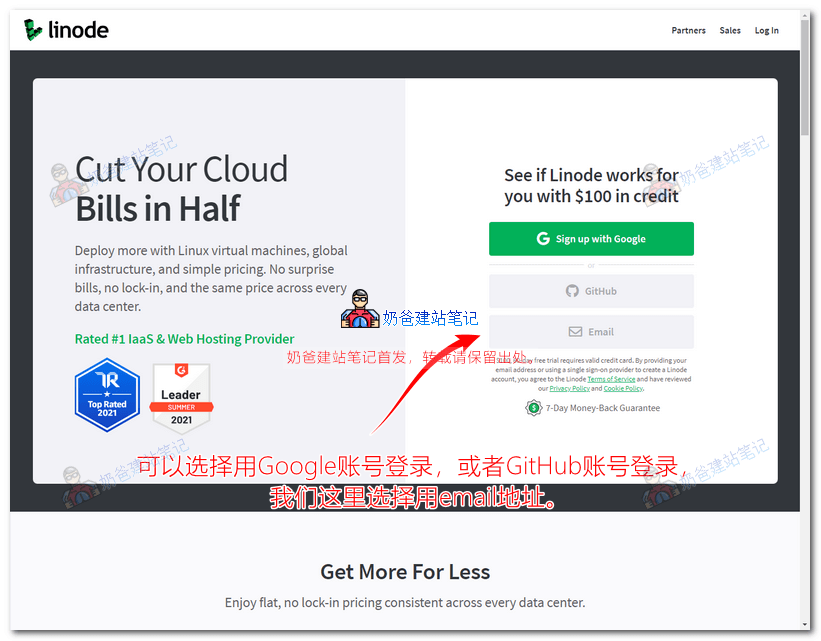 2. On the new page, enter your email, username, and password to register, as shown in the image below:
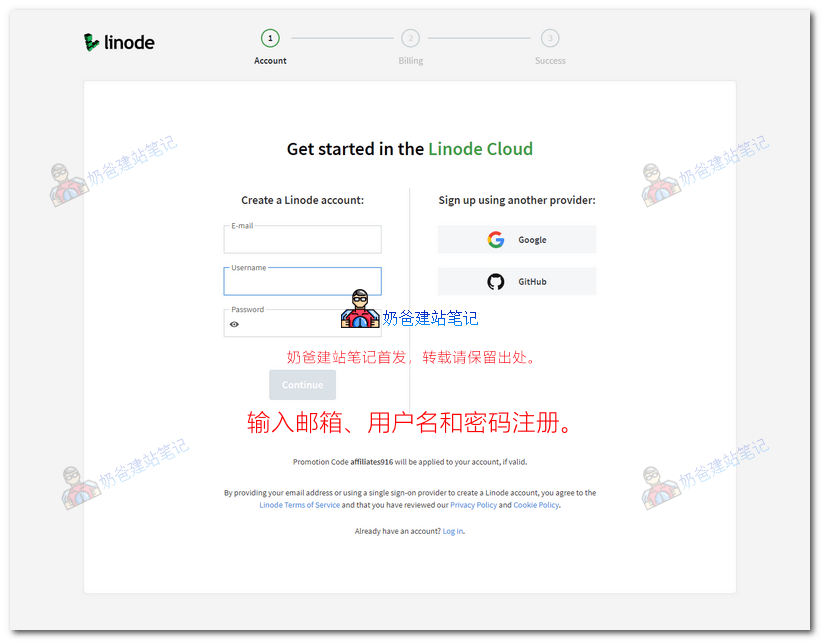 Because Naiba has already registered an account, we choose 'log in' at the bottom of the page to log in directly.
2. Top Up Your Linode Account
Linode's billing model is pay-as-you-go, so you need to top up first. Click 'Account', then 'Make a Payment' in the top right corner to recharge. You can choose credit card, PayPal, or Google Pay.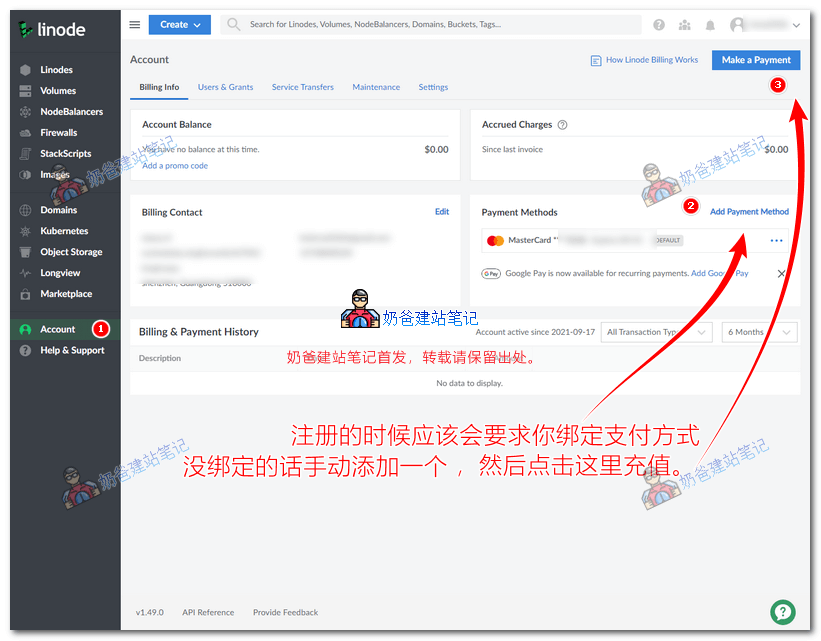

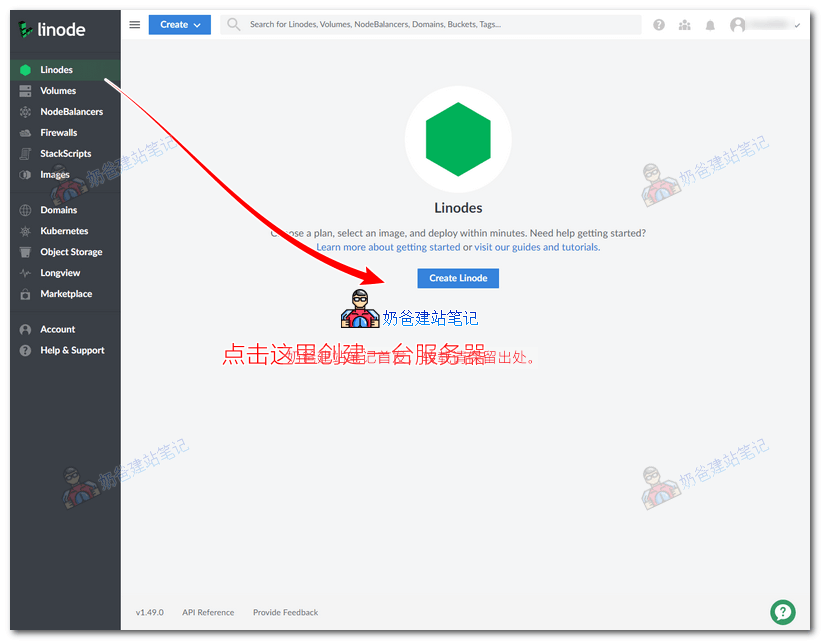
Three, Create Server
Method One: Create a server by installing Baota Panel yourself
This method is the same operation as ourBaota Panel Installation Tutorial, suitable for friends with strong learning abilities. The advantage of this method is that all server configurations are arranged by you, facilitating later management and maintenance. However, if you are sufficiently familiar with English, you can also directly consider aaPanel from Method Two.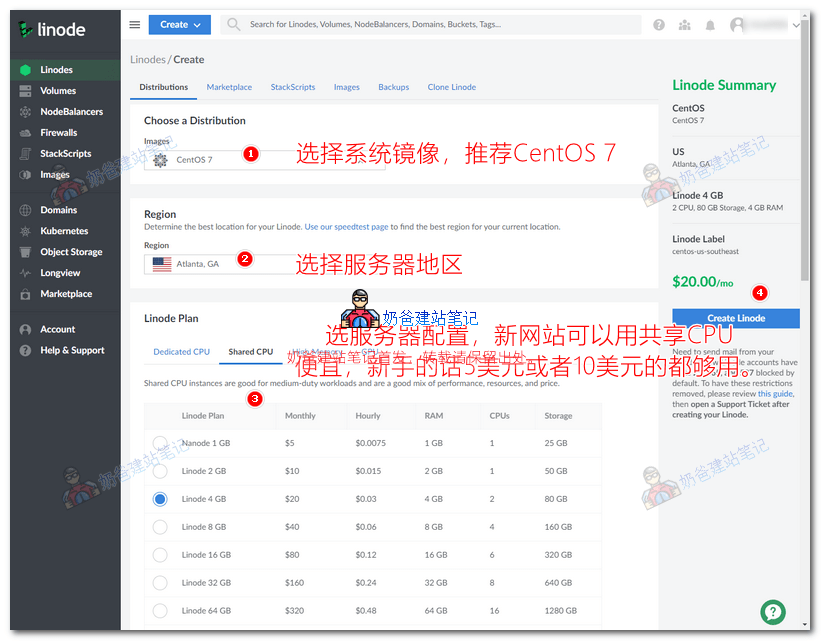
 After the system creation is complete, please refer to the previously writtenBaota Panel Installation Tutorial。
If prompted withAccount Limit reached. Please open a support ticket.please submit a support ticket to ask the customer service for the reason. (Support Ticket Link)
Method Two: Create a server directly from the Marketplace
This method is faster because they directly install the required programs in the system for you, saving you the process of manual installation. In the image below, aaPanel is the English version of Baota Panel, so it is recommended to prioritize this. Another option, CyberPanel, is a panel similar to Baota developed by foreigners, with some usage differences, but it can also be used.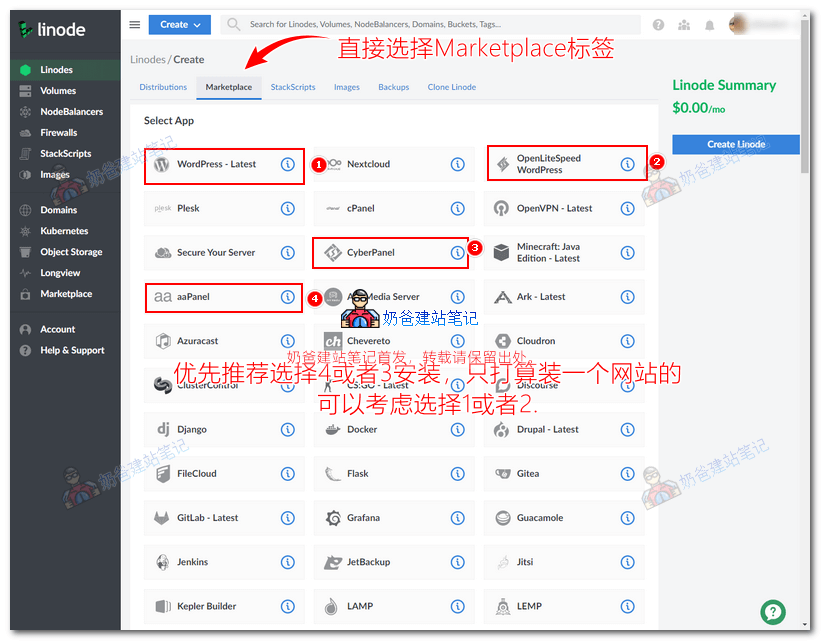
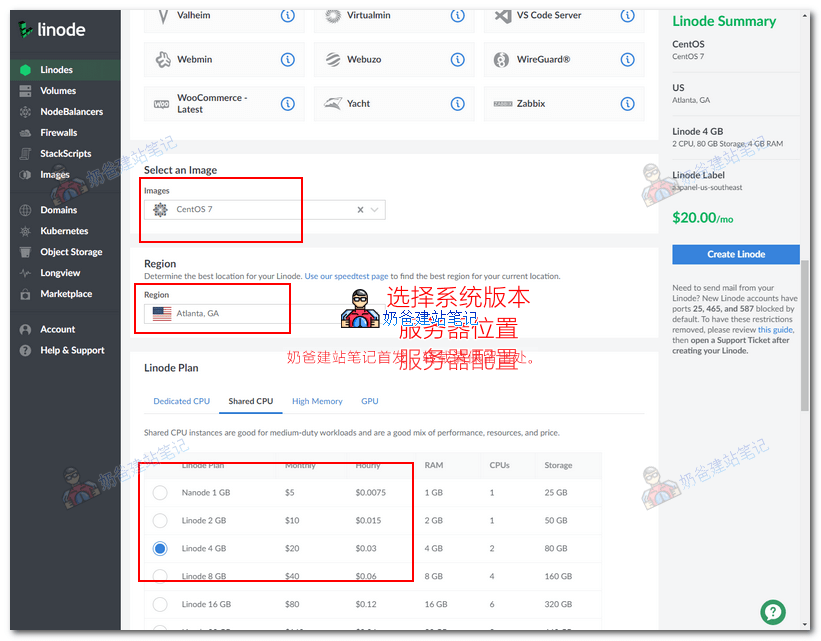
For the server version, it is recommended to choose CentOS 7, as it has the best compatibility with Baota Panel and has abundant online resources.
For Region, choose the appropriate area based on your business needs.
For Plan, beginners can start with a Shared CPU package, which is cheaper. Beginners can start with a $5 or $10 configuration.
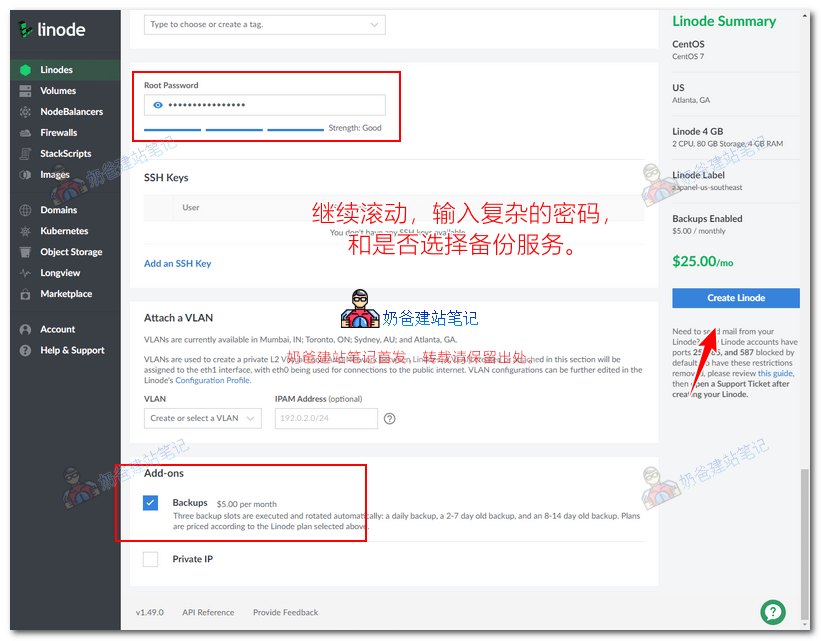
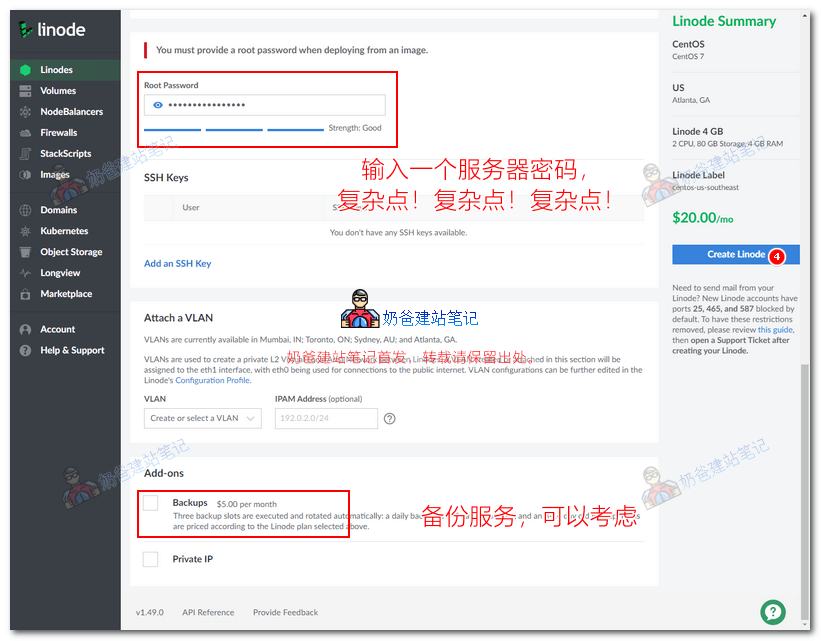
Finally, enter a complex server management password, choose whether backup service is needed, and then create.
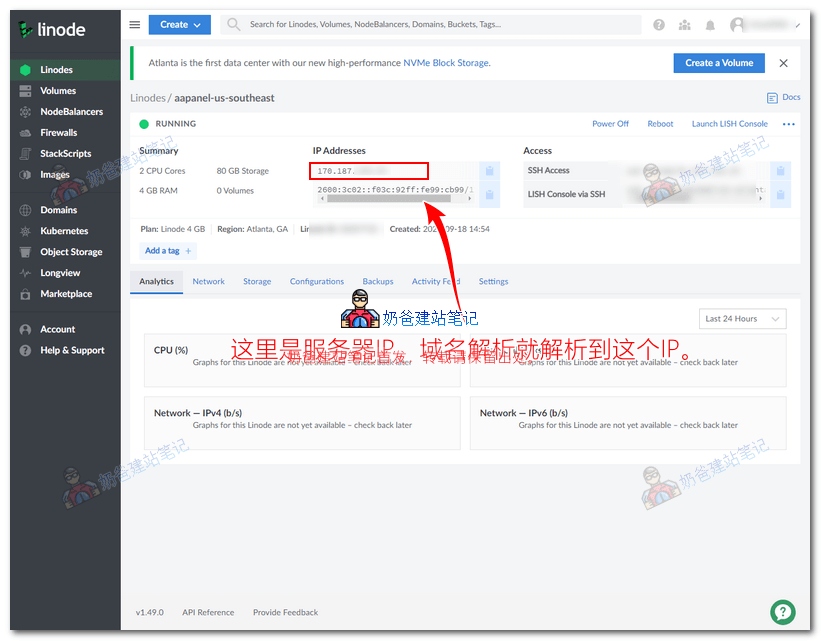
After installation is complete, you can see the server IP. When resolving the domain, just point it to this IP.
Four, Manage Server
To manage the server, we need to use corresponding SSH software. Naiba still recommends Xshell here. Click the link below to download and install.#Website Building# Free VPS management software Xshell7/Xftp7 Chinese version downloadAfter installation is complete, open Xshell, enter the following command, and then press Enter.ssh root@ip地址Replace the IP address with your own server's IP, don't just copy it as is.
 Then enter the server root password you filled in when creating the server earlier. After successful login, the interface will look like the following.
Connecting to 170.187.*.*:22...
Connection established.
To escape to local shell, press Ctrl+Alt+].

WARNING! The remote SSH server rejected X11 forwarding request.
[root@li2338-25 ~]#
Then enter
cat /root/.aapanel_infoView the default aaPanel information, as shown in the figure below: Open the URL following 'aaPanel Internet Address' in your browser, and the aaPanel login interface will appear. (You can close Xshell now, it's temporarily not needed.) Log in using the username and password information from the above figure. After success, it will look like the following:
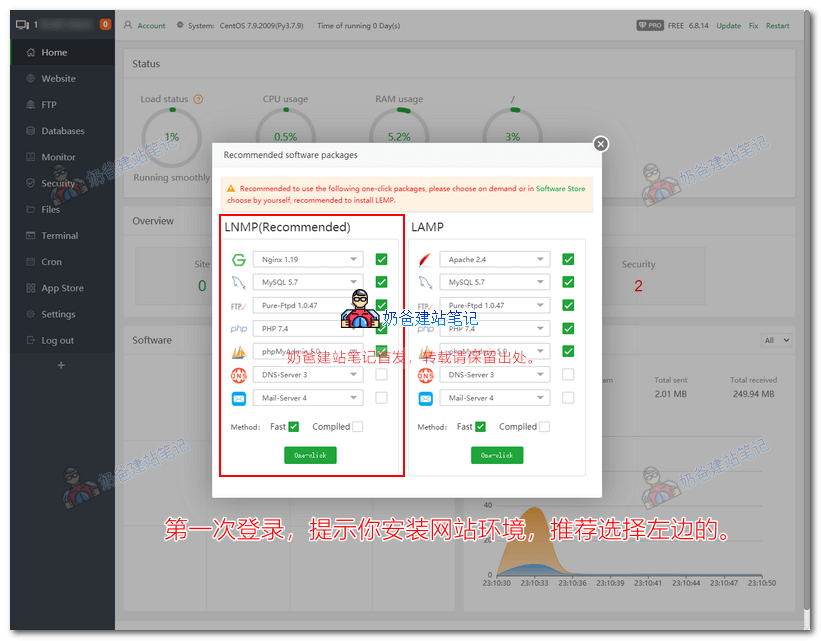 In the above figure, if you plan to install WordPress, it is recommended to use PHP version 7.4 or above, MySQL 5.6 or above. The FTP one can be skipped, as it's rarely used (refer toWordPress Configuration Requirements). The installation process may take several tens of minutes depending on server performance. Now you can go ahead and resolve your domain name.
Five, Resolve Domain
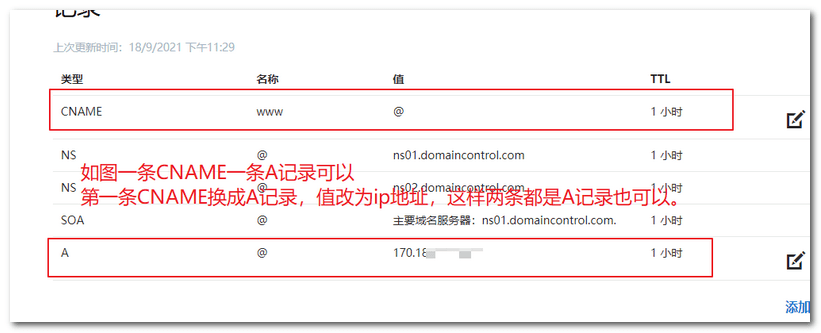
The operation interface differs for domains purchased from different websites. The general method is to add an A record pointing to your server IP. You can refer toDomain Name Guidethis article. Simply put, domain name resolution means entering your server's IP in the domain management backend. After purchasing a domain, you need to resolve the domain so others can access your website via the domain. The methods for domain resolution are largely similar. Please refer to the following tutorials:- NameSilo Domain Resolution and DNS Server Modification Tutorial
- Namecheap DNS Resolution Tutorial
- Tutorial on modifying DNS resolution records for domains registered with Godaddy
- How to check SiteGround server IP and DNS and resolve a domain
- Shopify domain setup tutorial: Resolving your own domain to Shopify
- dynadot domain purchase and resolution tutorial
- Tutorial on building a website with Hawk Host and binding domain DNS
- Alibaba Cloud Domain Resolution Tutorial: How to Modify IP Records for Domains Registered on Alibaba Cloud
- Tutorial on domain registration and DNS resolution on Tencent Cloud
Six, Add Website
After waiting for aaPanel installation to complete, return to the backend and enter 'website'. (If you find English tiring, you can refer to the steps in theChinese version Baota Panel installation tutorial, they are almost the same.)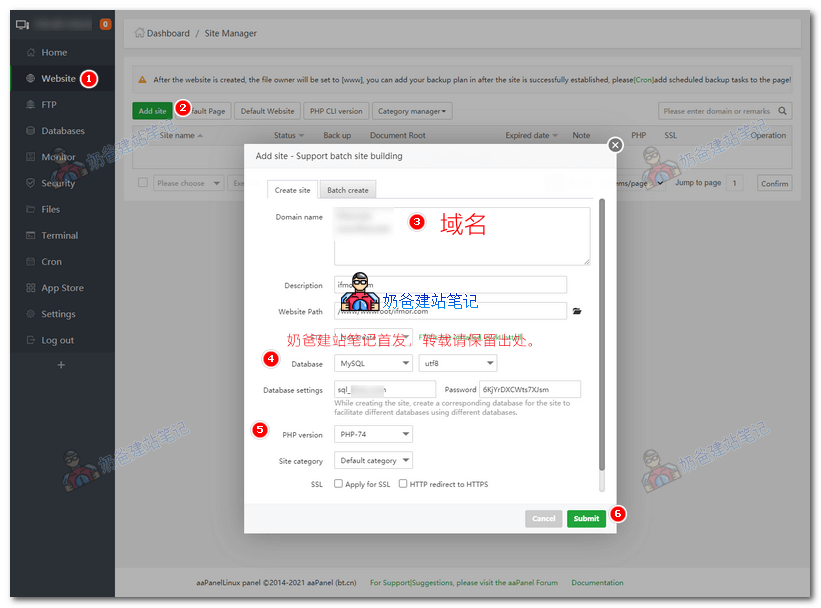 Website > Add site > Enter the domain name, create a database, then submit.
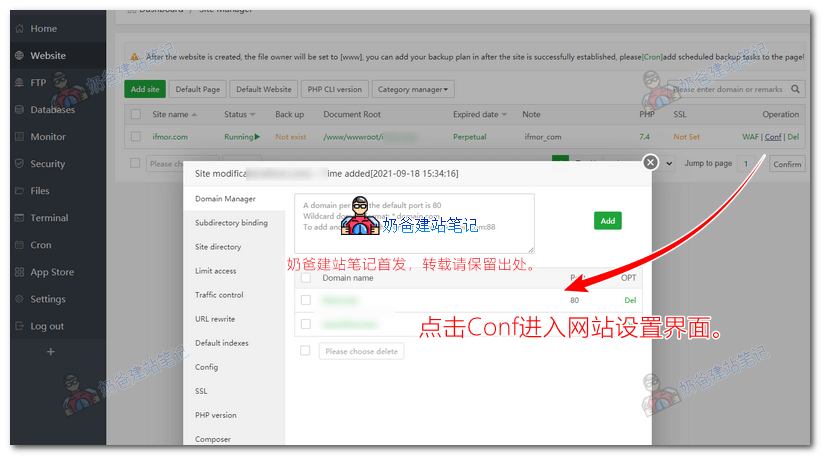 Then, enter the website settings. There are two areas that need attention:
- SSL: Select the first option 'Let's Encrypt', check your domain name, then click the button to automatically generate it. After success, turn on the 'Force HTTPS' button in the upper right corner. (Why not directly check SSL when creating the website? Because your domain might not have been resolved and active yet at that time, applying for SSL could fail.)
- In URL rewrite, select WordPress, then save.
Seven, Install WordPress Website
Next, start installing the WordPress website on the Linode server. First, click to enter the website directory.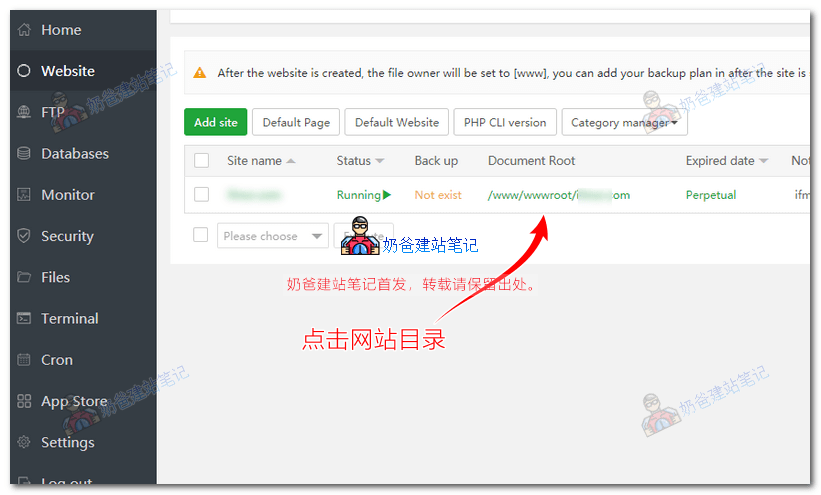 Then, remotely download the WordPress installation package from the address: https://wordpress.org/latest.zip
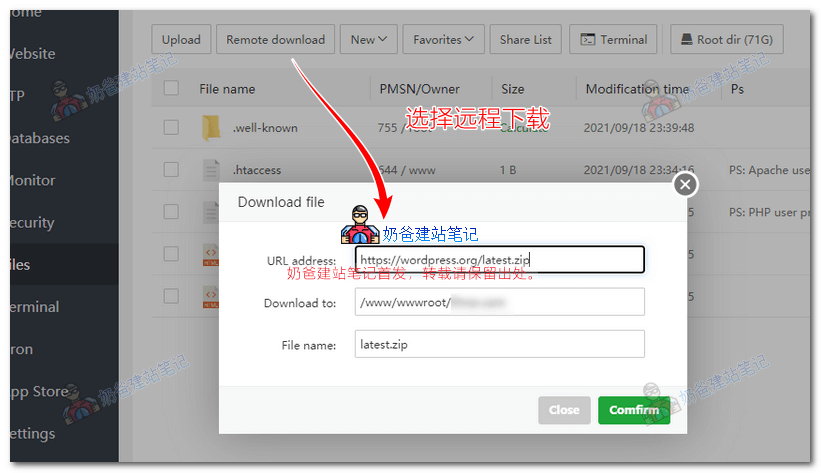 After downloading, extract it.
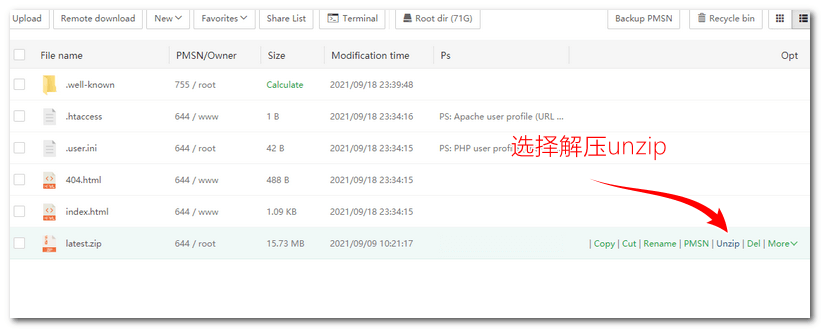 Enter the extracted WordPress folder, select all files, and choose 'Cut'.
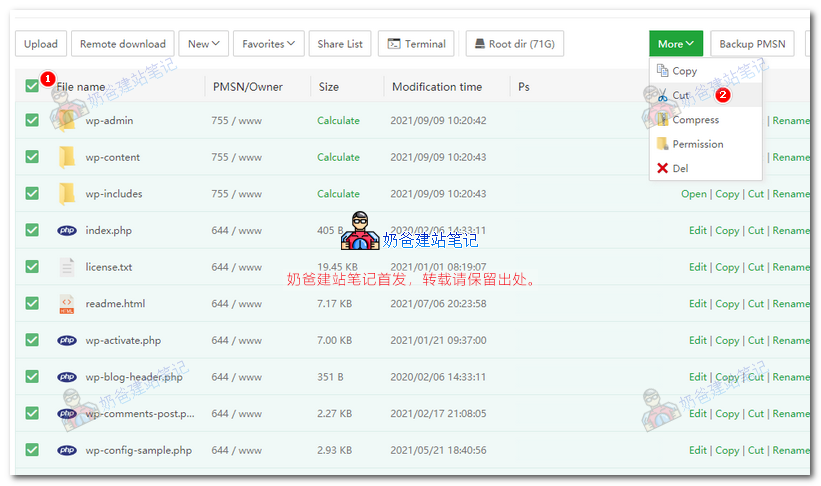 After selecting all and cutting, click the domain name folder in the address bar to go back. Then click the 'Paste' button in the upper right corner to paste the files under the domain name folder.
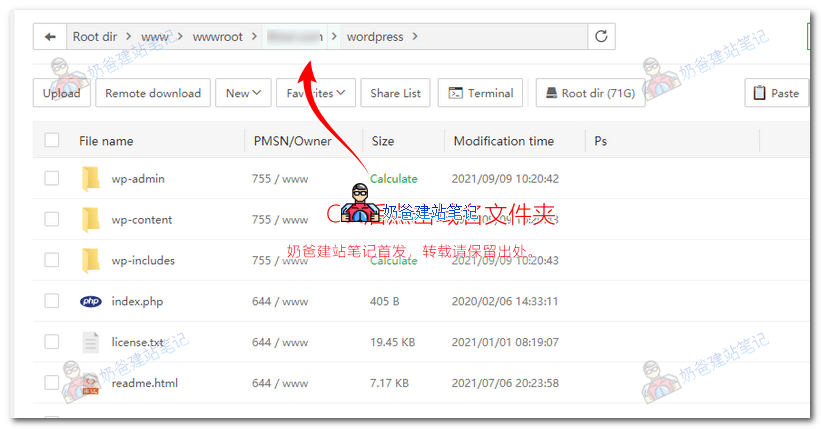 Open your website URL in a browser, and the WordPress installation interface will appear. The installation process won't be repeated here; refer toWP Installation Steps in WordPress Tutorial. At this point, the WordPress website has been successfully installed on the Linode server.