
HawkHost is a long-established foreign web hosting provider. Naiba checked the purchase history and found that the earliest purchase was on 03/11/2011 for a two-year Basic plan (annual payment $39.48). It is still stable and hasn't gone under.
HawkHost is suitable for foreign trade enterprises or individuals whose website visitors are overseas users. If the website visitors are domestic users, the loading speed may not be ideal.
In the Naibabiji website building QQ group, a user who purchased HawkHost encountered a problem when setting up a website. The website kept showing „SORRY! If you are the owner of this website, please contact your hosting provider:“ so they asked Naiba for help, which led to this article.
HawkHost Purchase Tutorial
Above is the purchase link for HawkHost. If you purchase from this link, Naiba can receive a certain commission reward.
Select a Shared Hosting Plan
After opening the HawkHost official website, click HOSTING – SHARED WEB HOSTING in the upper right corner to purchase shared web hosting.
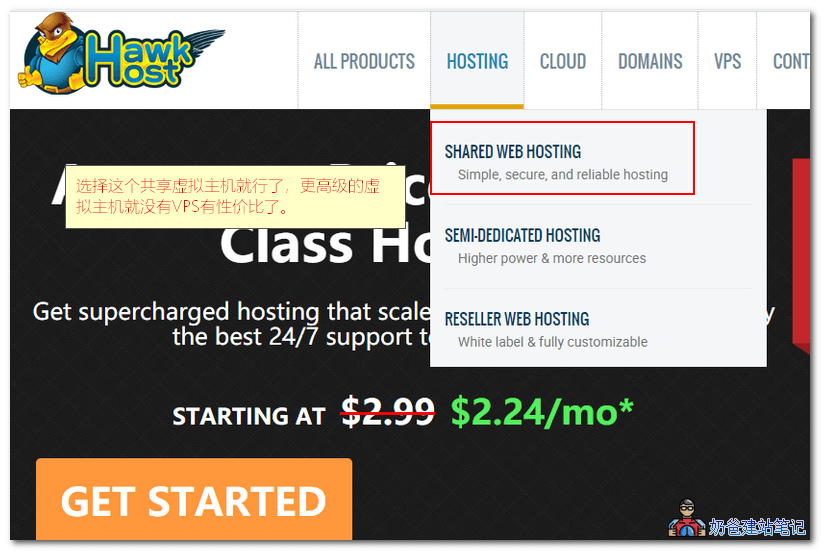
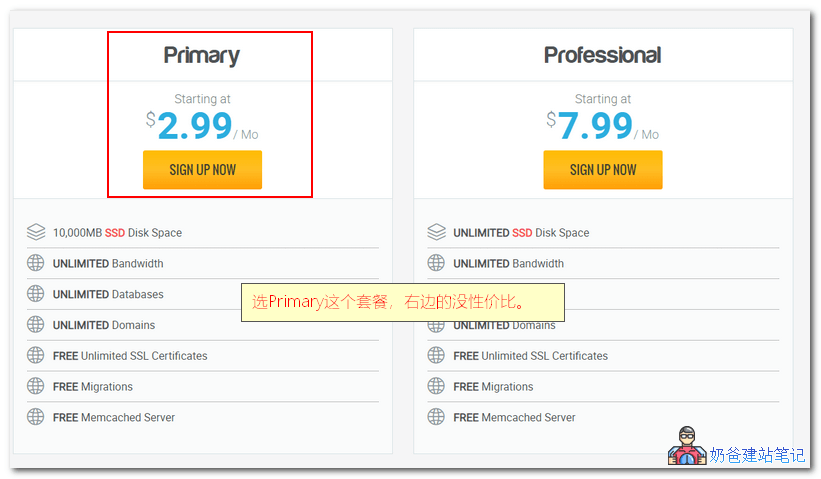
Just choose the cheaper Primary plan; 1000MB of disk space is sufficient for a regular website.
Fill in the Domain to Bind
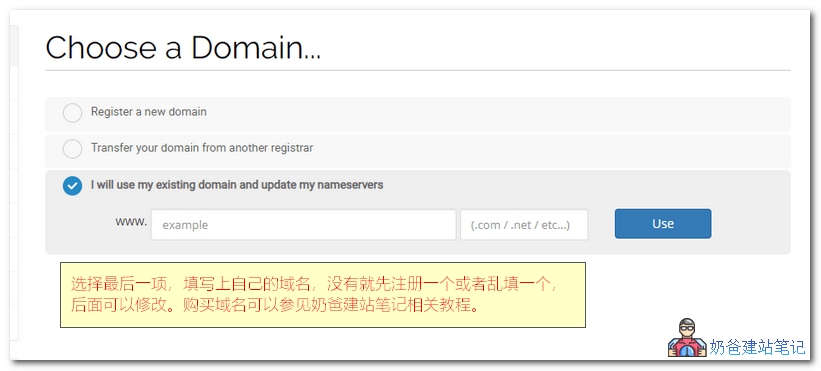
Then a page appears asking you to enter a domain name. The first option is to register a domain with HawkHost, and the second is to transfer a domain from elsewhere to HawkHost.
We choose the third option, to use a domain you have already registered. If you haven't registered one, you can register one first or fill in a random one.
For registering a domain abroad, it is recommended to use namesilo. It offers good value for money and includes privacy protection. Most of Naiba's domains are registered there.
- 2019 Foreign Domain Name Registrar Namesilo Domain Registration Tutorial
- Tutorial on DNS resolution and DNS server modification for NameSilo domains
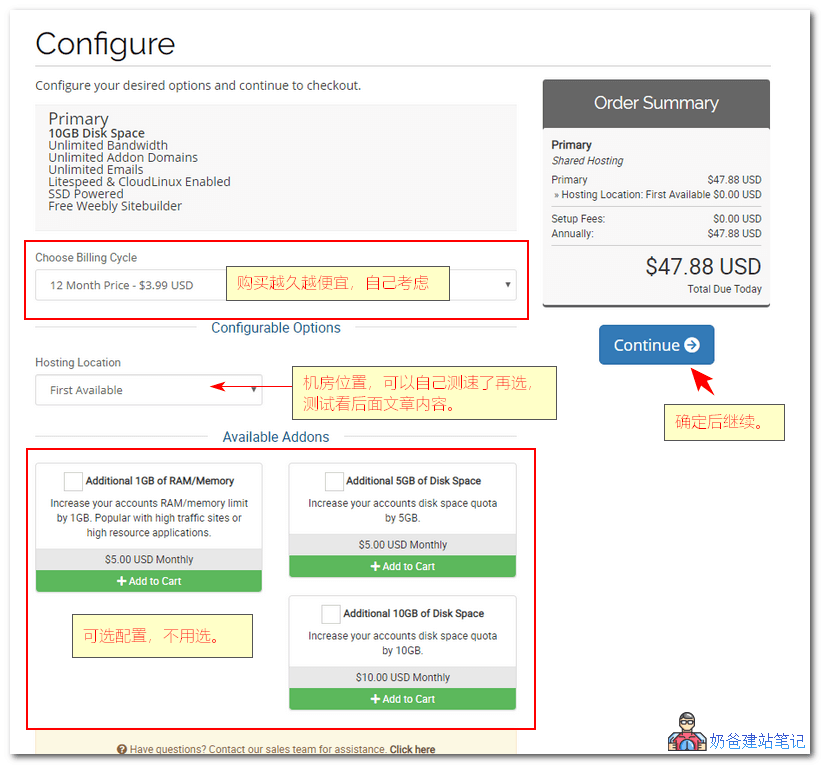
On the configuration options interface, the price is cheaper the longer you purchase. It supports monthly, annual, and two-year payments.
HawkHost Data Center Speed Test
Data center location. HawkHost has 7 data centers, which are: (You can ping the domain to check latency and download files to test speed.)
- New York nyc.hawkhost.comDownload Test
- Los Angeles lax.hawkhost.comDownload Test
- Singapore sng.hawkhost.comDownload Test
- Amsterdam ams.hawkhost.comDownload Test
- Hong Kong hkg.hawkhost.comDownload Test
- Toronto tor.hawkhost.comDownload Test
- Dallas dla.hawkhost.comDownload Test
After selecting your preferred payment cycle, data center location, and configurable options according to your needs, proceed to the next step.
Enter Promo Code and Complete Payment
On the payment interface, you can enter a promo codeWHTSHAREDV4to enjoy a 35% discount.
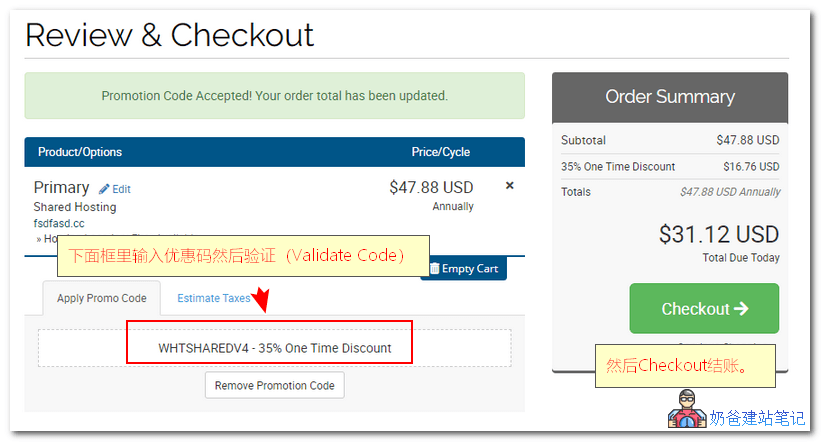
Then click the checkout button to enter the account registration and payment method selection interface.
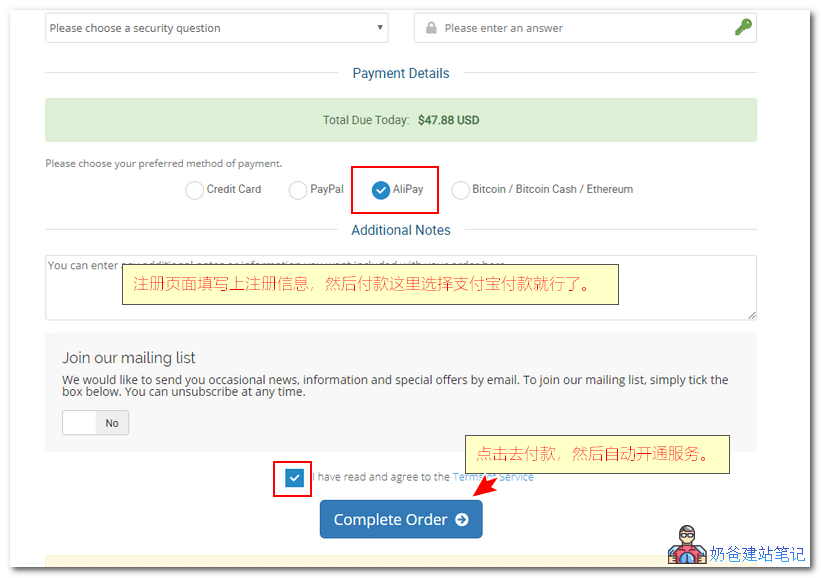
After payment via Alipay, the service will be automatically activated, and an activation email will be sent to your registered email address.
At this point, the registration process for HawkHost is complete. Next, we will explain how to install a WordPress website on HawkHost.
WordPress Website Building on HawkHost
在How to Build a Website Using a Server After Buying a Domain Name_Does It Require ICP Filing and Hosting Space?In the previous article, Naiba introduced that after purchasing a domain, you need to point it to the server's IP address to use it properly. Since HawkHost is a foreign host, there is no need for ICP filing.
So first, let's check the server IP address of HawkHost.
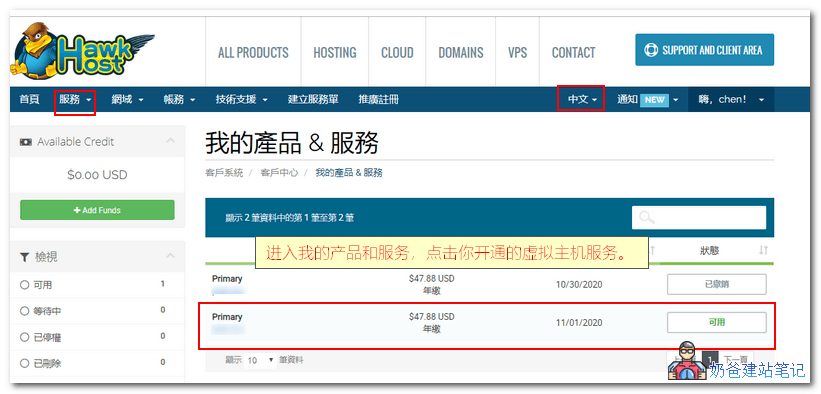
View Virtual Host IP
First, log in to the HawkHost user center, then click on Services, My Products & Services, and click on the name of the service you purchased to enter the details page.
At the very bottom of the service details page, find the cPanel icon and click to enter.
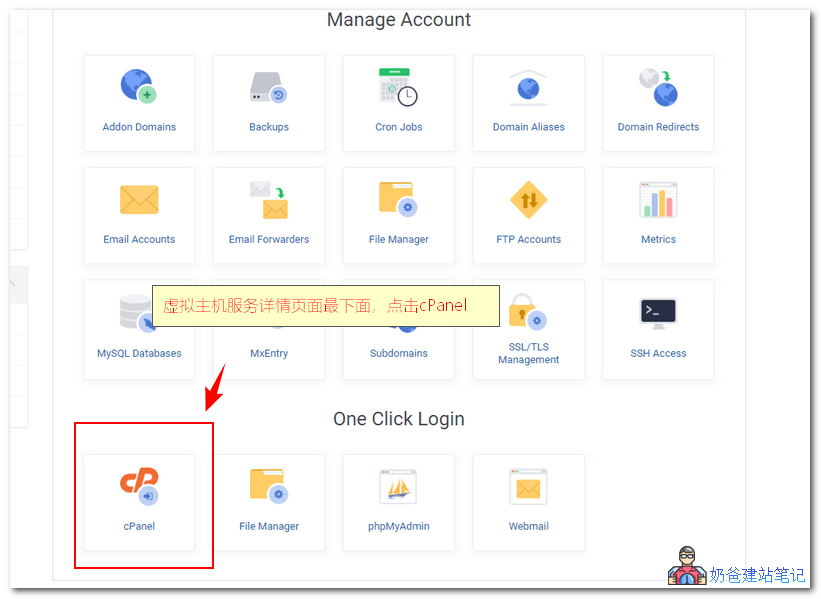
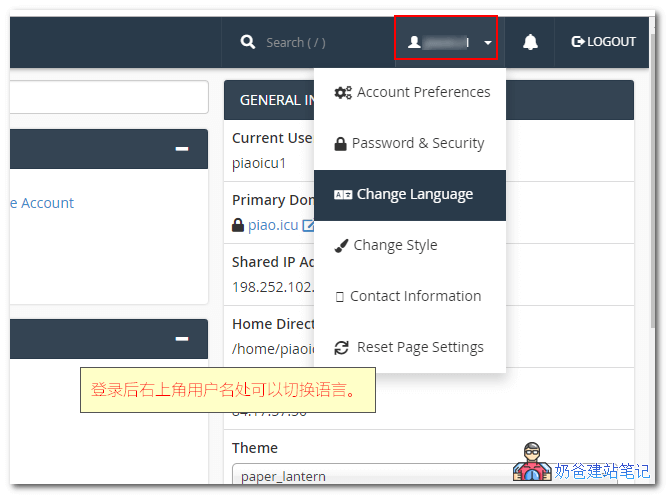
In the newly opened cPanel, you can switch to the Chinese language in the top right corner.
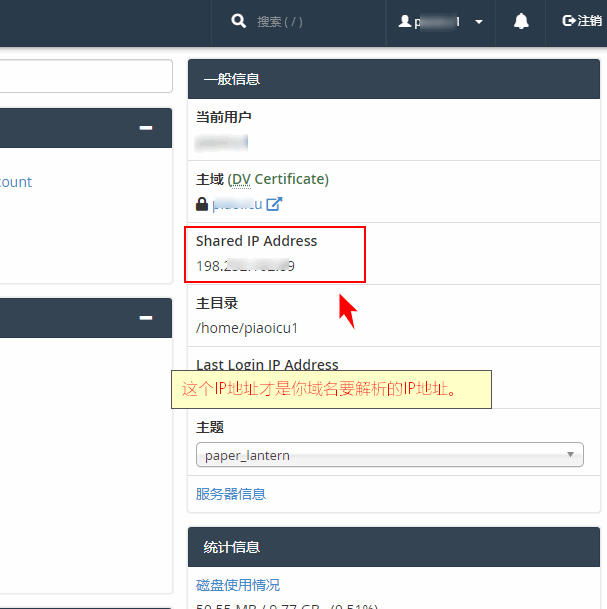
After switching, on the right side of the webpage, you can see an IP address labeled Shared IP Address.
This IP address isthe one your domain needscorrectlypoint to. I„m not sure if this bug with Hawk Host has been around since 2011, but it took me a while to figure out that the IP address on the service details page is different from the one in cPanel. If you add a DNS record and your website keeps showing “SORRY! If you are the owner of this website, please contact your hosting provider:„, it“s probably because you pointed to the wrong IP.
Add Domain Name Resolution
After finding the correct IP of the virtual host you purchased, go to the website where you bought the domain to add DNS records. Only after correctly pointing and binding the IP of the HawkHost virtual host can the website be accessed via the domain.
When adding DNS records, add both www and @ (or empty) records, select A record type, and fill in the IP address from the above image as the record value.
If you are not sure how to do this, refer to the following tutorial articles:
- How to Build a Website Using a Server After Buying a Domain Name_Does It Require ICP Filing and Hosting Space?
- Tutorial on DNS resolution for domains registered on Alibaba Cloud
- Tutorial on domain registration and DNS resolution on Tencent Cloud
- Tutorial on DNS resolution and DNS server modification for NameSilo domains
One-click WordPress Website Installation
After DNS propagation, it takes from a few minutes to tens of hours to take effect. Once the DNS resolution is effective (you can ping your domain to see if it resolves to the IP you set), we can install WordPress with one click in the cPanel.
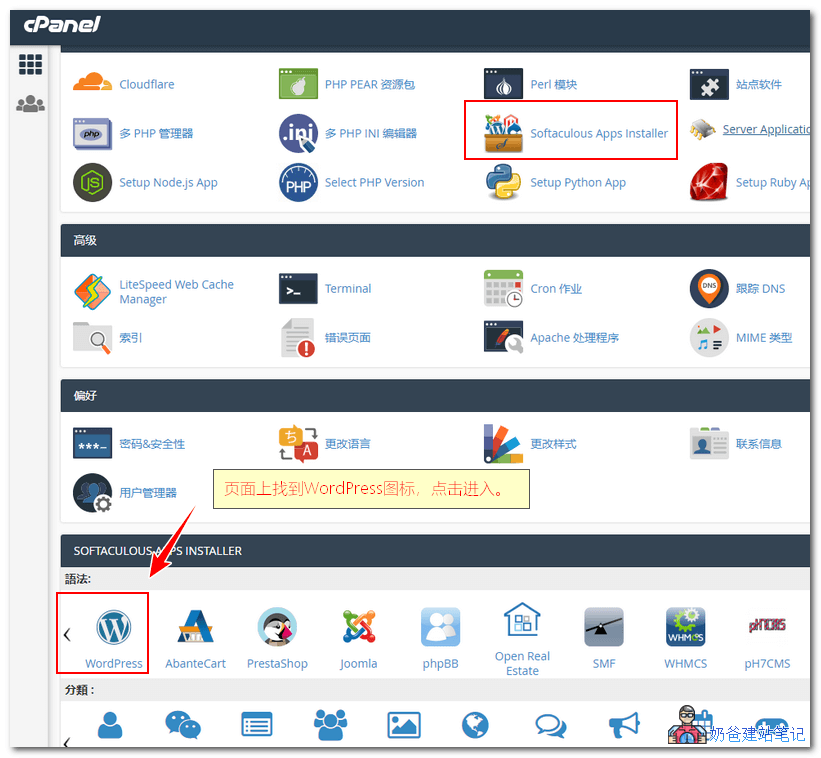
In the cPanel, find the WordPress icon and click to enter.
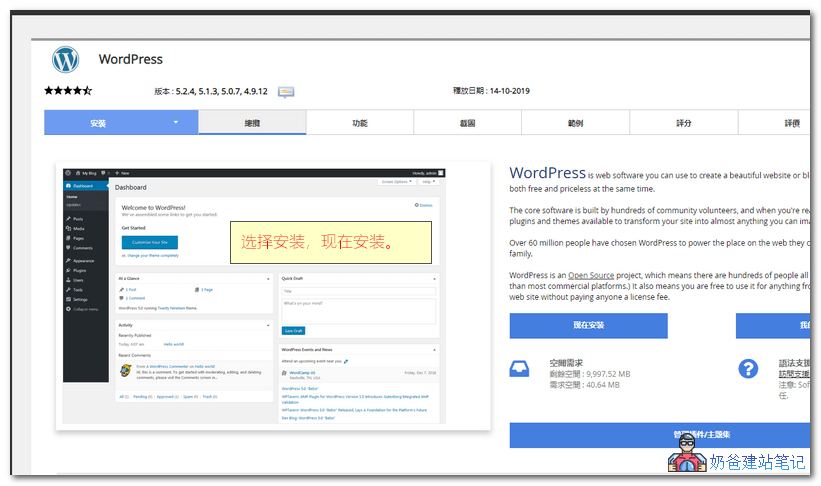
The WordPress installation interface will appear. Click Install Now.
On the installation options page, fill in your website URL, site name, and tagline (you can also modify them after installation).
It is recommended to choose the latest version.
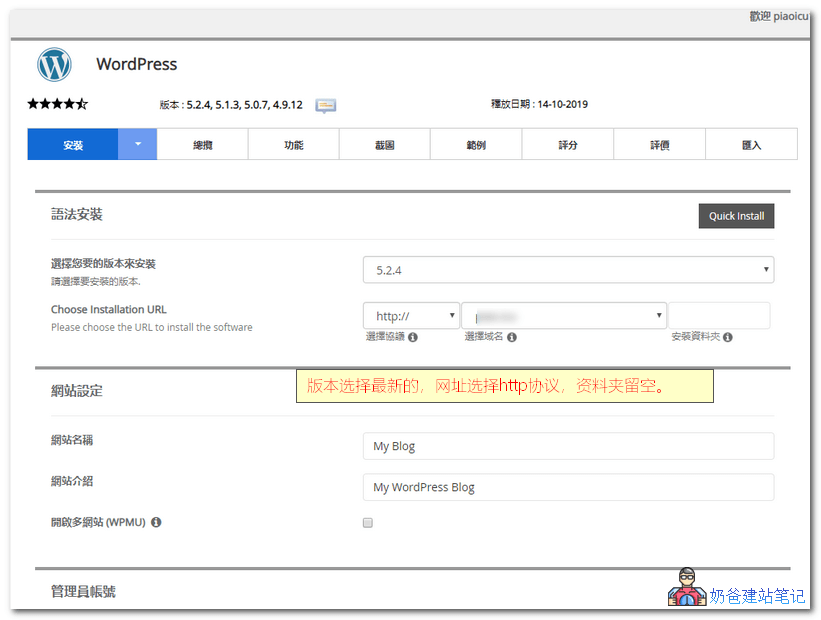
Naiba Tip:
The installation protocol should also allow you to select https://. After installation, I found that Hawk Host automatically added an SSL certificate for the domain. Of course, you can modify the protocol in the website settings after installation.
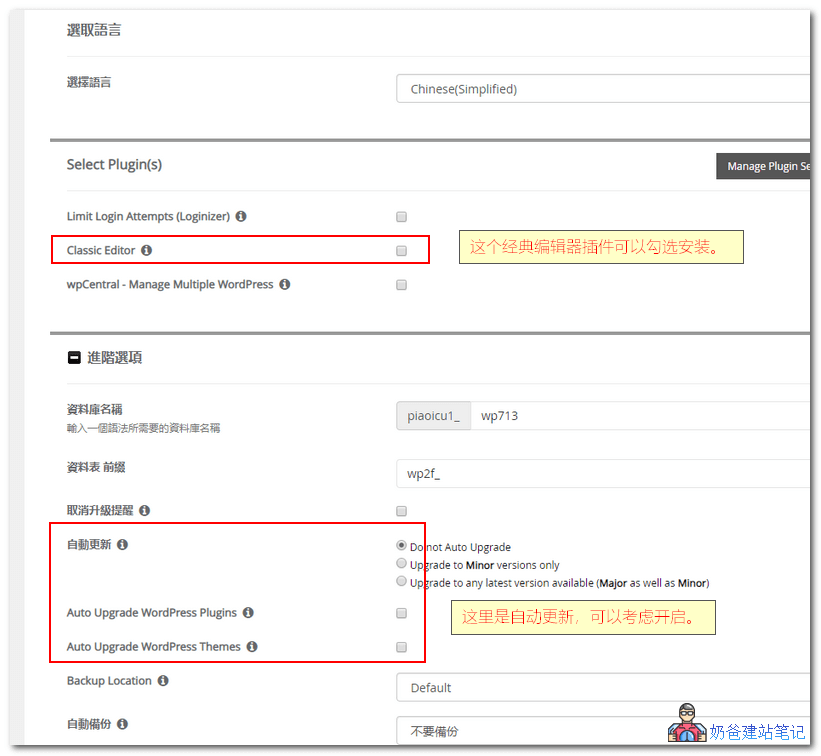
Select Chinese as the language. Three plugins are recommended by default; only the Classic Editor plugin needs to be installed. The other two are related to blocking backend login errors and multisite.
In the advanced options, it is recommended to enable all automatic updates. Since HawkHost is a foreign web hosting space, automatic updates will not be affected by network issues and help with website security.
You don't need to select a theme; you can find and install your preferred theme after installation.
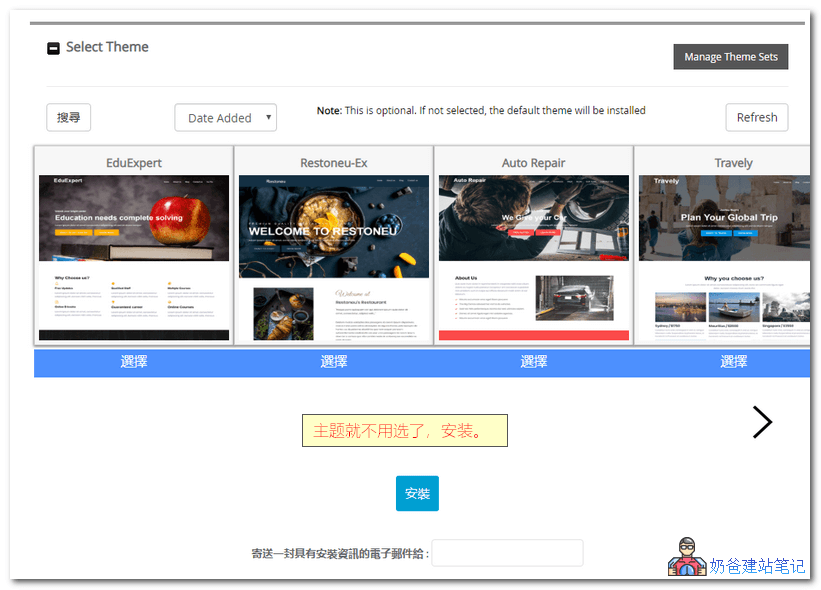
The installation process is quick, taking no more than 3 minutes.
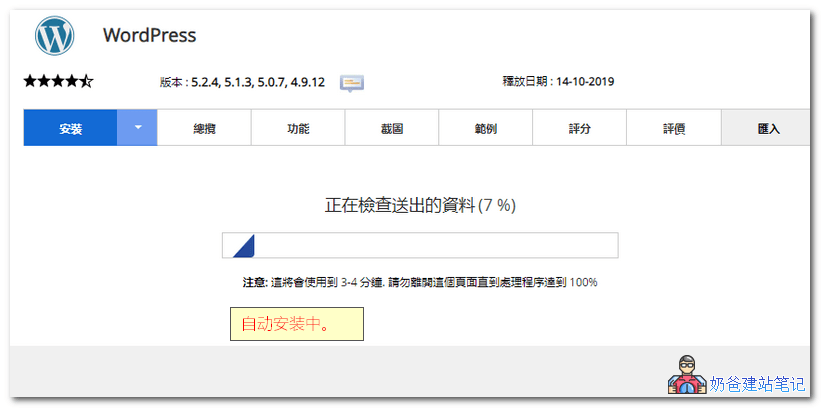
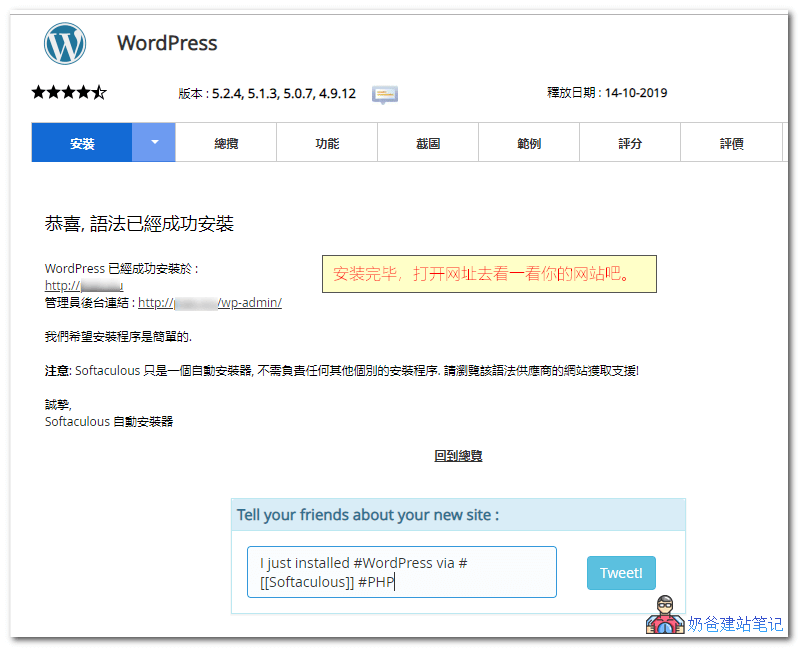
After installation, you can open and manage your WordPress site via the URL.
How to Use WordPress
For friends using aWordPress installationwebsite for the first time, you might not know how to use it. You can refer to the articles below or join the group via the QR code at the end of the article to discuss.
- WordPress Beginner Tutorial 1: Admin Dashboard Settings
- WordPress Beginner Tutorial 2: How to Publish a Post
- WordPress Website Settings Optimization Tutorial
- 2019 WordPress Theme Installation Tutorial and Download Address Recommendations
- WordPress Plugin Installation Tutorial
HawkHost Refund Policy
Without violating Hawk Host'sTOS (Terms of Service)all hosting services you purchase come with a 30-day money-back guarantee. The refund method is as follows:
- Log in to the Client Area
- From the menu navigation, click „Services“, then select „My Services“ from the dropdown list
- Find the service you wish to cancel
- Select the dropdown arrow to the right of „View Details“
- Select „Request Cancellation“ from the dropdown menu
Enter your refund reason in the text box, for example, "30 day money back guarantee".
The selected service will be canceled within 24-48 hours. If your invoice due date falls within that time, you will not be charged.