The previous website building tutorial for beginners introducedWordPress Beginner Tutorial 1: Admin Dashboard Settings, this article will explain how to publish a post.
Actually,WordPresshow to publish a post is quite obvious once you look in the admin dashboard. This article mainly focuses on points you need to pay attention to when publishing a post.
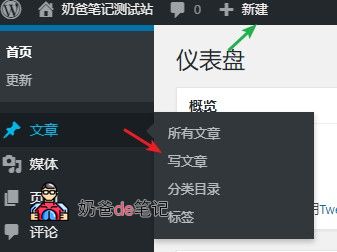
You can create a new post from either of the two places shown in the image below.
By default, WordPress versions 5.0 and above use a new editor called the Gutenberg editor. If you are not comfortable with this editor, you can disable it and use the Classic Editor. Method:Method to Disable the WordPress Gutenberg Editor
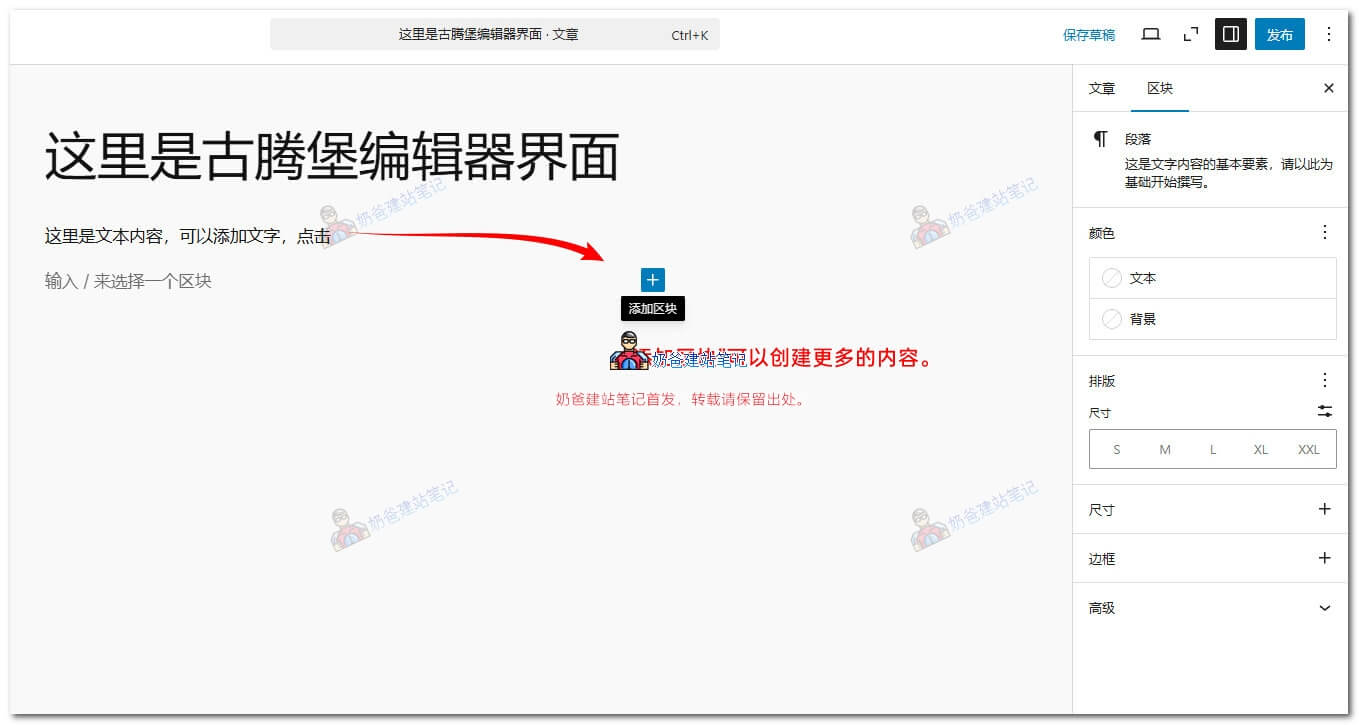
The Gutenberg editor primarily uses the „Add Block“ function. Normal text input uses the „Paragraph“ block. For other needs, you can add them via the „Add Block“ function.
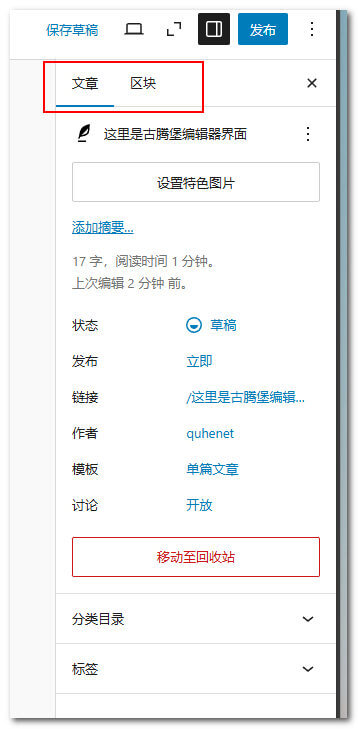
On the right side of the editing window, you can switch between „Post“ and „Block“. The „Block“ settings apply to the currently selected content, and the settings differ for different block types.
The „Post“ interface is for setting the featured image, selecting post categories, etc. Just try publishing a test post yourself to understand the specific functions.
Introduction to the Classic Editor Features
After disabling the Gutenberg editor, you'll see the old version editor as shown in the image below, which is quite similar to editors you've used on other websites.
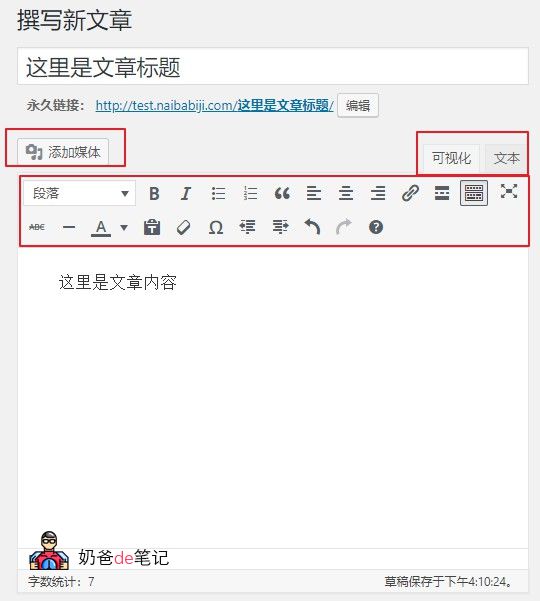
In the old editor interface, the title and content areas are self-explanatory. Beginners writing posts can directly select the visual panel. If you have some HTML knowledge, you can switch between visual and text modes.
The 'Add Media' button is for uploading images. You can upload locally or reference external images. In the visual interface, you can also directly copy and paste external images.
The permalink below the title: if you„re using a format like “post name„, you can edit it to change it to English or pinyin. Otherwise, a Chinese name URL will be very long and not suitable for SEO optimization.
Publishing features
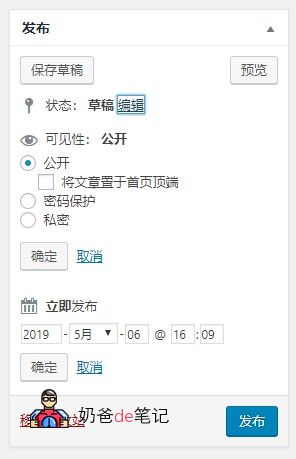
The main functions used here are visibility and publish time. Visibility can be set to private or password-protected, and posts can also be sticky (most themes support sticky posts).
If you modify the time in 'Publish immediately', it will be published at the specified time, also known as scheduled publishing.
Formats and Categories
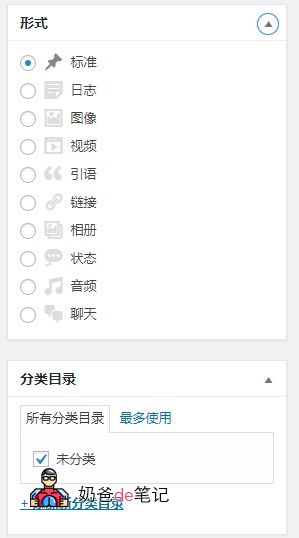
There are many format options here. Depending on the theme you use, the supported formats vary. Usually, this is kept as 'Standard' without selection.
The 'Status' format is somewhat similar to a one-sentence status update; see how it looks on the frontend.
Tags and Featured Images
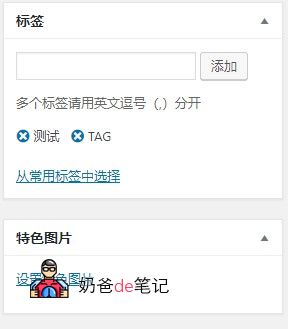
Tags can be understood as the central keywords of your post, serving as a supplement to categories. For example, this post by Naiba is published under the 'Web Development Knowledge' category, but there are many posts in this category, so I usedWordPress和WordPress Tutorialssuch tags. You can click on a tag to view all posts containing that tag.
The featured image is a header image for each post. You can add one or not based on your preference. Some themes may have layout issues without a featured image. If you don't want to add a featured image for every post, consider installing a plugin to automatically add featured images:WordPress Random Featured Image Plugin: Random Post Thumbnails
Alright, that's all for how to publish posts in WordPress.