
For a domain name registered and purchased on Godaddy, followingthe steps to build your own website, we need to perform DNS resolution on the domain name so that we can access our server via the domain name and then install the website program. This article will introduce how to add DNS resolution records on Godaddy.
If the interface changes and differs from this tutorial, and you cannot manage it, you can contact Naiba for help.
Godaddy Domain Name Adding DNS Records
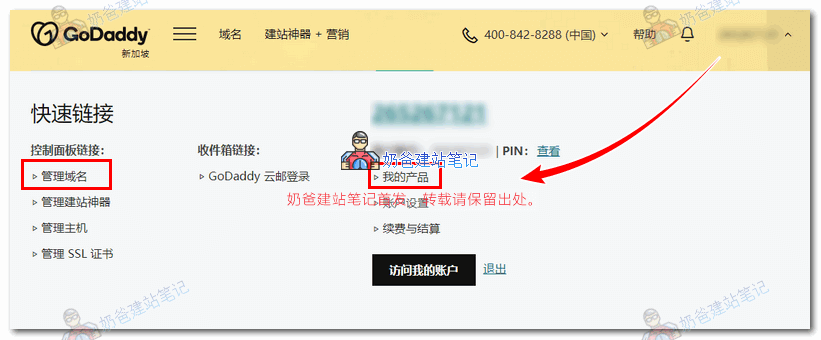
1. After logging into the Godaddy website, click on the username, select Manage Domains or My Products, as shown in the figure below:
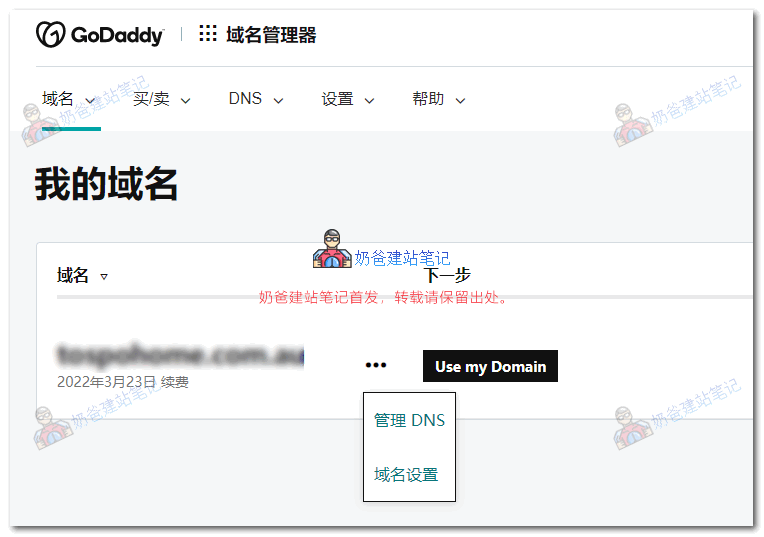
2. Click on the domain name for which you want to modify the resolution, then click Manage DNS.
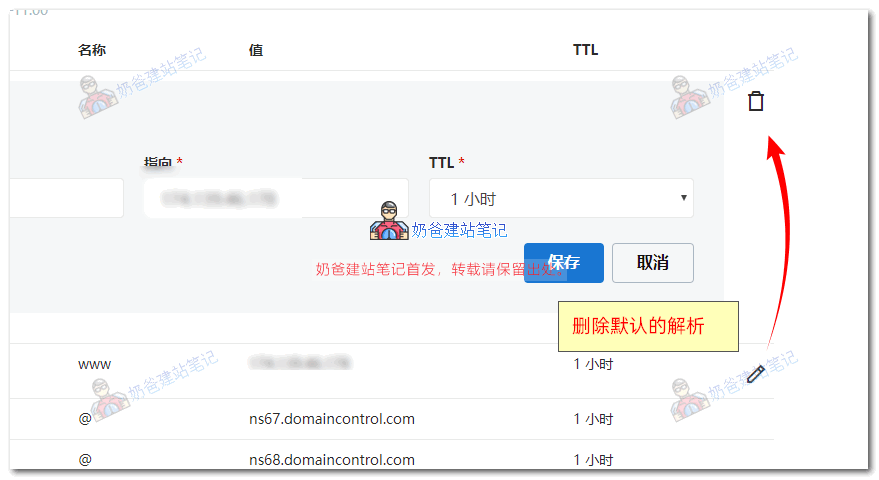
3. There are several default resolution records. Click the edit icon and then the trash button to delete them.
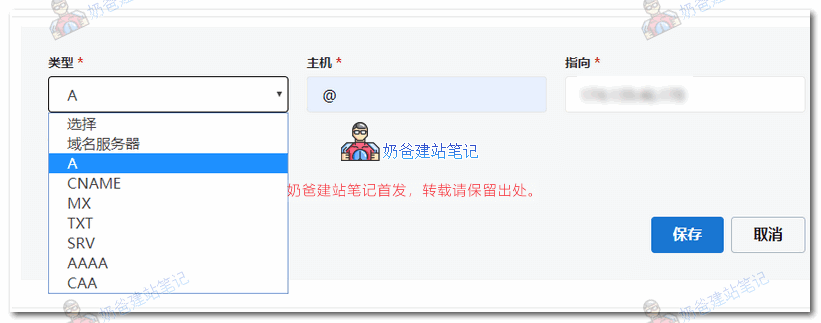
4. Then click Add Record, select Type A, enter www or @ for Host, and fill in your server's IP address for Points to.
After saving, wait for the domain name resolution to take effect, and then you can build a website on your own server.
Godaddy Domain Name Modifying DNS Servers
If you have purchasedSiteGroundorHostingerthis type of server and need to change the domain name's DNS servers to those of the server, you can modify them using the method below.
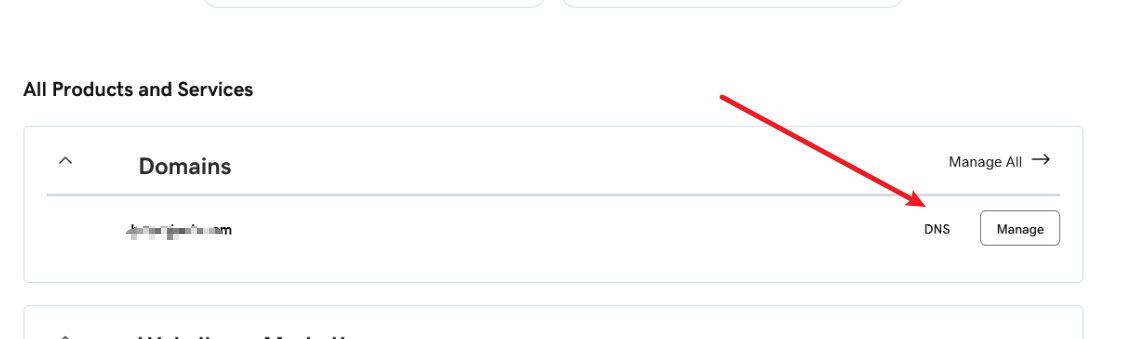
First, go to your purchased domain name list and find the DNS management entry.
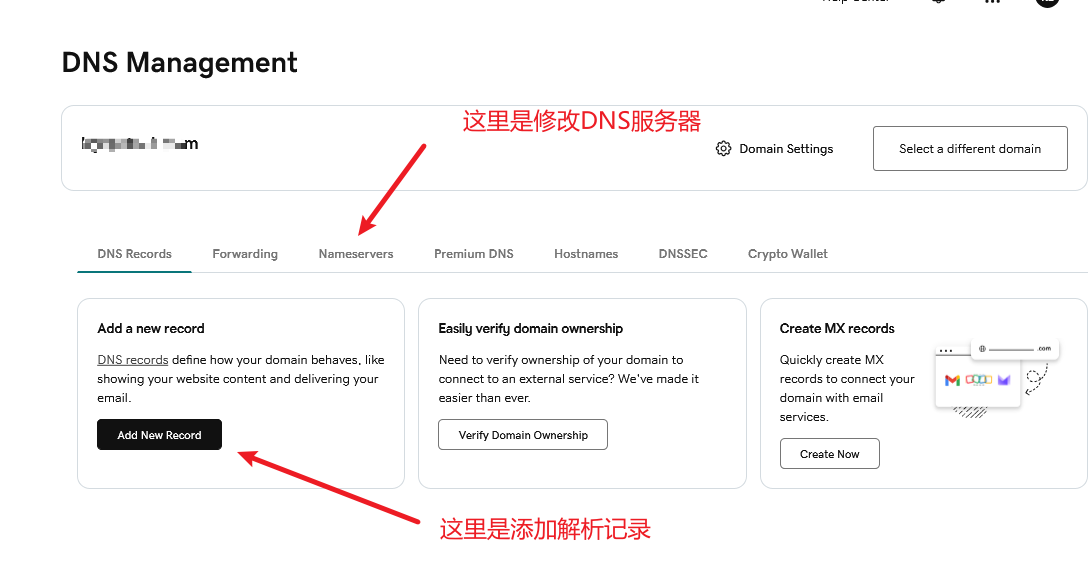
Then click on Nameservers at the top to go in and modify the DNS servers.
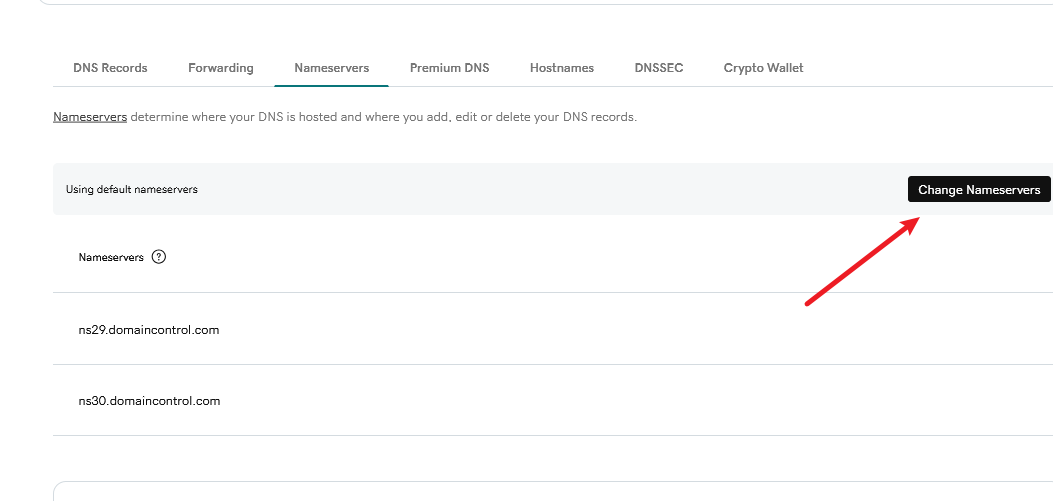
Click Change Nameservers and change the DNS server addresses to the records from the server side.