Baota Panel is a server operation and maintenance software that helps beginners manage VPS servers. It allows server management and website creation on the server through a graphical interface. This article details the complete steps for installing Baota Panel on mainstream cloud servers, supporting major VPS providers like Alibaba Cloud and Tencent Cloud. Installation can be completed in 5 minutes.
Preparations for Installing Baota Panel
1. Before installation, you need a VPS. If you don't have one yet, please click hereto view VPS providers recommended by Naibaand purchase a VPS for use.
2. Then, you need to download the Xshell software to manage the VPS. Refer to:Free VPS Management Software Xshell7/Xftp7 Chinese Version Download
3. Register a free Baota account, which will be needed later.Click here to register for Baota(Free registration in the top right corner of the website)
One-click Installation of Baota Panel
Baota Panel One-click Installation Script
The server systems recommended by Baota Panel are Debian-12, Ubuntu-22, OpenCloud-9 (Tencent Cloud), or Alibaba-Cloud-3 (Alibaba Cloud).
If your system is not a Baota image, you can use the following script for one-click installation.
if [ -f /usr/bin/curl ];then curl -sSO https://download.bt.cn/install/install_panel.sh;else wget -O install_panel.sh https://download.bt.cn/install/install_panel.sh;fi;bash install_panel.sh ed8484becIf it's a Debian system, you can also use the following script for installation.
wget -O install_panel.sh https://download.bt.cn/install/install_panel.sh && bash install_panel.sh ed8484becQuick Installation Using Baota Image on Tencent Cloud/Alibaba Cloud
If you find manual installation too troublesome and are using a Tencent Cloud or Alibaba Cloud server, you can also directly choose to reinstall the system with a Baota image.
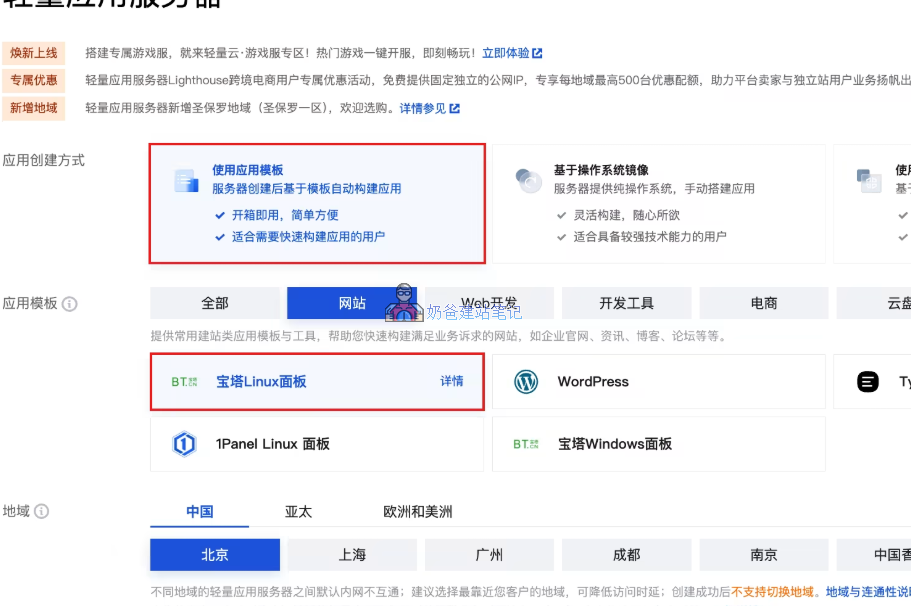
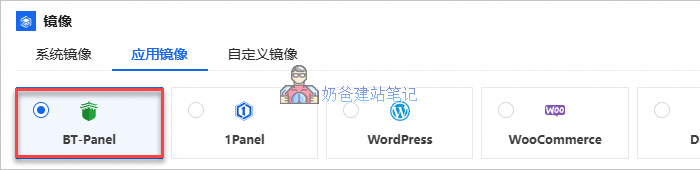
Choosing these images with Baota Panel pre-installed is similar to the old Ghost systems. By default, Baota Panel is already installed in the system. Once the system is installed, you can directly view the Baota Panel login information without needing to install it manually.
The only difference between manual installation and using a system image is that the version installed via the system image may not be the latest and may require a manual update.
Note: If you cannot access the Baota Panel admin dashboard after installing it on Tencent Cloud, Alibaba Cloud, or Huawei Cloud servers, it is likely due to the firewall not being opened. Refer to the tutorial below to open the Baota port.
Tutorial:Tencent Cloud、Alibaba Cloud、Huawei Cloud
Detailed Step-by-Step Guide with Images for Installing Baota Panel
If you are not using a VPS with a Baota image from providers like Alibaba Cloud or Tencent Cloud, we canmanually install Baota Panel. The total estimated time is about 2 minutes.
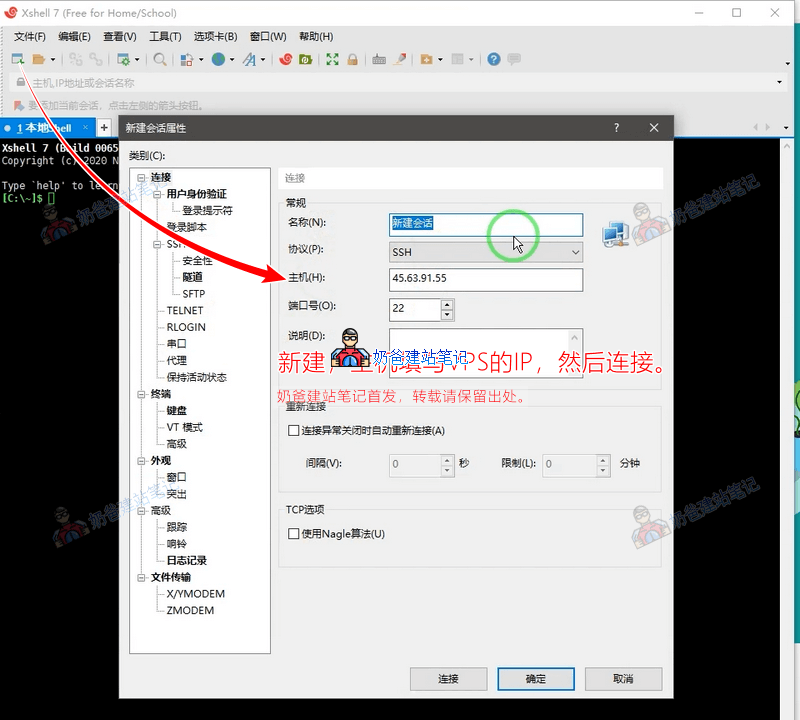
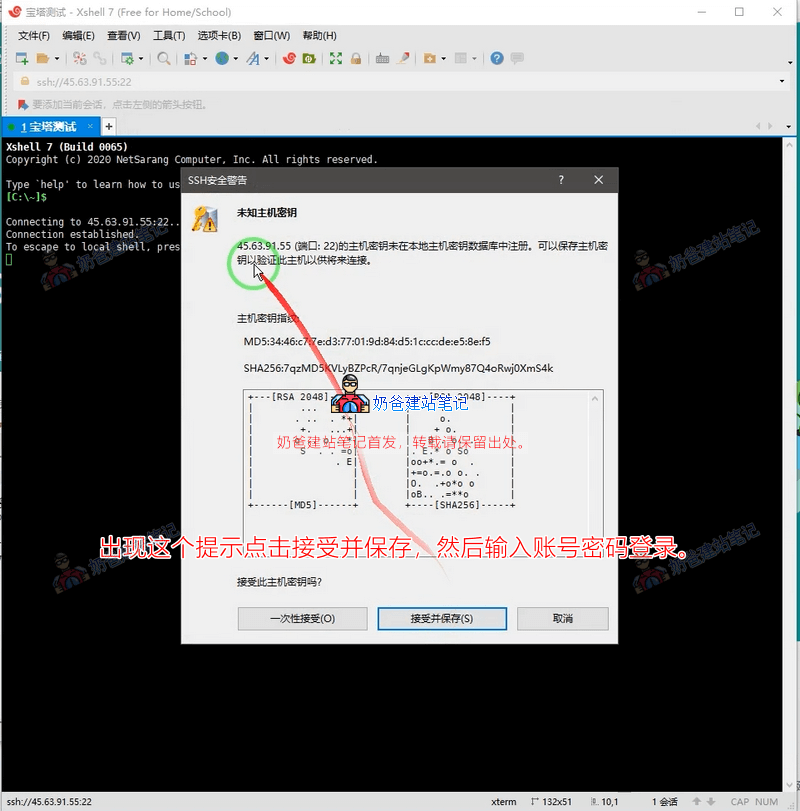
1. Open the Xshell software, click 'New', then fill in your VPS's IP address.
2. On the first connection, there will be a security prompt. Click 'Accept and Save', then enter the VPS username and password to log in.
Usually, the username is 'root'. You can save the username; decide whether to save the password based on your situation.
Special note: If your VPS system is not Linux (e.g., CentOS, Ubuntu, or Debian) but Windows, first reinstall the VPS system with a Linux distribution before following this tutorial. This tutorial uses theDebian 12version.
3. When a prompt like `[root@xxx ~]#` appears, it means the login was successful.
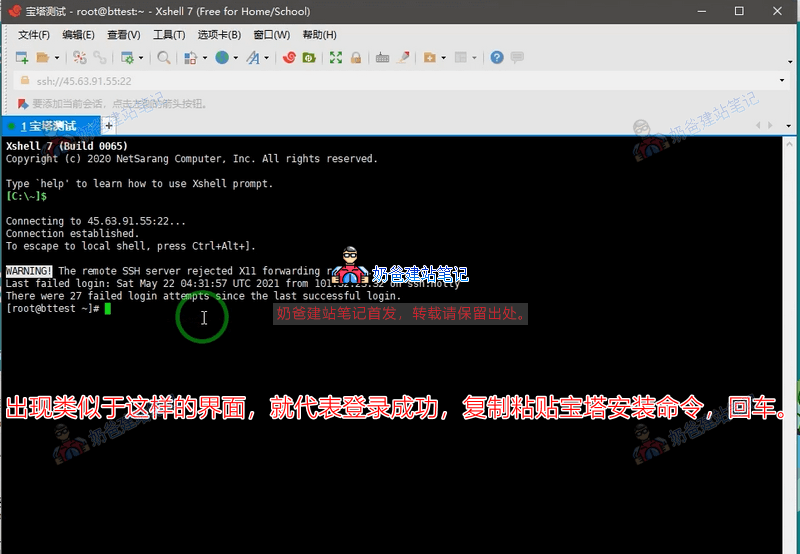
After connecting to the VPS using Xshell, copy the following code and paste it into the Xshell interface. (Tip:You can copy and paste commands by right-clicking the mouse in the Xshell interface.)
CentOS 7 officially ended support on June 30, 2024. Baota Panel recommends the following systems [compatibility order: Debian-12 Ubuntu-22 CentOS 9, OpenCloud 9, AlibabaCloud 3]
if [ -f /usr/bin/curl ];then curl -sSO https://download.bt.cn/install/install_panel.sh;else wget -O install_panel.sh https://download.bt.cn/install/install_panel.sh;fi;bash install_panel.sh ed8484becFor Windows systems, it is recommended to reinstall the OS to Linux first.
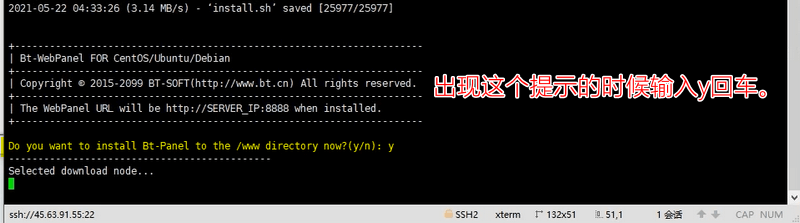
After pasting the command, press Enter. When the content shown in the image below appears,type 'y' and press Enter.。
Do you want to install Bt-Panel to the /www directory now?(y/n)
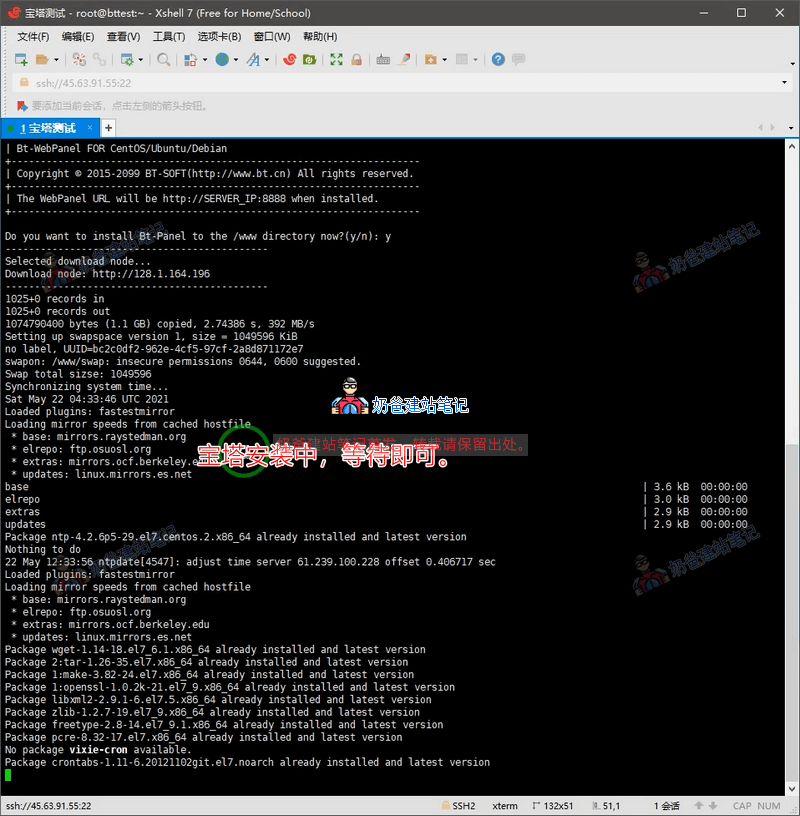
Then the Baota Panel will be automatically installed on your server. Just continue waiting.
When an interface like the one in the image below appears, 'Congratulations! Installed successfully!' means the installation was successful.
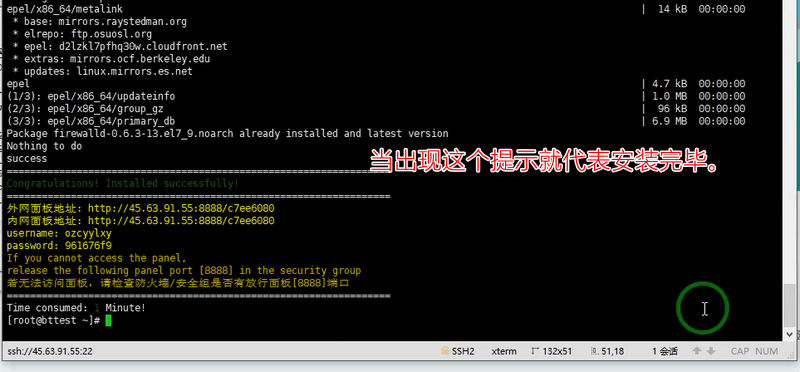
The three lines inside the red box in the image above are your Baota Panel management URL, admin username, and admin password. You can select them with the mouse, right-click to copy, and save the information on your computer.
Special reminder: Be sure to bookmark or save the backend login URL. The content after '8888/' also needs to be remembered to log into the backend. If you really forget the address, refer toWhat to do if you forget the Baota Panel backend login URL
4. Use a browser to open the public network panel management address, and the Baota login page will appear.
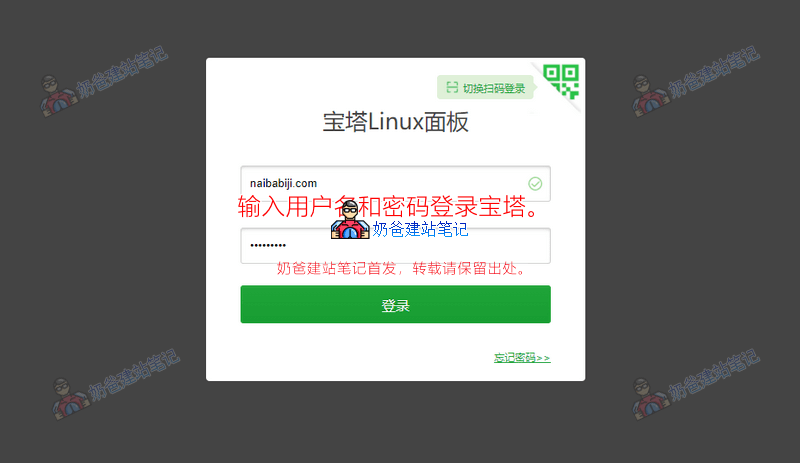
If you want to change the Baota Panel username and password yourself, log into the Baota Panel, select „Panel Settings“ on the left, and modify the „Panel User“ and „Panel Password“ fields below.
Install Website Environment
Note: Installing the Baota Panel does not mean you can install a website yet; you still need to install the website environment.By default, the first time you log into the Baota Panel, you will see the image below.
The new version of Baota requires mandatory login with a Baota account after logging in, so register a Baota account yourself and log in.
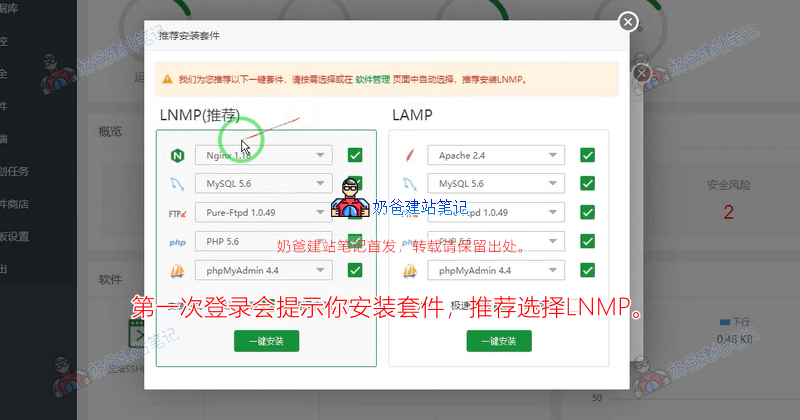
By default, choose the one-click installation on the LNMP side.If you are a user with 1GB of RAM or more, it is recommended to choose PHP version 8 or above for PHP, MySQL 5.7, and keep the other settings default.(For high configurations, it is recommended to use PHP 8.3+ and MySQL version 8.0+ or MariaDB version 10.6+. You can refer toWordPress Configuration Requirements)
Then you will see an interface like the one in the image below. Just wait; this will take a while, so you can do something else first.
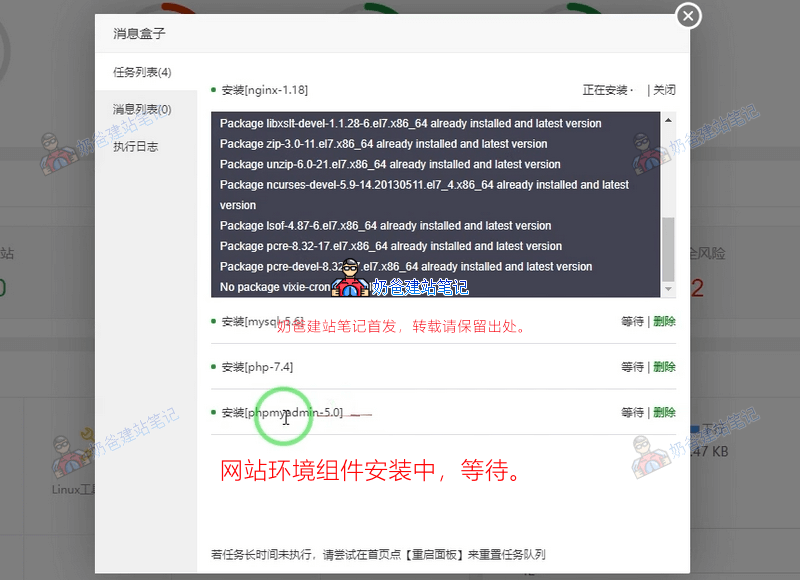
When everything is installed, you can create a website. Please clickAdding Your Own Website in Baota Panel (Adding Virtual Host in Baota)to view.
Video Tutorial for Installing Baota Panel
If you feel the text and image tutorial might be hard to understand, you can directly watch the Baota Panel installation video tutorial below.
Note: The video is a few years old, and the software interface has changed somewhat. Adapt as needed to understand the operations. Note that the operating system is now recommended to be Debian 12.
Other Related Tutorial Articles on Baota Panel
- How to Add a Website in Baota Panel_Bind More Websites
- Baota Panel WordPress Installation Tutorial: Build a Website in 10 Minutes for Beginners
- Modifying Baota Panel nginx configuration to support Converter for Media plugin
- Baota Panel Nginx FastCGI Cache Configuration Tutorial: Complete Guide to WordPress Website Acceleration
- Baota Panel: Solutions for Forgetting the Admin Login URL and Failing Security Entry Verification
- Baota Panel: Solution for WordPress Upgrade Error Requiring FTP Information When Connecting to Server
- Baota Panel: Methods for Installing Extensions like Memcached and ionCube
Common Software Configuration File Paths in Baota Panel
Baota Panel installs the managed software (such as web servers, databases, etc.) uniformly in the/www/server/directory.
1. Web Server
Nginx
| Configuration File | Path | Description |
|---|---|---|
| Main Configuration File | /www/server/nginx/conf/nginx.conf | The core configuration file for Nginx. |
| Site Configuration File | /www/server/panel/vhost/nginx/ | Independent configuration file generated by Baota Panel for each website, for example,www.yourdomain.com.conf。 |
| Default Site File | /www/server/nginx/conf/ | Contains general configurations such as theproxy.conf, rewritedirectory. |
Apache
| Configuration File | Path | Description |
|---|---|---|
| Main Configuration File | /www/server/apache/conf/httpd.conf | The core configuration file for Apache. |
| Site Configuration File | /www/server/panel/vhost/apache/ | Independent configuration file generated by Baota Panel for each website。 |
OpenLiteSpeed
| Configuration File | Path | Description |
|---|---|---|
| Main Configuration File | /usr/local/lsws/conf/httpd_config.conf | The core configuration file for OpenLiteSpeed. |
2. Database
MySQL / MariaDB
| Configuration File | Path | Description |
|---|---|---|
| Main Configuration File (my.cnf) | /etc/my.cnf | Main MySQL configurations, such as port, buffer size, etc. |
| Data Directory | /www/server/data/ | The actual location where database files are stored. |
3. Programming Language Environment
PHP
| Configuration File | Path | Description |
|---|---|---|
| PHP.ini Main Configuration | /www/server/php/{版本号}/etc/php.ini | For example:/www/server/php/74/etc/php.ini |
| PHP-FPM Process Management Configuration | /www/server/php/{版本号}/etc/php-fpm.conf | PHP-FPM Main Process Configuration. |
| PHP-FPM Pool Configuration | /www/server/php/{版本号}/etc/php-fpm.d/www.conf | Configuration for managing PHP process pools. |
Pure-FTPd
| Configuration File | Path | Description |
|---|---|---|
| Pure-FTPd Configuration | /www/server/pure-ftpd/etc/pure-ftpd.conf | Configuration file for the pure FTP service. |
4. Other Services
Redis
| Configuration File | Path | Description |
|---|---|---|
| Redis Main Configuration | /www/server/redis/redis.conf | Redis configuration file. |
Memcached
| Configuration File | Path | Description |
|---|---|---|
| Memcached Configuration | /etc/init.d/memcached | Memcached startup script and configuration. |
Common Installation Issues for Baota Panel
Unable to access the panel after installation?
This is usually caused by the server not opening the corresponding firewall rules. For domestic hosts, such as Alibaba Cloud and Tencent Cloud, this is referred to as a security group. Manually open the corresponding port for the Baota Panel to gain access.
Forgot the Baota Panel login address?
SSH connect to the server and execute the command: `bt default` to view the external panel address. Detailed method:Recover Baota Panel Login Address
