
想要把一个WordPress网站从宝塔面板搬家到WP面板(WP Panel)面板,只需要先在宝塔面板后台创建网站和数据库的备份,下载到本地。然后在WP Panel后台创建网站,恢复备份即可,本文奶爸将为你实操,如果将宝塔面板重装为WP Panel后恢复网站数据。
第一步,宝塔面板后台备份
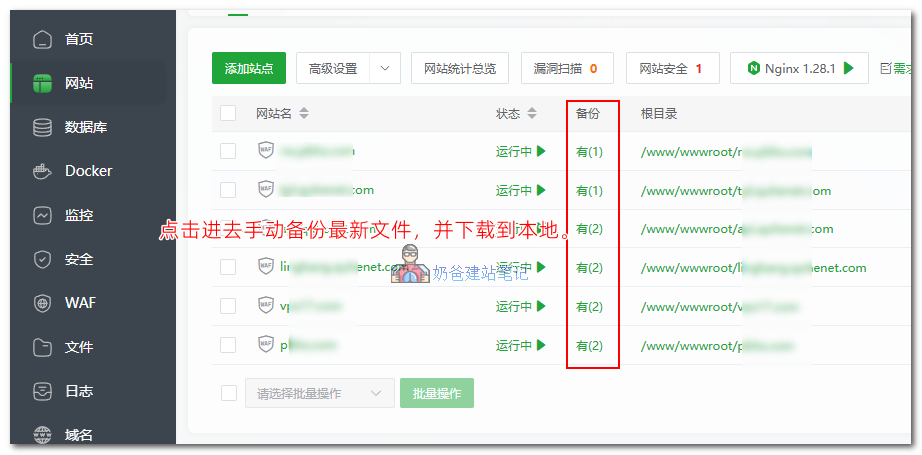
先进入网站列表,点击网站后面备份列,进去后手动备份最新的网站文件,然后下载到本地。
如果你有多台服务器,也可以直接在另外一台服务器上使用wget命令下载,不会用可以直接问AI。
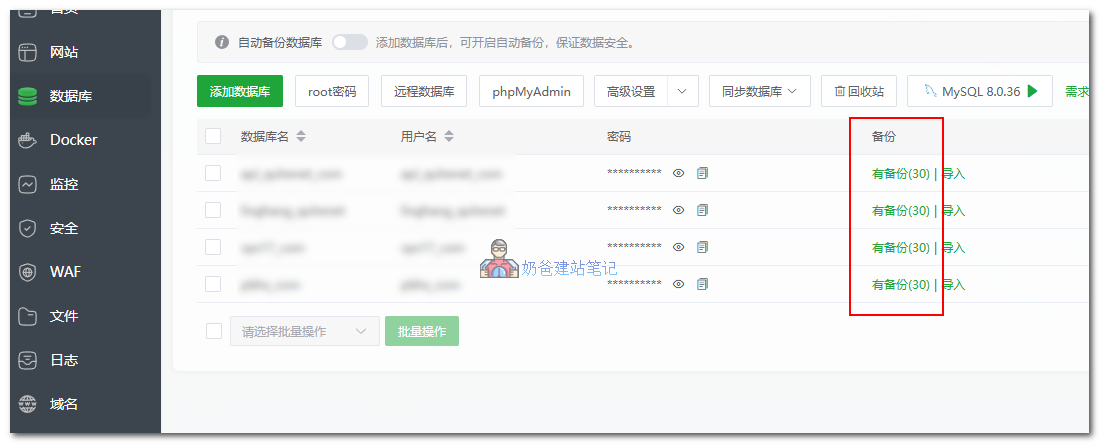
然后进入数据库,对每个数据库做最新的备份,并且下载到本地。
第二步,重装VPS系统并安装WP Panel
如果你不是在当前VPS重新安装WP Panel面板,那么可以跳过这一步,直接进入第三步,恢复网站数据。
重装系统请选择Debian 13操作系统,其他系统很大可能出bug。
你可以在服务器后台重装,也可以直接在SSH里面使用bin456789/reinstall: 一键DD/重装脚本 (One-click reinstall OS on VPS) 直接重装干净的原版Debian 13操作系统。
重装好系统后,SSH登录VPS,直接复制下面的命令执行,等待WP Panel的安装完毕。
apt-get update && apt-get install -y wget ca-certificates && wget -qO- https://raw.githubusercontent.com/naibabiji/wp-panel/main/install.sh | bash第三步,恢复WordPress网站和数据库
1、创建网站
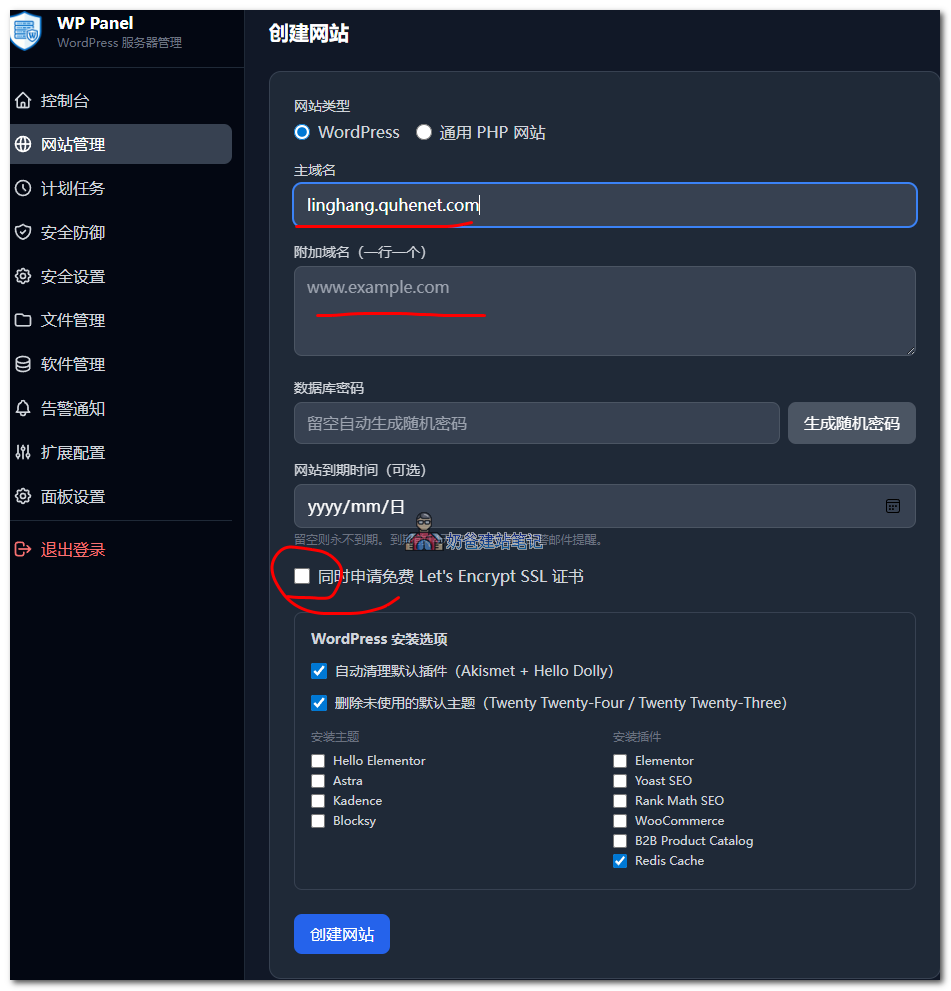
登录WP Panel面板 → 网站管理 → 添加网站
网站界面填写主域名,如果你需要绑定www网站域名就填写到附加域名内。同时勾选申请SSL证书。点击创建按钮。
2、恢复网站文件
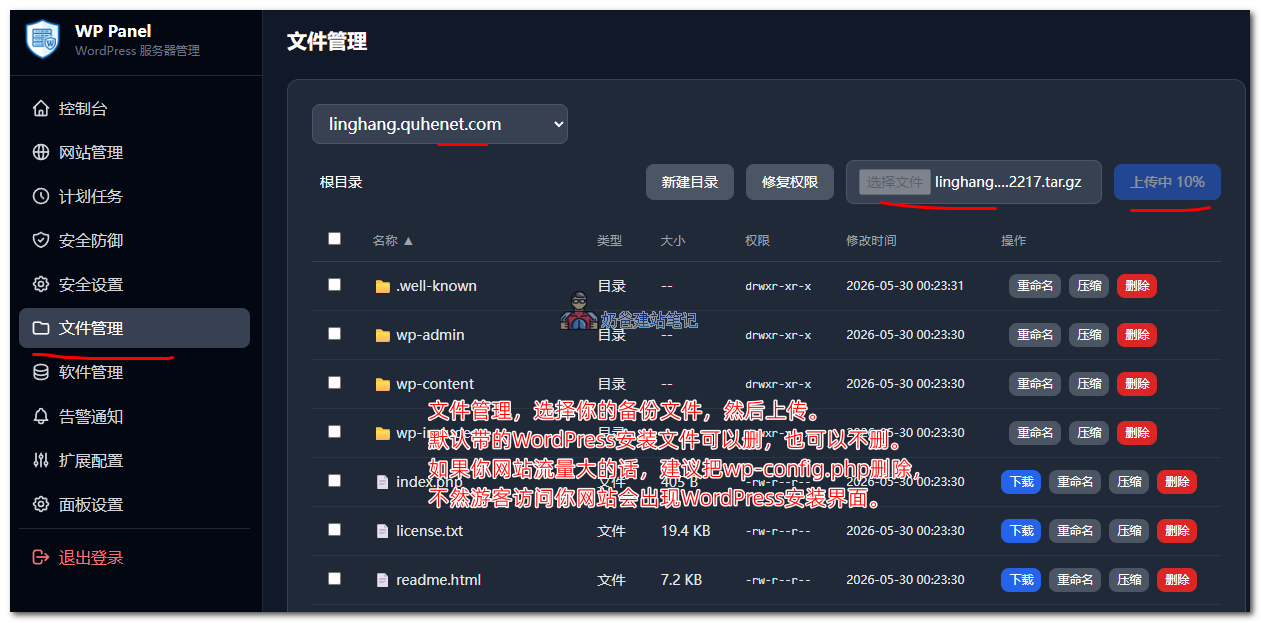
文件管理,选择你的备份文件,然后上传。(新版本WP Panel新增了远程下载功能,也可以直接从老服务器下载)
如果你网站流量大的话,建议把默认创建网站添加的安装文件里面的wp-config.php删除,不然游客访问你网站会出现WordPress安装界面。
上传后,解压你的压缩包,直接覆盖现有文件。
最后点击右上角的“修复权限”按钮。
3、恢复数据库
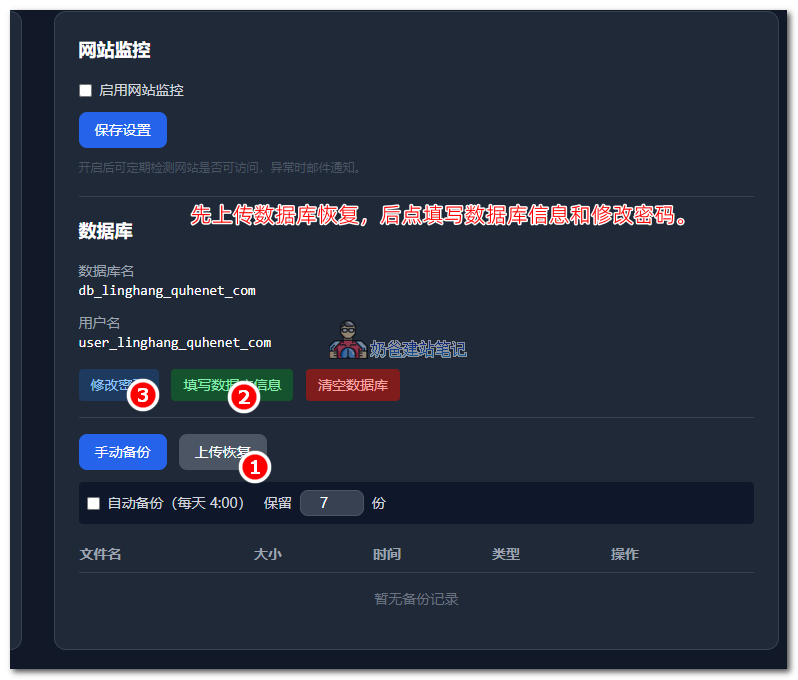
网站管理 → 网站详情 → 数据库上传恢复。
上传完毕后,依次点击“填写数据库信息”和“修改密码”按钮。(新版本WP Panel新增了数据库前缀检测,如果你改了数据库前缀的,还需要检测一次。)
一切顺利的话,网站就已经可以正常访问了,搬家结束。
提示:本教程适用于在同一台服务器把宝塔面板的网站恢复到WP Panel面板,所以不需要做域名解析操作,如果你是恢复到另外的服务器上,需要解析域名且域名生效后才能申请成功SSL证书哦。
恢复网站后的优化
简单三步操作,就把网站从宝塔面板切换到了WP Panel。
既然已经用上了WP Panel,那么面板自带的优化功能一定不能错过。
1、WordPress的优化

进入网站详情页,找到WordPress优化,把Nginx FastCGI缓存打开,安装配套的优化插件。进入你网站后台,把之前的缓存插件就可以删除了。
另外如果你没有删除安装网站时默认勾选的Redis Object,那么也可以启用这个插件,并开启数据库缓存。
如果要做css、js压缩等优化,可以安装Autoptimize。
2、服务器的优化
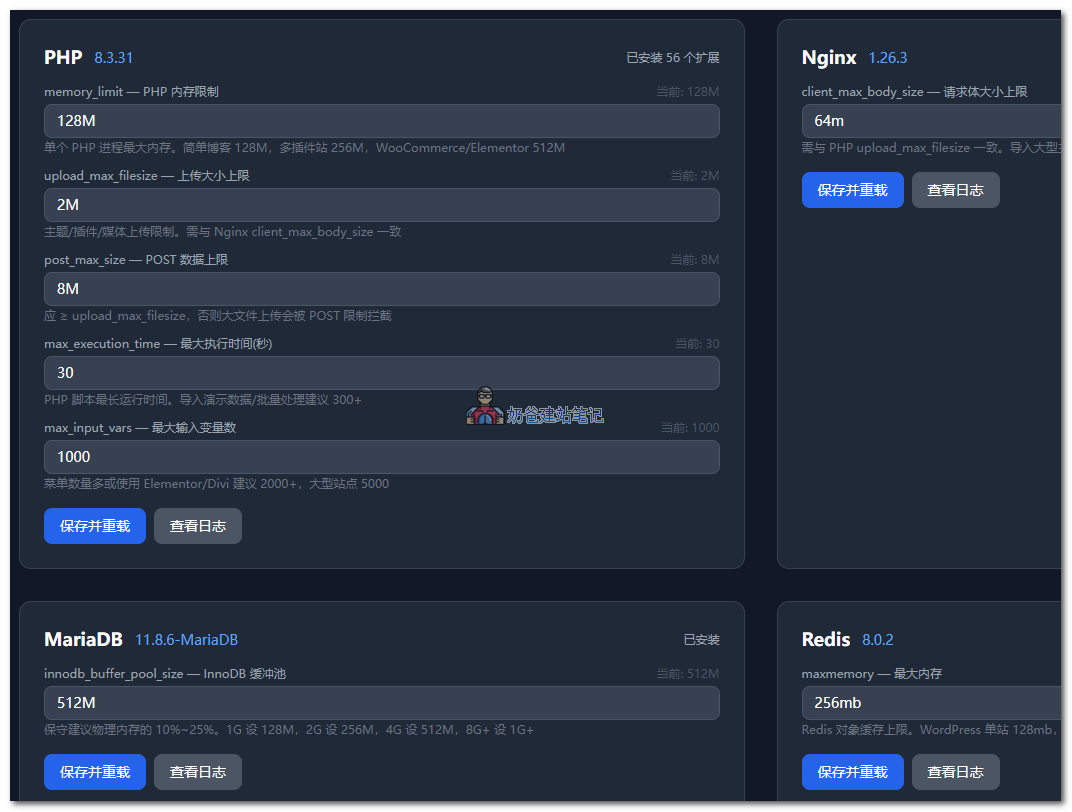
- 进入软件管理界面,在右上角有配置建议,根据你服务器的配置填写合适的值。
- 进入告警设置,配置SMTP或者Webhook推送,服务器有消息及时通知你。
- 如果你有两台VPS,去面板设置里面启用远程备份,没有的话去VPS推荐里面挑选一款便宜的机器当备份机也行。
- 网站详情页里面启用数据库自动备份;
- 网站详情页里面启用日志,首选仅异常,服务器攻击多选全部记录;
- 计划任务里面创建网站的定时备份,可以半个月或者一个月备份一次,推荐增量备份;