
Google Ads is an advertising platform launched by Google that allows businesses to place ads on Google's properties such as Google Search results pages, YouTube, and Gmail to attract more potential customers. After building an official website, using Google Ads is more effective thanGoogle SEOcan quickly drive traffic to the website and convert orders. If you want to learn how to open an account and run Google Ads, this article will provide you with a detailed tutorial and guidance.
Preparation Before Opening a Google Ads Account
Before officially registering, please confirm the following items are ready:
| Preparation Item | Description | Importance |
|---|---|---|
| Gmail Account | Used to log in to Google Ads; it is recommended to use a business email | essential |
| Company/Personal Information | Company name, address, contact information (must match payment details) | essential |
| Payment Method | Visa/MasterCard credit card, PayPal, or corporate online banking | essential |
| Promoted Website | Ensure the website is live and accessible | essential |
| Time Zone and Currency Decision | Cannot be changed once set; must be determined in advance | Very Important |
If you haven't built a website yet, we recommend followingWordPress Tutorialsto build one. WithNavigator WordPress Corporate Theme, beginners can quickly create a professional business website.
Special Note: The Google Ads account'scountry/region, time zone, and currency cannot be modified after submissionTherefore, the choice of currency (RMB vs. USD) before opening an account needs careful consideration, which will be compared in detail later.
Detailed Explanation of the Google Ads Account Opening Process
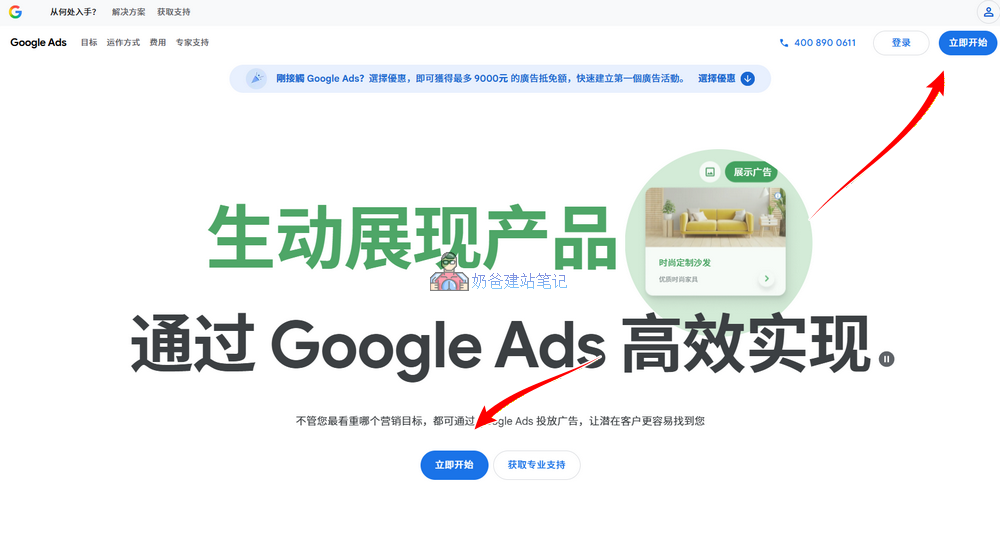
1. Openhttps://ads.google.cn/home/and select 'Get Started Now'.
2. Log in with your Gmail account. If you don't have one, register for a Gmail account first.
3. After registering your Google Ads account and logging in, since the interface may differ from when Naiba registered, if there are any prompts, you can skip them first or send a screenshot to Naiba for analysis on where to click.
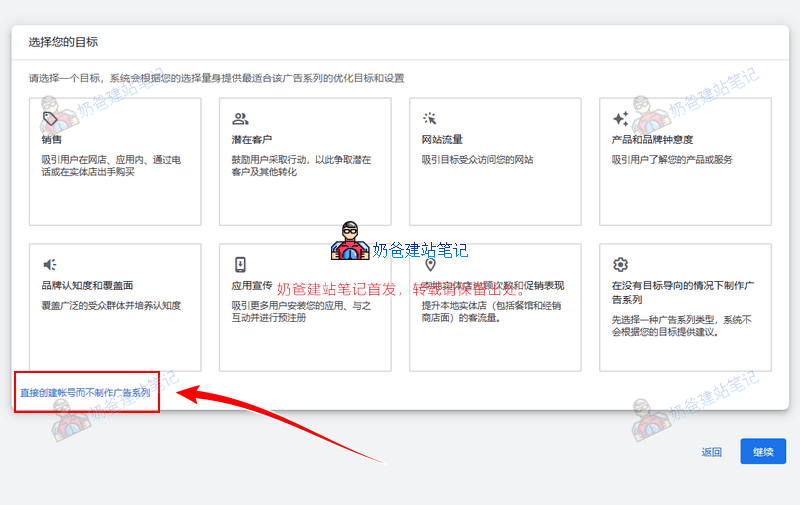
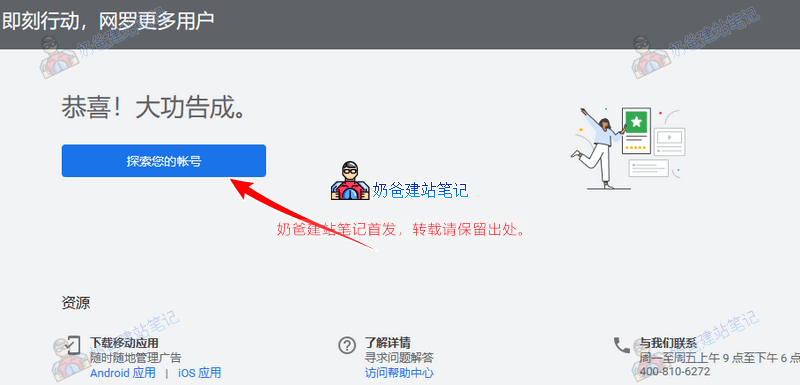
4. Choose to create an account without setting up a campaign first, and go to set up billing information.
Next, the „Confirm Your Business Information“ interface will appear. These settings cannot be changed later, so make sure your choices are correct before proceeding.
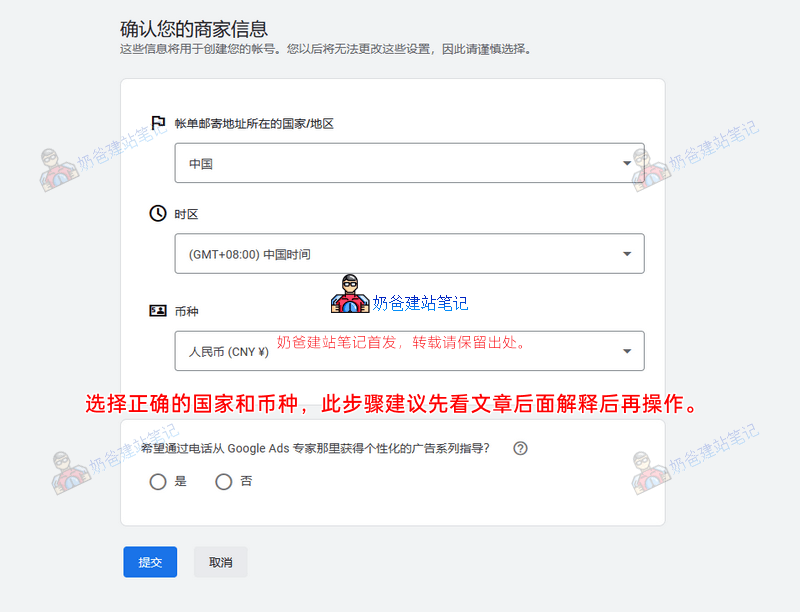
Select the correct country, correct time zone, and confirm the billing currency. These cannot be modified after submission.
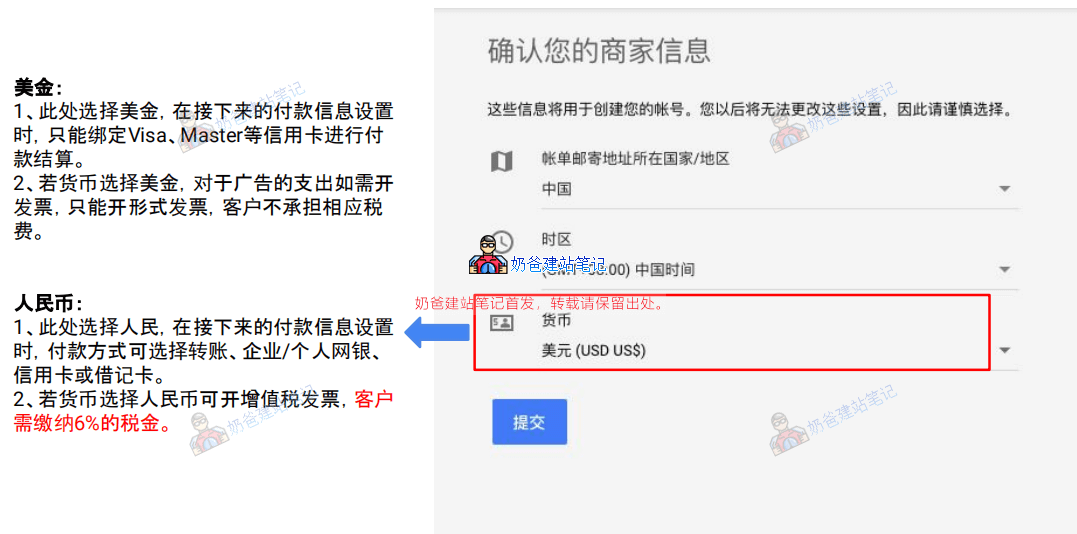
USD:
1. If USD is selected here, only credit cards such as Visa and Mastercard can be bound for payment settlement in the subsequent payment information setup.
2. If USD is selected as the currency, for advertising expenses requiring an invoice, only a proforma invoice can be issued, and the customer is not responsible for the corresponding taxes.
CNY:
1. If CNY is selected here, in the subsequent payment information setup, payment methods can include bank transfer, corporate/personal online banking, credit card, or debit card.
2. If CNY is selected as the currency, a Value-Added Tax (VAT) invoice can be issued, and the customer needs to pay a 6% tax.
Recommendation: If you plan to bind PayPal payment or mainly serve overseas customers, choose USD; if you need domestic invoice reimbursement or tax compliance, choose RMB. Naiba chooses USD here to bind PayPal.
Because Naiba plans to bind PayPal to pay in USD, so choose USD currency. You should choose according to your actual situation.
Set up Google Ads Billing Information
After creating a Google Ads account, we still need to set up billing information; only then will the ads created later be delivered (they certainly won't run ads for you if you don't pay).
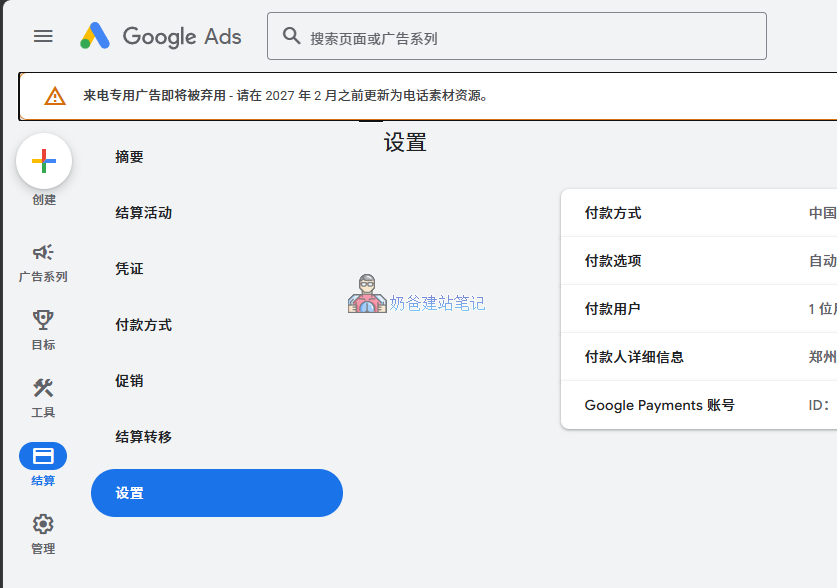
Click „Billing“ in the left navigation bar and select „Settings“. In the customer information section of payment settings, if this account is used for enterprises, institutions, organizations, partnerships, or educational institutions, select Company; otherwise, select Individual. Fill in the name and address according to the actual situation.
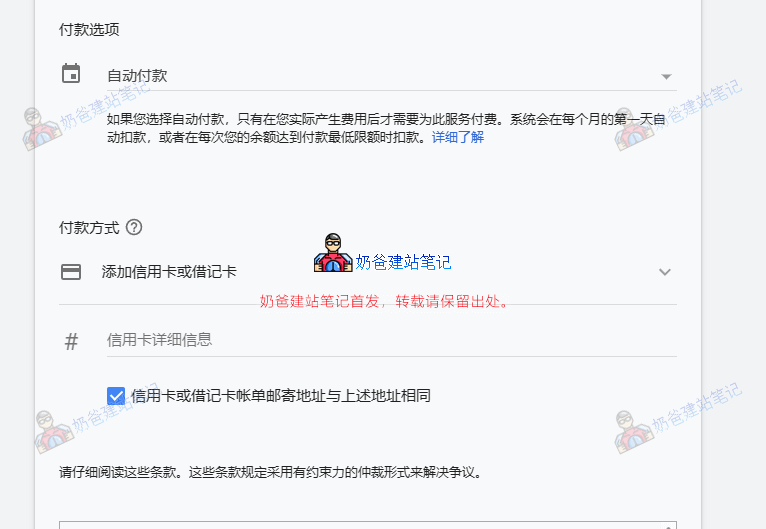
Payment methods can be selected as automatic payment or manual payment. This will differ depending on whether you choose USD or RMB. In short, fill in the corresponding information according to the prompts and your actual situation.
After setting up, if you are using manual payment, you can first top up a certain amount into your Google Ads account. After topping up, there may be a delay before it appears in the balance.
After carefully reading the terms, submit. New accounts usually need to completeAdvertiser Verification. Google will require submitting a business license or identity document, and advertising can only be officially launched after approval.
Creating a Google Ads Search Campaign (Core Hands-On)
After completing Google Ads account opening and billing settings, return to the Google Ads homepage, click the plus sign on the left, and select„Campaigns“to start creating.

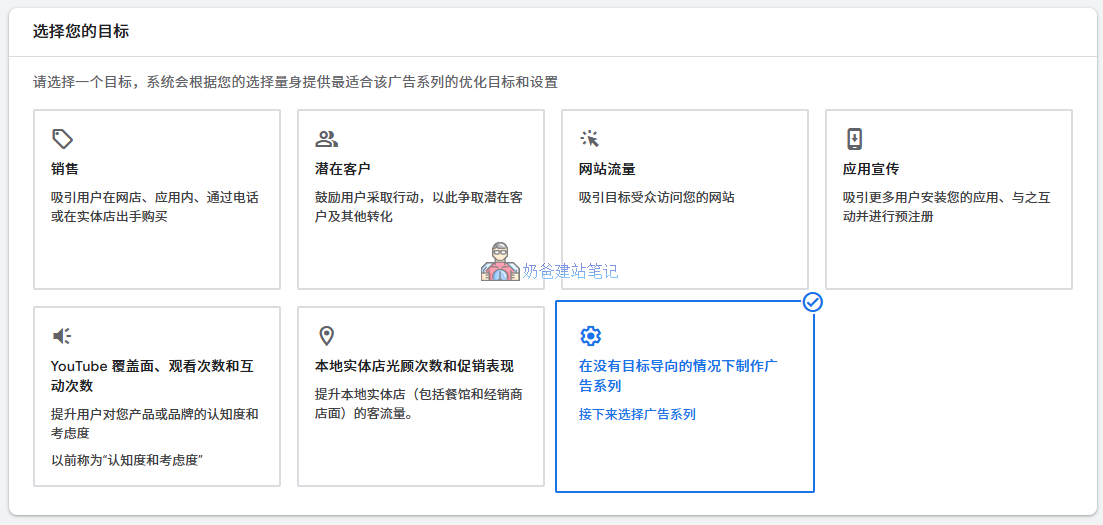
After clicking the „New Campaign“ button, the goal selection interface appears. Based on your different goals, Google provides multiple default selection methods. If you want to customize each item, choose „Create a campaign without a goal's guidance":
After selecting the goal, enter the campaign type selection page. Here, it is recommended to chooseSearch Campaign,which displays ads when users search on Google. It is most suitable for practice and learning ad placement.

Once you are familiar, you can try creating different types of ads and see which type has the highest conversion rate for your website, then keep the best one.
Under the campaign goal, select „Website visits“ and fill in your website URL.
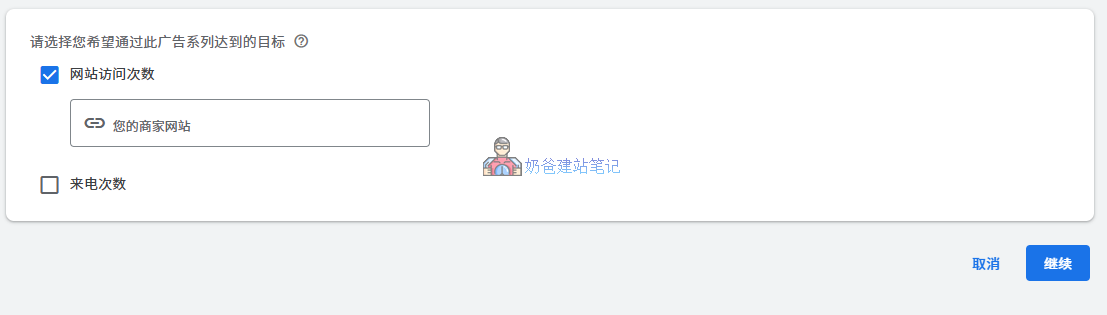
For the conversion actions section, you can skip it for the first ad campaign and set it up after the ads are running.
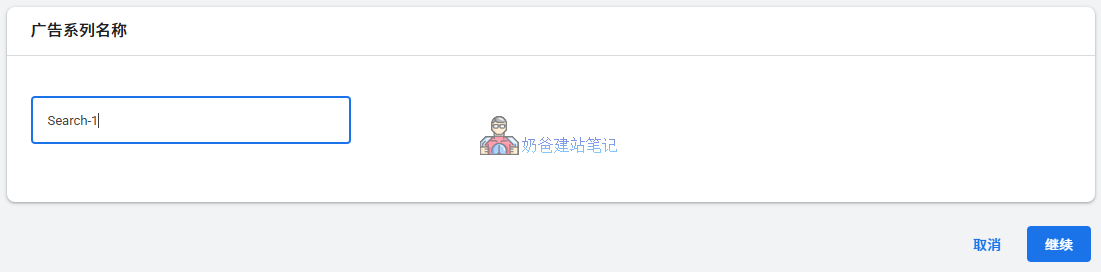
Then name this campaign to distinguish it from multiple campaigns.
Set Bidding Strategy
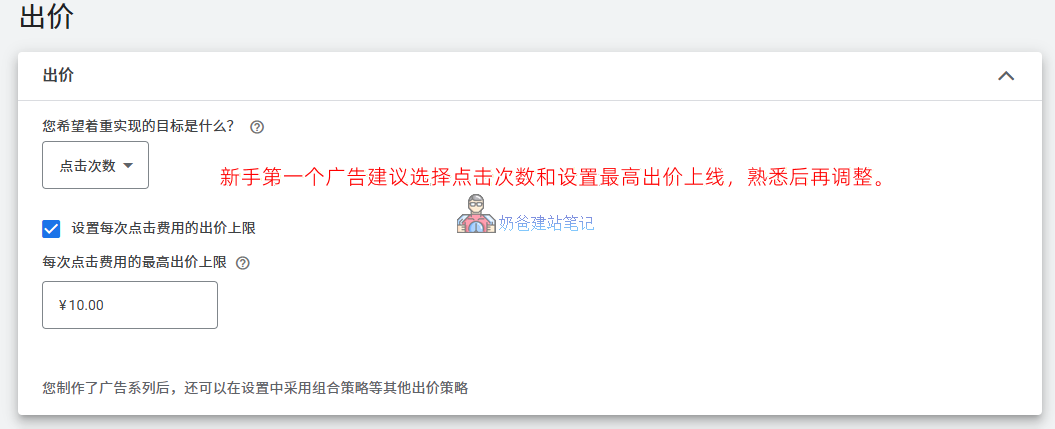
After continuing, you will enter the bidding settings interface, which is a relatively important point.
Users click on the ad and enter our website, converting through the website content, so we set the goal asClicks。
For the maximum cost-per-click bid limit, you can first set a price you can accept, and after it runs, check how much ad spend is used daily.
Different industries have varying levels of ad competition. In industries with heavy ad spending, a single click may cost tens of RMB.
If your bid is too low, your ad may not be displayed. In this case, you can appropriately increase the maximum bid or initially not set a bid limit, letting the system run the ad spend automatically. Observe for a day or two to understand the industry's bidding situation, then set a maximum bid.
Campaign Settings
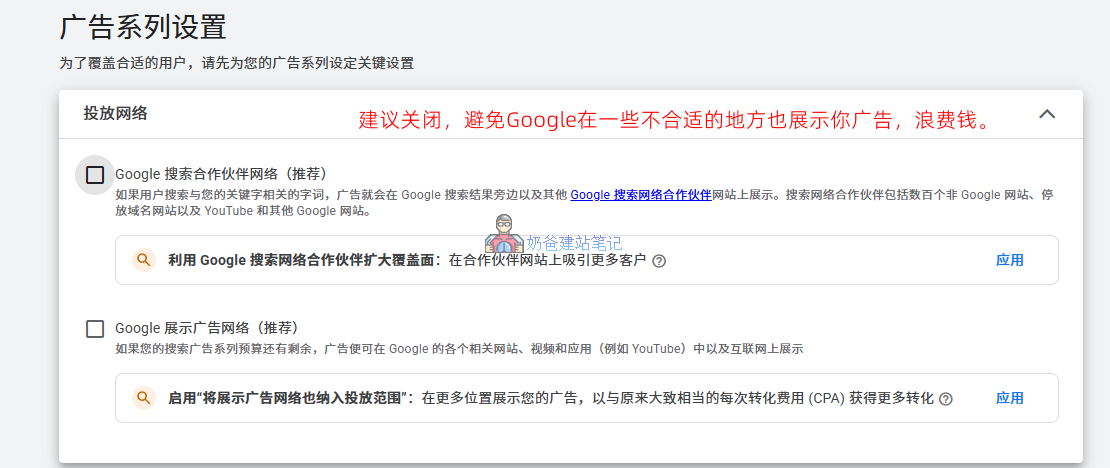
The default network will suggest checking „Google Search Partners Network“ and „Google Display Network“. Naiba recommends not checking these options, because for B2B enterprise ads, displaying in these positions is likely to waste ad spend.
For geographic locations, if your customers are targeted to a specific country, you can select that country here to avoid showing ads in non-target countries and wasting ad spend. Additionally, different countries have different spending power, so you can also consider creating separate ads for different countries to set different bids and keywords.

For language, similarly choose the language of your target region's users, such as English and the language of the specified country.
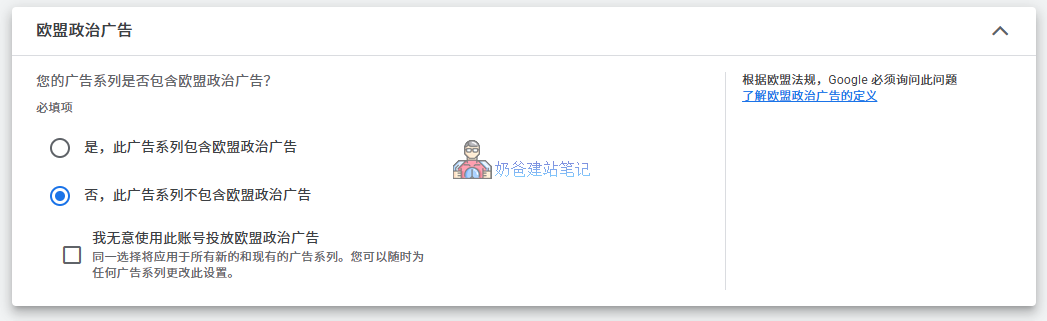
If EU political advertising is not involved, directly decline.
Keywords and Ads
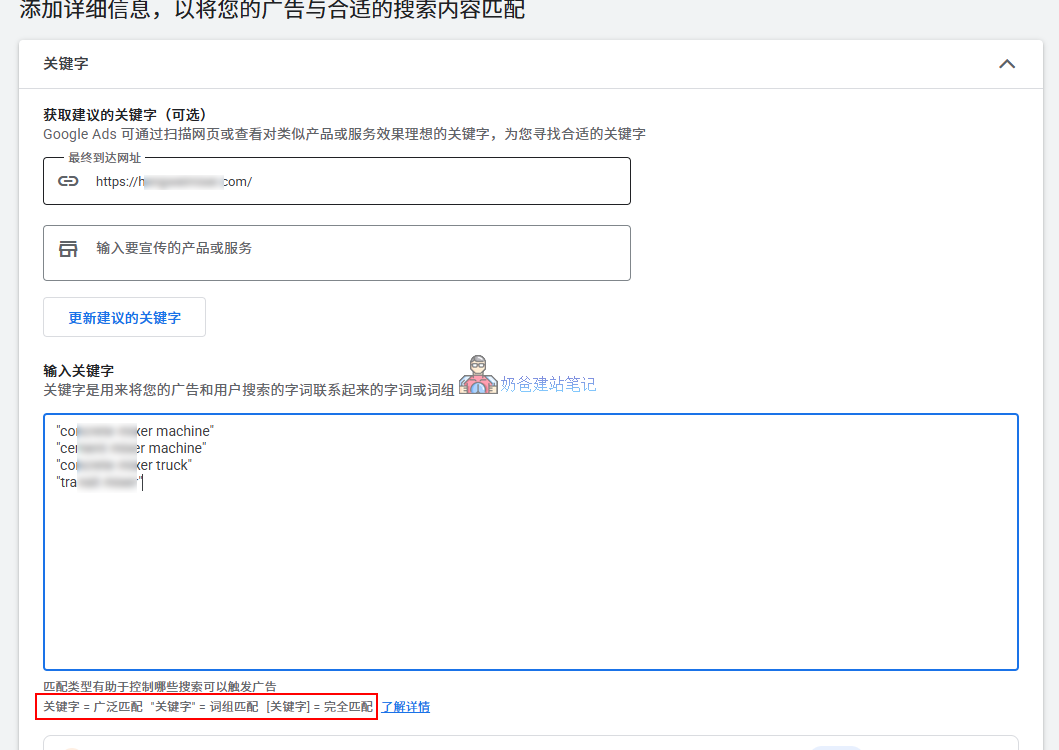
Next, you will come to the keyword settings interface, which affects whether your ads are displayed and how accurate they are.
On this interface, fill in the URL of the page you want to advertise, then input the keywords you want to target. Google can automatically generate some useful keywords for you (these words can also be considered for use inGoogle SEOOh) However, it is not recommended to directly adopt these keywords; they are usually not precise enough. Unless an advertising agency wants to quickly spend your ad budget, you should carefully analyze which words are searched by precise users.
Here we can also use Google's Keyword Planner tool to discover keywords. Open a separate tab and go to the Keyword Planner page.
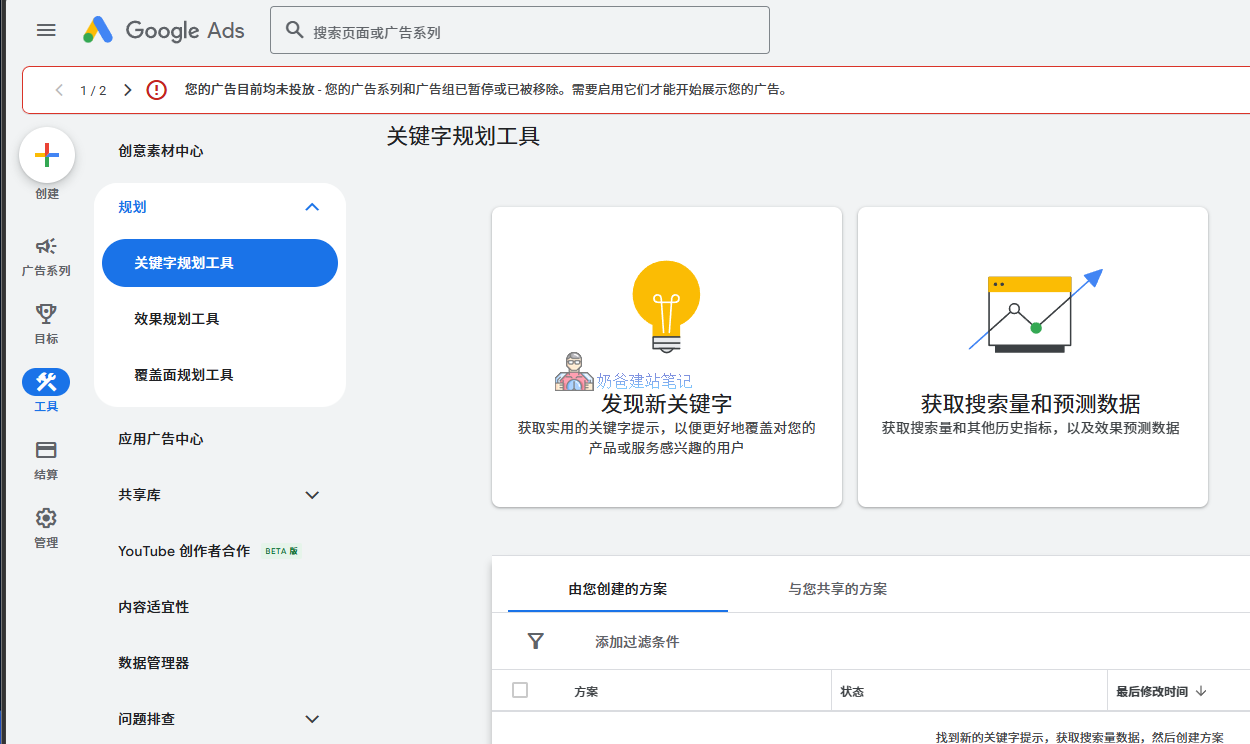
Here, fill in your ad keywords, country, and language, then check the keywords generated by Google and delete any inappropriate ones.
What are unsuitable keywords? These are words that are clearly unrelated to the content of the page you are advertising, words that will not lead to conversions.
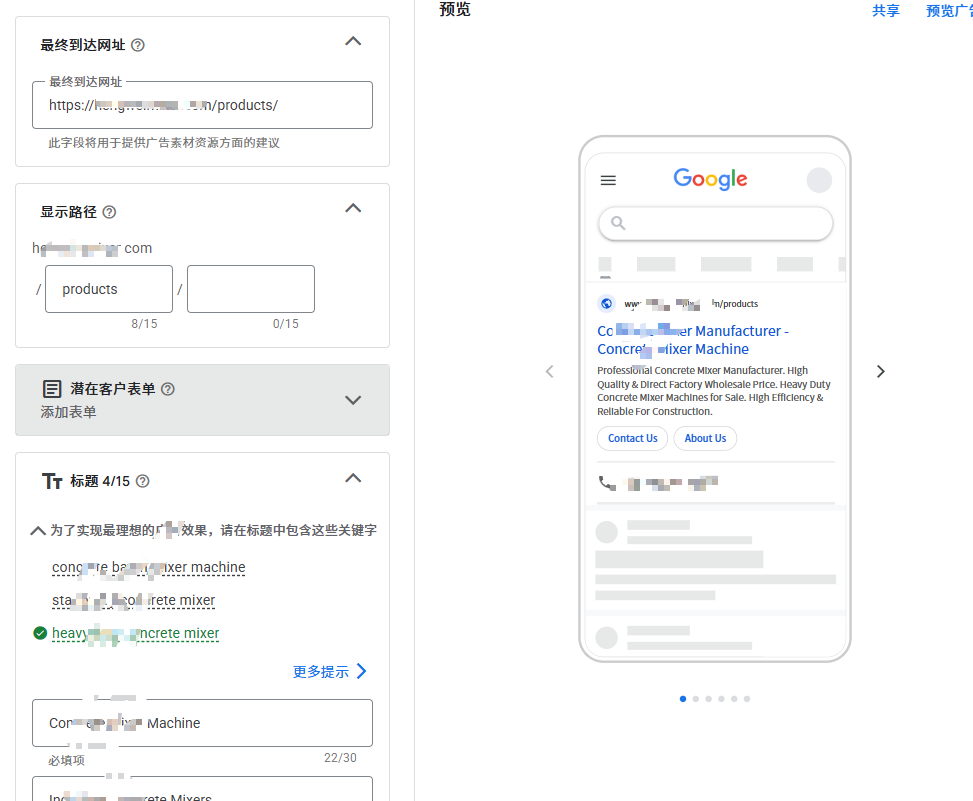
Next, you will refine the ad content. You can refer to the prompts in the upper right corner and then create the corresponding ad content.
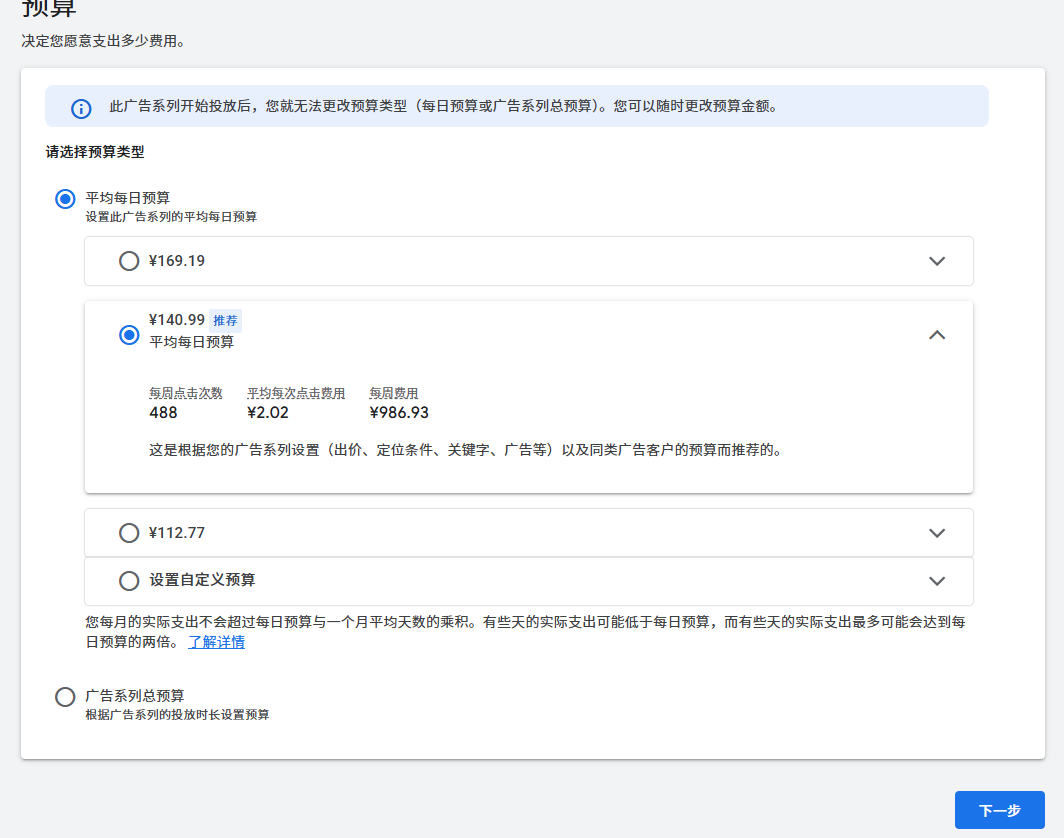
Budget
Finally, go to the budget page. The cost of acquiring customers through ads in some industries can be as high as several hundred yuan each. So if you set your budget too low, it may not be effective. However, beginners learning to run Google Ads on their own can set a lower budget initially and adjust it later after gaining familiarity.
Publish the Ad
After all settings are complete, you can publish the ad.
Once your ad is approved, users will be able to see your ad content when searching on Google. At this point, we have completed the process of registering a Google Ads account, opening it, and launching ads ourselves.
After the ads have run for a period, analyze the ad performance and make corresponding adjustments to achieve a better return on investment.
Setting Up Google Ads Conversion Tracking (Must-Do After Launch)
After the ads start running, you need to set up conversion tracking to know whether the ads are bringing actual results. (Of course, for a new website without SEO or other promotion, the website traffic basically comes from Google Ads. If your website has traffic, it proves the ads are effective.)
But if your website has both SEO traffic and SEM traffic, how do you determine if an inquiry came from an ad? You need to set up ad conversion tracking.
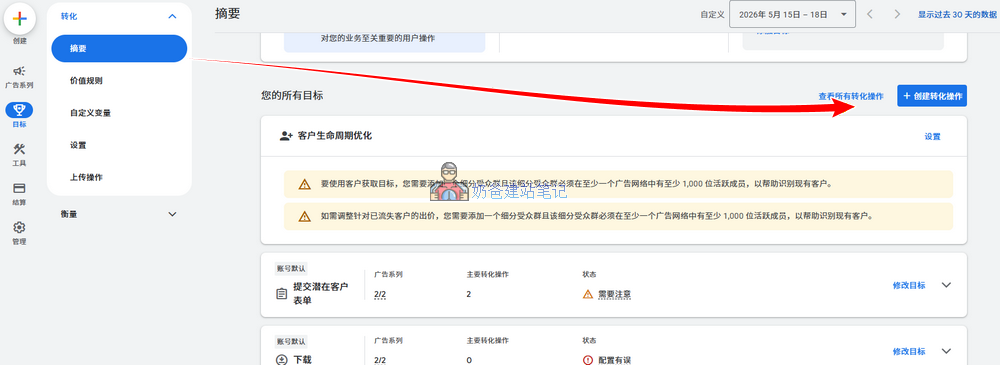
The simplest way for B2B companies to track form conversion effects is through the form submission thank-you page.
Here we select „Conversions occurring on the website“ and modify the data source to sync your code or associate statistics.

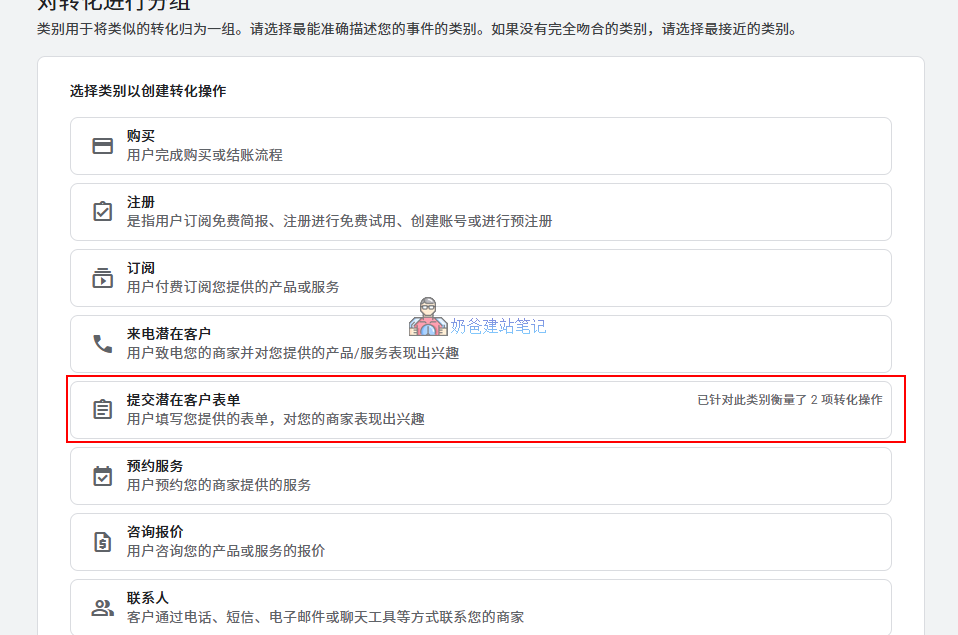
Conversion select „Submit lead form”
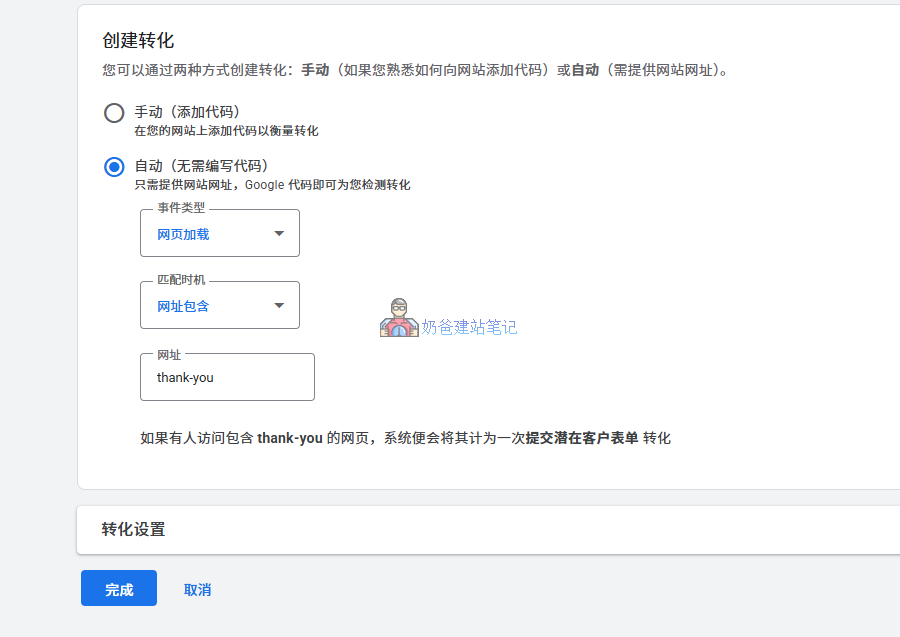
Then on the new page, create a URL visit that contains „thank-you“.
Within 24 hours of installation, check the "Conversions" page to see if the status shows "Recording conversions".
This concludes the tutorial on how to open a Google Ads account and run ads by yourself. If you have any questions, you can add Naiba's WeChat for discussion.
The current version seems to lack Expert Mode
The interface may have changed. I don't have a new account to take screenshots, so please adapt flexibly.