How is Cloudways?Is it suitable for building websites? Coincidentally, a Naiba client purchased a Cloudways server today, taking this opportunity
Naiba here shares a Cloudways tutorial and discusses my purchasing advice for Cloudways as a server provider.What is Cloudways?
Cloudways is a cloud server hosting platform. To put it plainly, they rent cloud servers from other cloud server providers, configure them, and then provide them for you to use—it feels a bit like a middleman making a profit. Of course, this middleman does provide services; you don't have to manage server OS installation, security, upgrades, configuration, etc. You can just buy and use it.
Is Cloudways worth buying?
For friends learning website building on their own, is it necessary to purchase Cloudways? Let's first look at a comparison:

From the above image, we can see that Cloudways' hosting uses servers from DigitalOcean, Linode, Vultr, AWS, and Google Cloud. Then, let's look at Vultr's configuration.
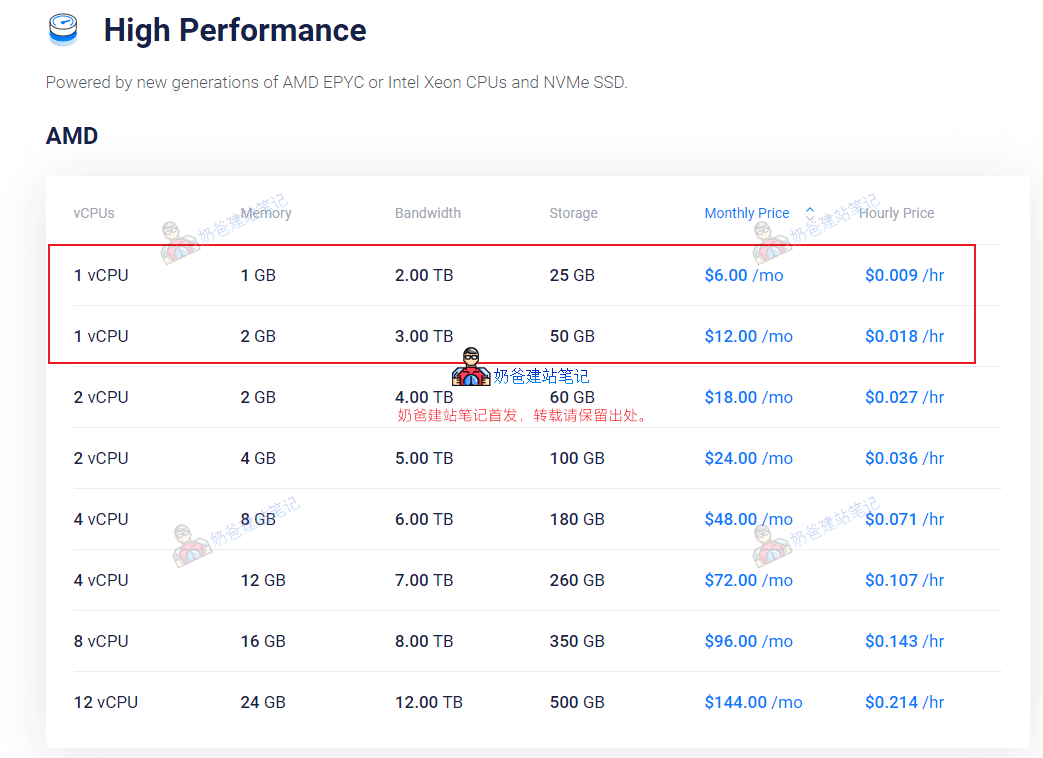
It can be seen that, purely looking at CPU and RAM (ignoring traffic and storage size), on Vultr's official website, purchasing a 1H1G configuration costs $6 per month, and a 1H2G configuration costs $12 per month. However, Cloudways' starting price is $13. That's about double the price. What services do you get for this doubled cost?
- Cloudflare Add-on NEW Built-in Cloudflare CDN acceleration
- 24/7/365 Support Year-round after-sales support
- Free SSL Free SSL certificates
- Free Migration
- Unlimited Application Installation
- Team Management
- Dedicated Firewalls
- 24/7 Real-time Monitoring
- Automated Backups
- Staging Environment (used for building temporary websites for testing)
- Optimized With Advanced Caches
- Auto Healing (Automatic Backup Restoration)
- Regular Security Patching
- HTTP/2 Enabled Servers
- SSH and SFTP Access
Among the features mentioned above, if you purchase from Vultr, automated backups cost an extra $2 per month. Apart from after-sales support, most other features are essentially available when you buy a VPS, so they shouldn't be counted as additional costs.
In summary, by paying double the price on Cloudways, what you gain is year-round after-sales support, automated backups, and a relatively user-friendly VPS management system. Is it worth buying?First, a $13 per month server is not expensive. Even if you purchase from Vultr yourself, Naibabiji recommends starting with at least a $10/month configuration, although the specs would be one tier higher than Cloudways. However, because Cloudways has configured and managed the servers, using the VPS becomes simpler.
In terms of server optimization, it will certainly be more thorough than what a VPS beginner could achieve.Therefore, a $13 server on Cloudways might run faster than a $12 server you buy yourself. Then, because the VPS is configured by Cloudways, any issues related to the VPS will be handled by Cloudways' after-sales support, allowing you to utilize their customer service.
Cloudways Purchase Recommendation:If you have sufficient budget, lack technical knowledge, and want to use a VPS for your website, buy it. If your budget is limited but you have decent self-learning ability, you can first buy
Shared Hostingor
Vultrthese
VPSto build your website. When your website traffic grows and you feel the site is slow even after upgrading the VPS yourself, then switch to managed providers like Cloudways. Because a normal VPS, by installing
Baota Panel, is also very simple to use. In all the years Naibabiji has shared website building tutorials, only one business owner with high 2C traffic needed to upgrade their server. For other websites, server performance issues are basically non-existent. Moreover, for true beginners, using a VPS, including managed VPS like Cloudways, is still too complex. Shared hosting might be more suitable for beginners. If website traffic doesn't grow, even the best server won't be utilized effectively. When website traffic does grow, it's not too late to switch to a better server.
Cloudways Tutorial
After analyzing what Cloudways is like and whether it's worth buying, we will now officially begin the Cloudways tutorial.
First, registration.
1. Open
https://www.cloudways.com/website, click the GET STARTED FREE button to register.
Cloudways Official Website Click to Register (3-day free trial available) 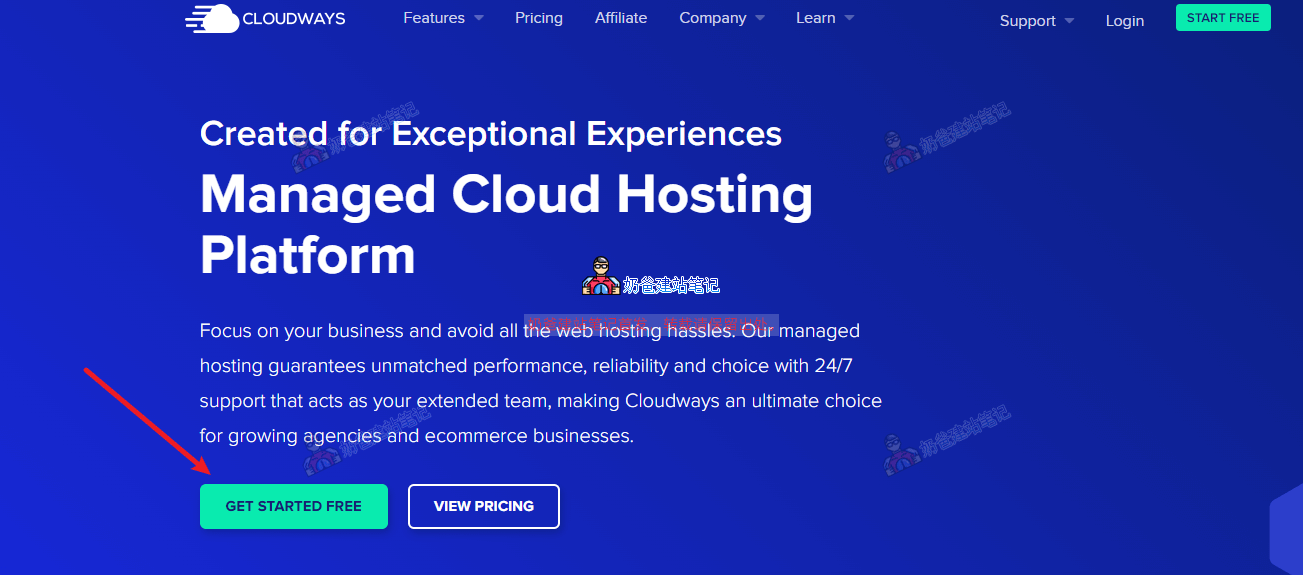
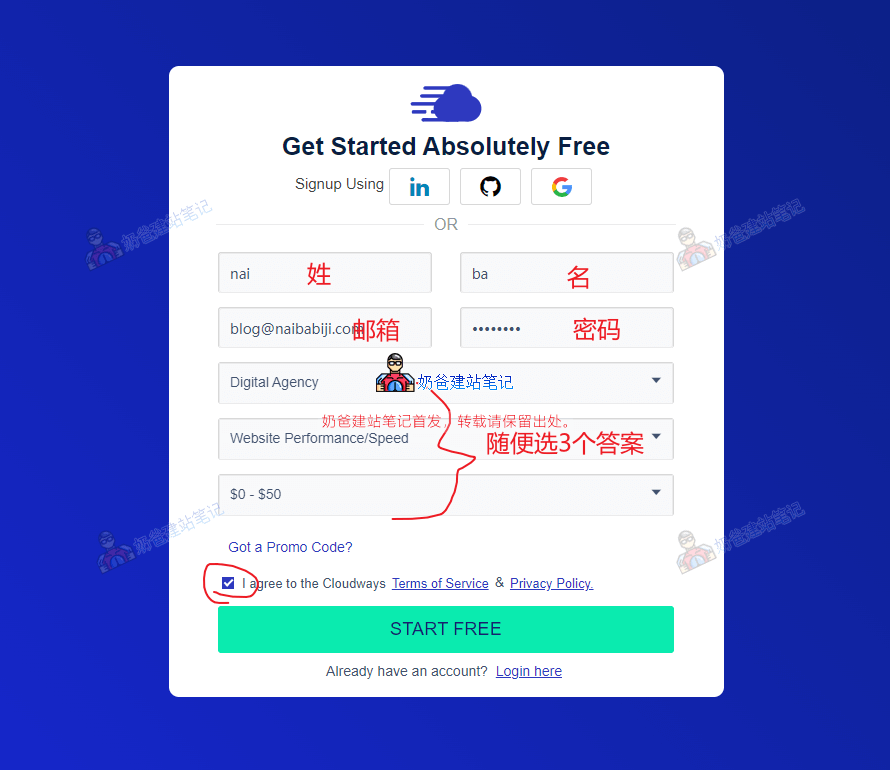
Then fill in the registration information and submit.
After registration, a verification prompt may appear, like the example below:
Welcome To Cloudways
To activate your account, please contact our verification team at av@cloudways.com. Once your account is activated, you'll be able to login and start your free trial.
At this point, we need to manually send an email to av@cloudways.com for account verification (an automatic verification reminder will also be sent to your registered email, and you can reply directly).
The email subject can be 'Account verification'. The email content can be: 'Hello, I am going to buy Cloudways services to build my own website, please help me to verify my account, my email is your email address. my facebook: your facebook address my twitter: your twitter address my linkedin: your linkedin address'
Then wait for their reply and follow the instructions in their response email. Generally, they will ask you to provide proof of identity, including ID card, Facebook address, Twitter address, your own website, LinkedIn address, phone number.
Select 2 pieces of information to send to them.。
Then, create a server.
Once approved, you will receive an account activation email. After activation, log in to Cloudways, and you will see the service creation interface, as shown in the figure below:
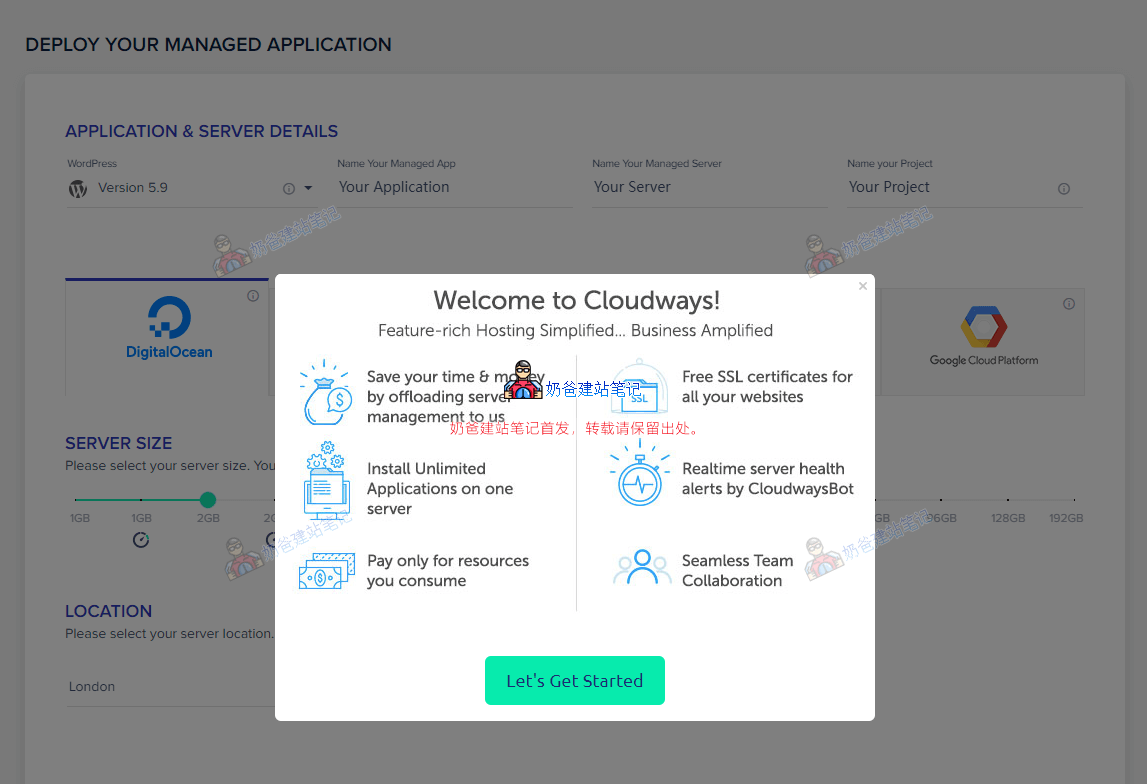
Choose the appropriate server provider and configuration based on your needs, then proceed to the next step.

Wait a few minutes, and the website will be created.

Next, server management.
After the server is created, click the server tab to enter the server details page, where you will see an interface like the one shown below.
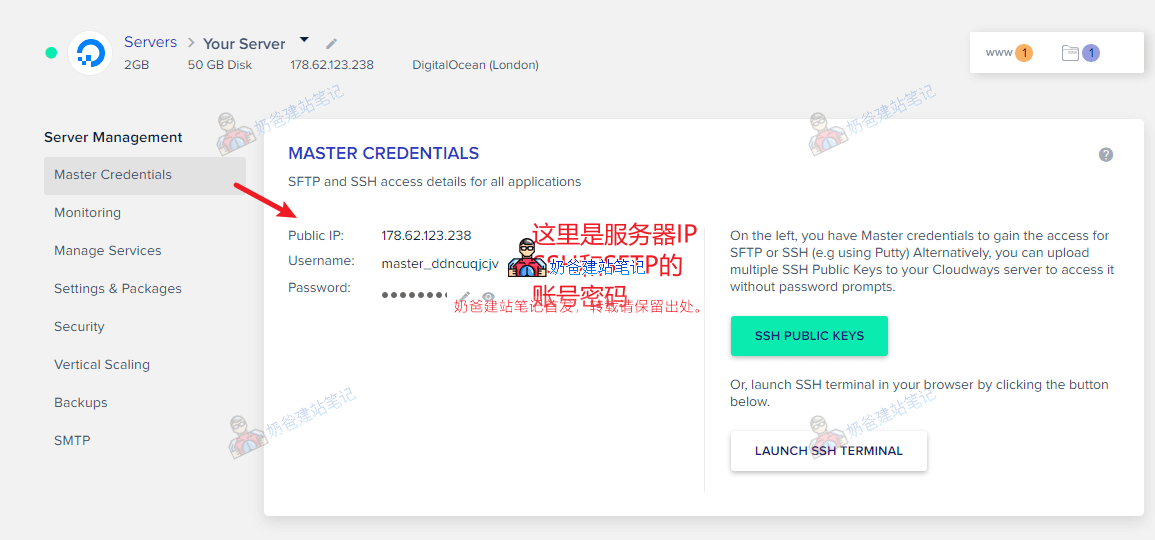
在
Master CredentialsIn this interface, you can see your server IP (Public IP), SSH/SFTP username and password. This account allows you to
XSHELL and XSFTPuse such software to connect to the server for server management or file upload/download, but generally, beginner users on Cloudways do not need to use this.
MonitoringThis interface is for server monitoring, where you can view your server usage.
Manage ServicesThis interface is for server process management, similar to the task manager on a computer.
Settings & PackagesThis interface is for software configuration and optimization, such as setting PHP timeout, upload size, memory limits, changing PHP versions, and other operations.
SecurityThis interface is mainly for setting IP whitelists and blacklists for SSH and the database.
Vertical ScalingThis interface is for scaling the server up or down.
BackupsThis interface is for website backups, where you can set up automatic backups or perform immediate backups.
SMTPThis interface is for configuring the server's email sending function, but this requires an additional fee (not expensive), or you can install a Plugin on WordPress to achieve it yourself.
Manage WordPress.
After introducing the server, let's talk about WordPress. After the server is installed, Cloudways has already installed WordPress for you by default.
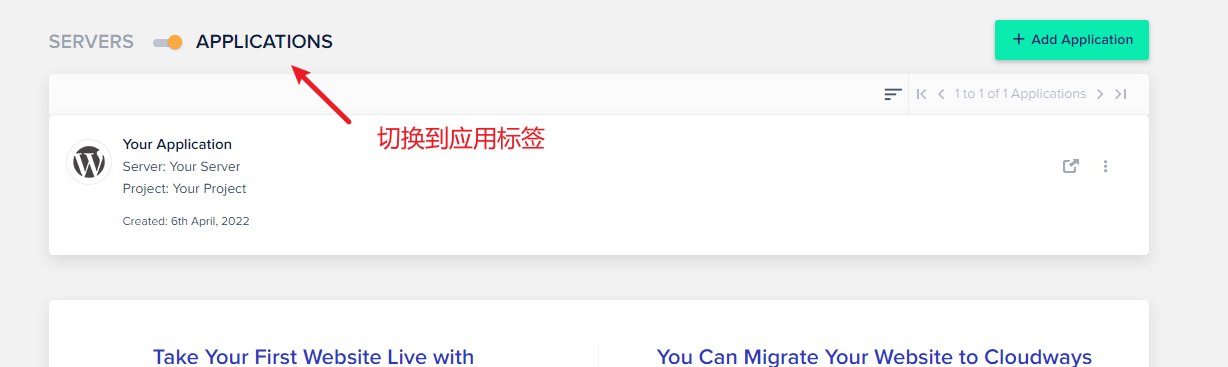
Click the menu bar or the 'Applications' in the image above to switch to the applications tab. From the image above, we can see that a WordPress website has been installed for us by default. If you want to create multiple websites, simply click the 'Add Application' button in the upper right corner to create one. Click the application title to enter the details page, where you will see the interface shown below.
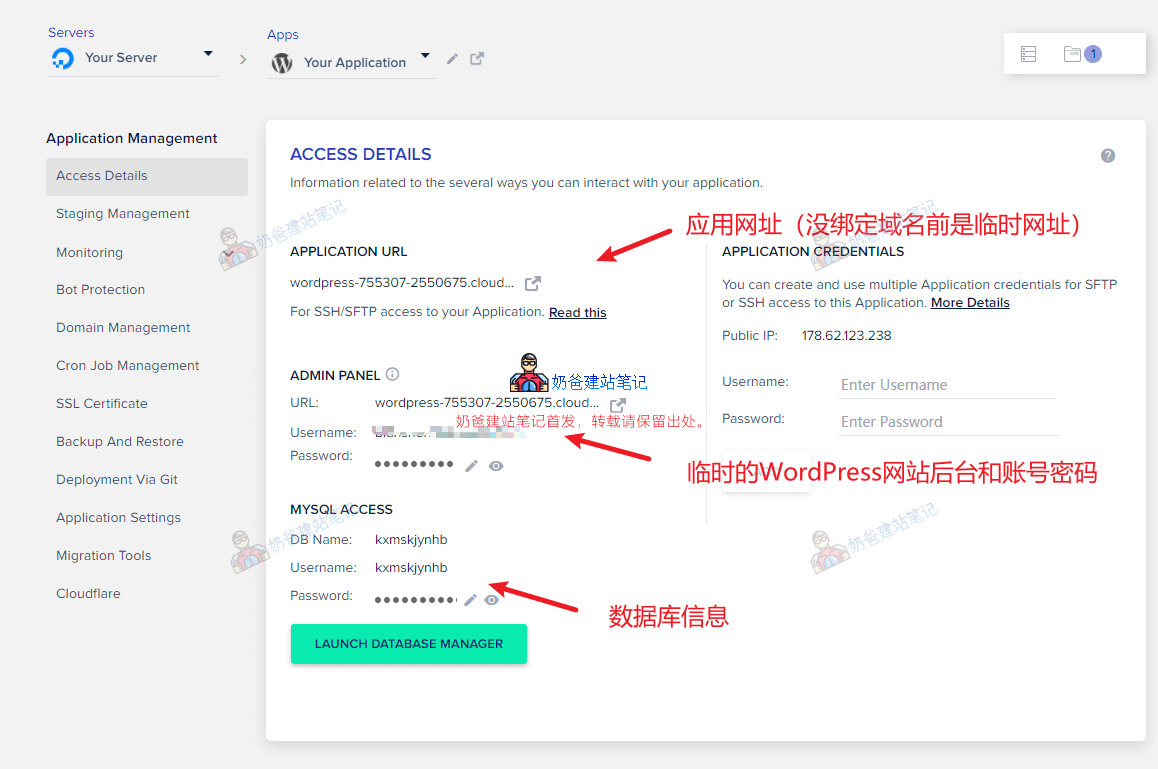 Access Details
This interface contains the basic information of your application, including the website URL, account passwords, etc.
Staging ManagementThe interface provides you with an identical copy of your website as a testing environment for testing or debugging new features. It is generally not frequently used for small websites.
MonitoringThe interface is also for monitoring, allowing you to separately monitor information such as website traffic, PHP, and databases.
Bot ProtectionThe interface displays statistics from a security plugin, which requires the WP plugin installed by default on Cloudways to function.
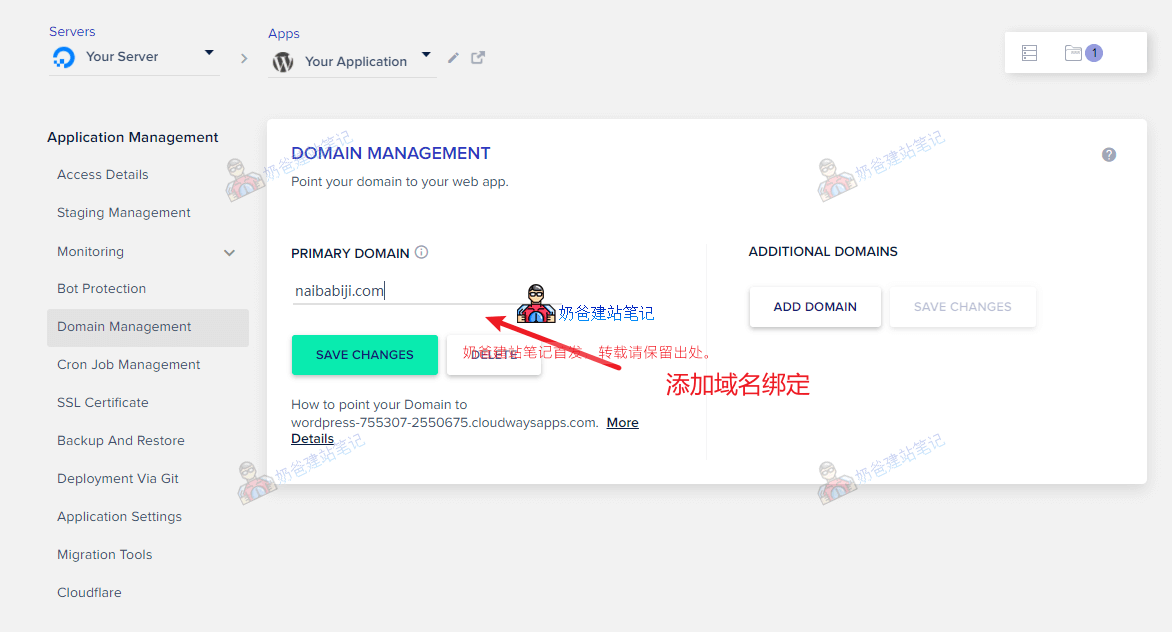 Domain Management
The interface is for binding your own domain to WordPress, so you don't have to access it via a temporary domain.
Naibabiji recommends binding your domain here first, then proceed to the WordPress Admin Dashboard to build your website. This helps avoid link errors that may occur when switching from a temporary domain to the official domain after the site is built (there is a possibility that Cloudways' automatic domain replacement may not be completely clean).
After adding the domain, you need to go to your domain registrar's website to set up DNS resolution. Simply put, add two A records with the record value being your server's IP address. Refer to the tutorial:
Cron Job ManagementThe interface is generally not needed; it is for managing scheduled tasks.
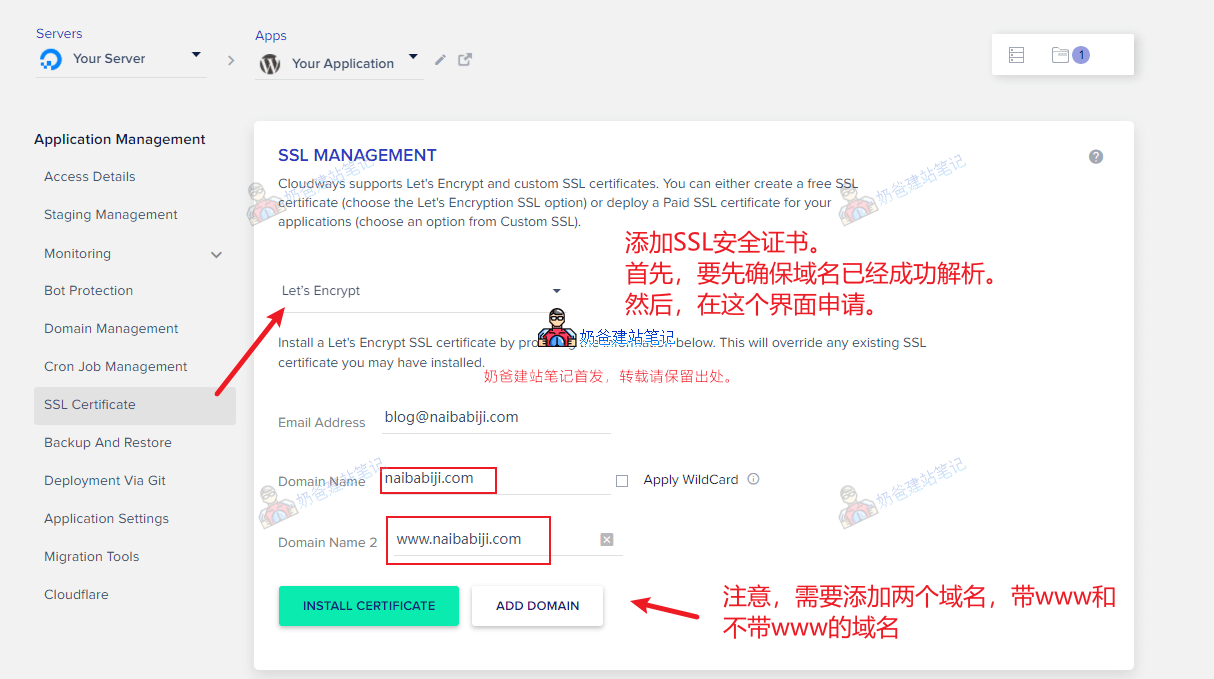 SSL Certificate
The interface is for applying for an SSL security certificate. After your domain resolution is successful, come to this interface to apply for the SSL certificate so that the website can be accessed via https.
Backup And RestoreThe interface is for backup and restore.
Deployment Via GitThe interface is generally not used; it is for deployment via git.
Application SettingsThe interface allows you to configure settings such as the WordPress installation folder (not recommended to change) and also individually configure PHP parameters for this WordPress.
Migration ToolsThe interface is for migrating websites; I haven't used it, so no evaluation.
CloudflareThe interface provides free CDN service; just fill in your email to activate it.
How to delete and add a new WordPress website?
If you need to delete a WordPress website, simply click the delete button next to the application, then enter „DELETE“ in the pop-up interface.
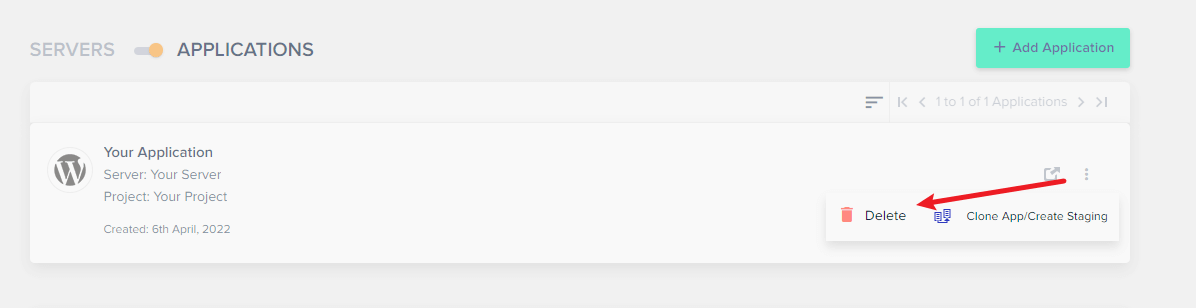
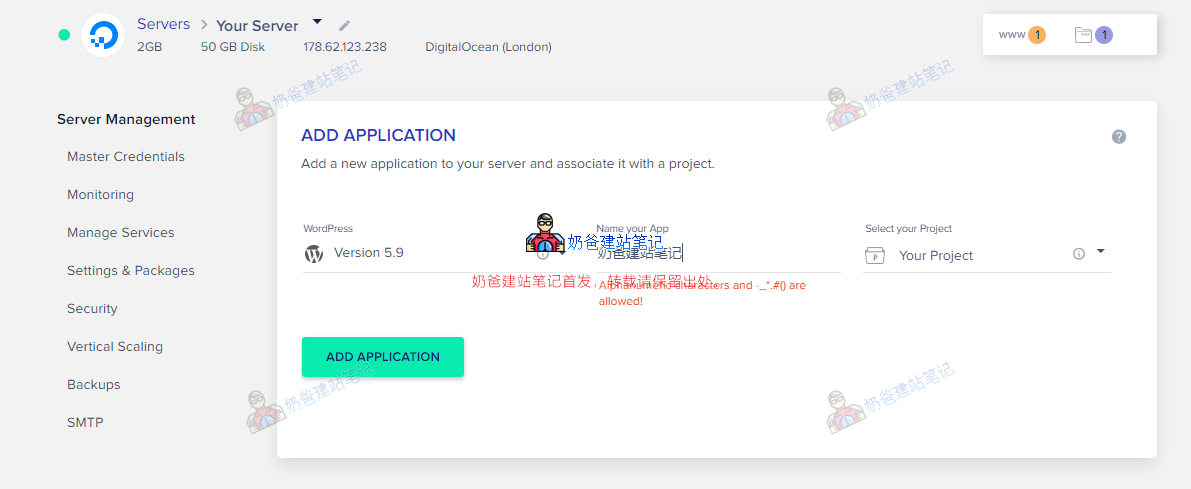
It is important to note that you must ensure at least one Application is running on the server. If you want to delete an old one, you can create a new application first, then delete the old one. If you need to add a new website, just click the 'Add Application' button in the upper right corner, select which server to create it on, choose the WordPress version, add a name, and create it.
How to delete a Cloudways server?
To delete a Cloudways server, directly click the three dots next to the server, select Delete, and then enter DELETE in the confirmation pop-up.

At this point, the basic usage tutorial for Cloudways is complete. If you have any further questions, feel free to leave a comment for discussion.
 From the above image, we can see that Cloudways' hosting uses servers from DigitalOcean, Linode, Vultr, AWS, and Google Cloud. Then, let's look at Vultr's configuration.
 It can be seen that, purely looking at CPU and RAM (ignoring traffic and storage size), on Vultr's official website, purchasing a 1H1G configuration costs $6 per month, and a 1H2G configuration costs $12 per month. However, Cloudways' starting price is $13. That's about double the price. What services do you get for this doubled cost?
 Wait a few minutes, and the website will be created.
 Click the menu bar or the 'Applications' in the image above to switch to the applications tab. From the image above, we can see that a WordPress website has been installed for us by default. If you want to create multiple websites, simply click the 'Add Application' button in the upper right corner to create one. Click the application title to enter the details page, where you will see the interface shown below.
 Domain ManagementThe interface is for binding your own domain to WordPress, so you don't have to access it via a temporary domain.
 SSL CertificateThe interface is for applying for an SSL security certificate. After your domain resolution is successful, come to this interface to apply for the SSL certificate so that the website can be accessed via https.Backup And RestoreThe interface is for backup and restore.Deployment Via GitThe interface is generally not used; it is for deployment via git.Application SettingsThe interface allows you to configure settings such as the WordPress installation folder (not recommended to change) and also individually configure PHP parameters for this WordPress.Migration ToolsThe interface is for migrating websites; I haven't used it, so no evaluation.CloudflareThe interface provides free CDN service; just fill in your email to activate it.

Is Cloudways CDN now charging a fee?
Free
Hello!
Today when I opened Cloudways, only DigitalOcean, AWS, and Google Cloud were available, but Vultr was gone. Is Vultr no longer providing service?
DO and Vultr are competitors (in the same tier), while AWS and Google Cloud are in the first tier. DO is Cloudways' own, so it's normal to remove Vultr. Vultr's official website is still selling products normally.
You often use Vultr servers, right? I want to follow your tutorials to achieve website building freedom, haha.
Hello, may I ask
Cloudways plan DO1GB
RAM: 1 GB
Processor: 1
Core Storage: 25GB
Bandwidth: 1TB
Compared with SiteGround's shared hosting plan GrowBig Hosting, which one is better and faster?
Cloudways should be a bit better. You can buy and compare them, then request a refund if it's not good.