
Tiny Tiny RSSis a free, open-source RSS aggregator reader based on PHP. It is currently one of the more popular choices for self-hosting an RSS subscription service. Naibabiji previously shared a method to install Tiny Tiny RSS via source code. Recently, it was discovered that the official version only supports installing TTRSS via docker, soThis tutorial has been updatedon how to install Awesome TTRSS using docker.
Awesome TTRSS aims to provide a「one-stop containerized」Tiny Tiny RSS solution, offering an easy deployment method and some additional plugins to enhance the user experience. (Naiba hasn't figured out how to install the official Tiny Tiny RSS version, ( ╯□╰ ))
Preparation Before Self-Hosting Tiny Tiny RSS
To successfully self-host a Tiny Tiny RSS service, we need to prepare the following:
- A VPS server. If you want to subscribe to foreign sources, it is recommended to choose a foreign VPS;
- A domain name. If you plan to access it directly via the server IP, this is optional.
You can choose a server located in China or abroad. If you have many subscription sources from foreign websites, it is recommended to use a foreign server for better network connectivity.
For domain names, registering one can cost from a few yuan to tens of yuan per year. If you already have a domain, you can also use a subdomain. SeeDomain Name Guide。
Steps to Self-Host Tiny Tiny RSS
Create a VPS Server
For the server, it is recommended to choose aForeign VPS. Here, Naiba choosesVultr. You can purchase a server starting from $2.50 per month, but the $5 and above plans are recommended for better performance and the ability to host websites.
Vultr Server Purchase Tutorial
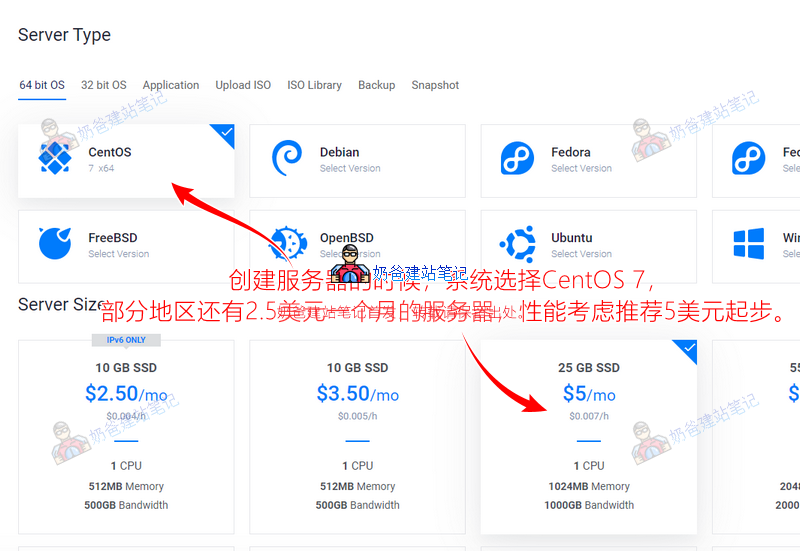
For the operating system, choose CentOS 7. It is recommended to select at least the $5 configuration for better performance, and you can alsoBuilding a Website。
install Baota Panel
After the server is created, we will install Baota Panel on it.
Baota Panel is a server operation and maintenance panel that can visualize many operations that would otherwise require Linux command-line input, a boon for beginners.
Naibabiji has previously published a dedicated tutorial on installing Baota Panel. Please refer to:
2021 Baota Panel Installation Tutorial (Updated with Video Tutorial)
Install docker and docker-compose
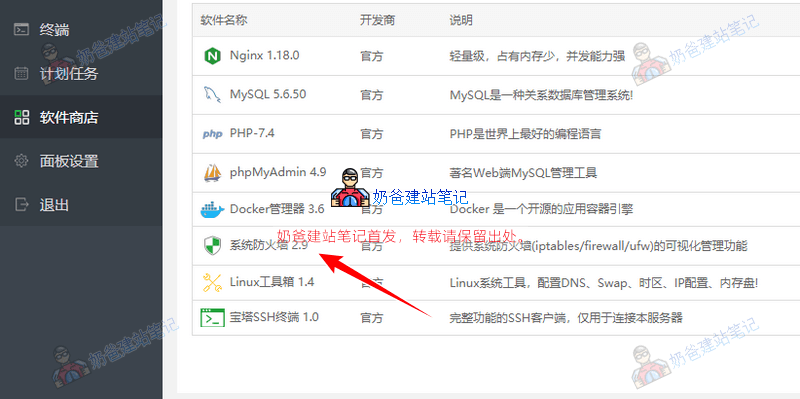
After installing Baota Panel, select Software Store on the left, then search for docker to install it.
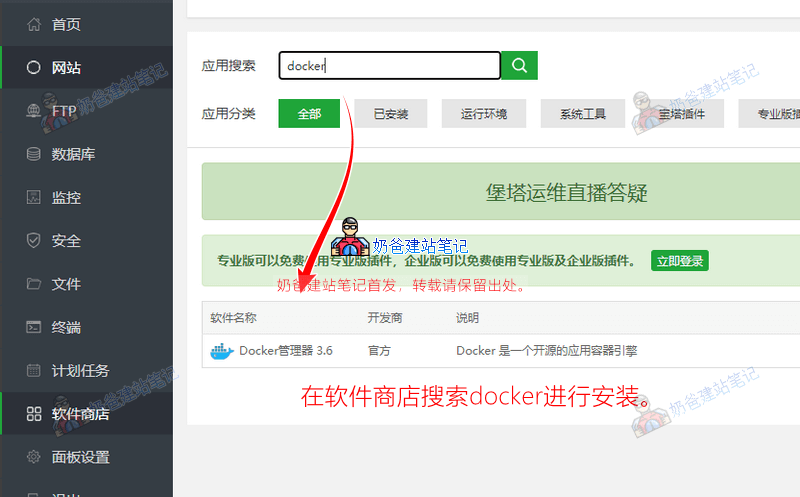
If you want to manually install docker using the terminal, the command is as follows:
curl -sSL https://get.docker.com/ | sh
systemctl enable --now docker
After the Docker Manager installation is complete, we also need to manually install docker-compose.
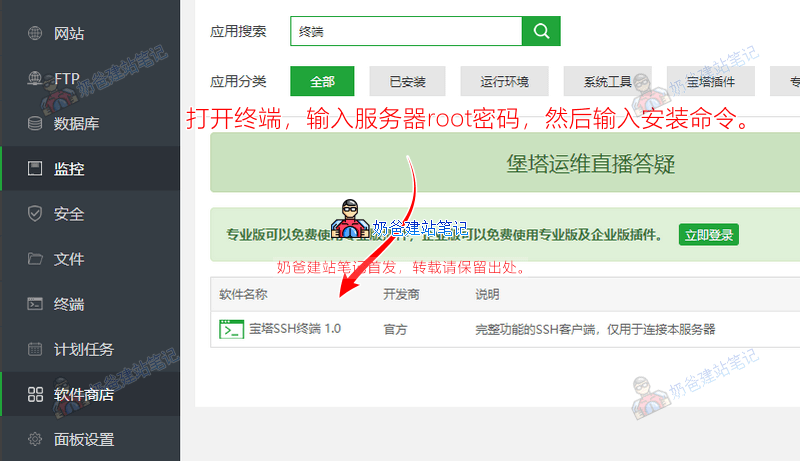
You can use the terminal in Baota Panel, or enter the following command in xShell to install docker-compose (the latest version at the time of this tutorial's release is 1.29.2).
curl -L https://github.com/docker/compose/releases/download/1.29.2/docker-compose-`uname -s`-`uname -m` -o /usr/local/bin/docker-compose
chmod +x /usr/local/bin/docker-compose
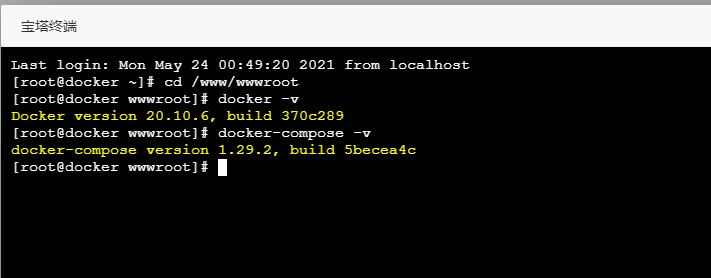
After installation, enter the following command to check if the installation was successful.
docker -v
docker-compose -v
Install Awesome TTRSS
Awesome TTRSS can be installed via Docker or Docker Compose. Here, we will use Docker Compose.
1. Downloaddocker-compose.ymlUpload this file to any folder on the server.
Open the Baota Panel, click on 'Files' on the left, and it will default to navigating to /www/wwwroot. This tutorial will save the file to this folder.
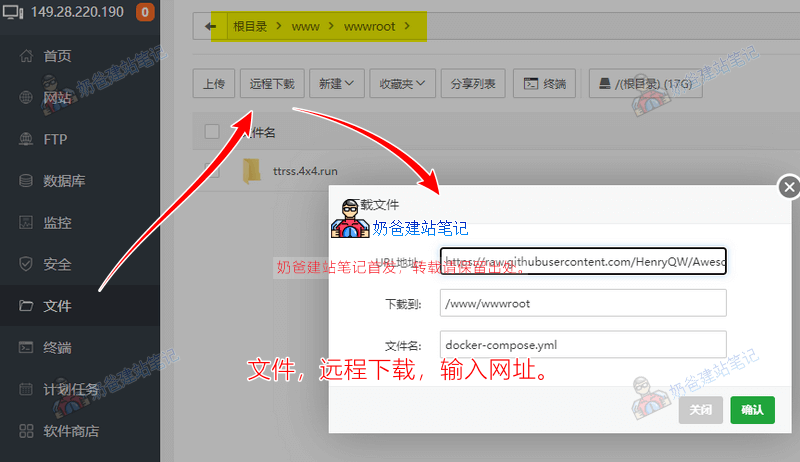
Click 'Remote Download', enter the URL https://raw.githubusercontent.com/HenryQW/Awesome-TTRSS/main/docker-compose.yml, and confirm.
Then, in the Baota Panel file manager, click to edit this docker-compose.yml file and modify the following 3 parameters.
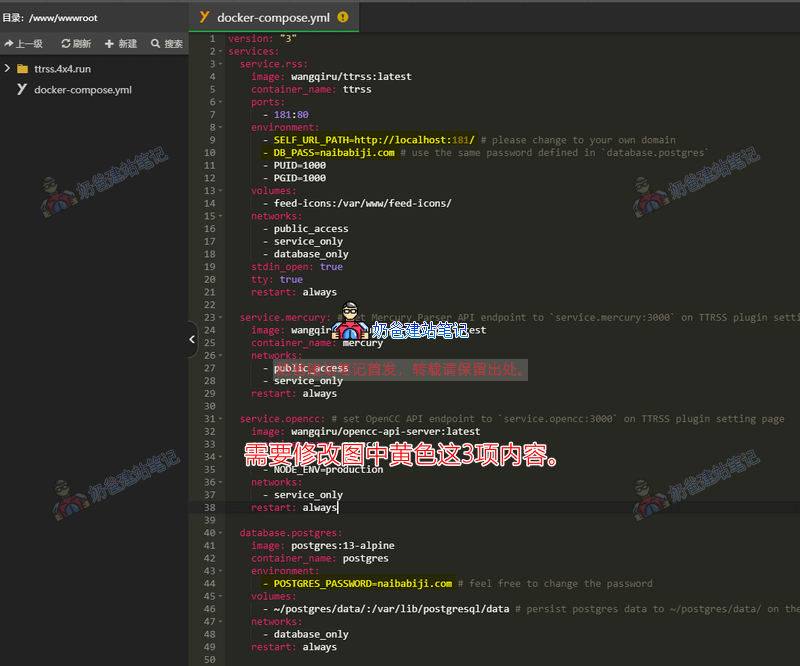
SELF_URL_PATH=http://localhost:181/ # 把localhost修改为你自己服务器的IP,便于待会儿通过IP访问查看是否正常工作。
DB_PASS=ttrss # 把ttrss改成和下面参数一样的值。
POSTGRES_PASSWORD=ttrss # 把ttrss改成和上面一样的值,就是说这两个参数用同一个密码。
After making the modifications, save the file, then click Terminal.
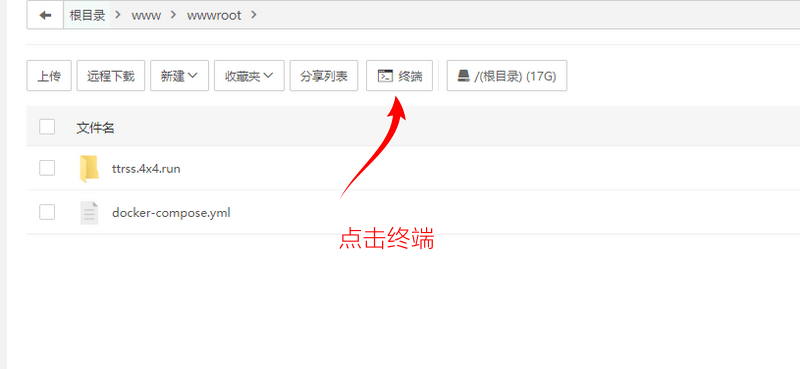
Enter `docker-compose up -d`, and when prompted with 'done', it means the service deployment and startup were successful.
Modify Tiny Tiny RSS Configuration
After starting TTRSS with the above command, open your browser and access your VPS's IP address plus port 181 to see the Tiny Tiny RSS login interface.
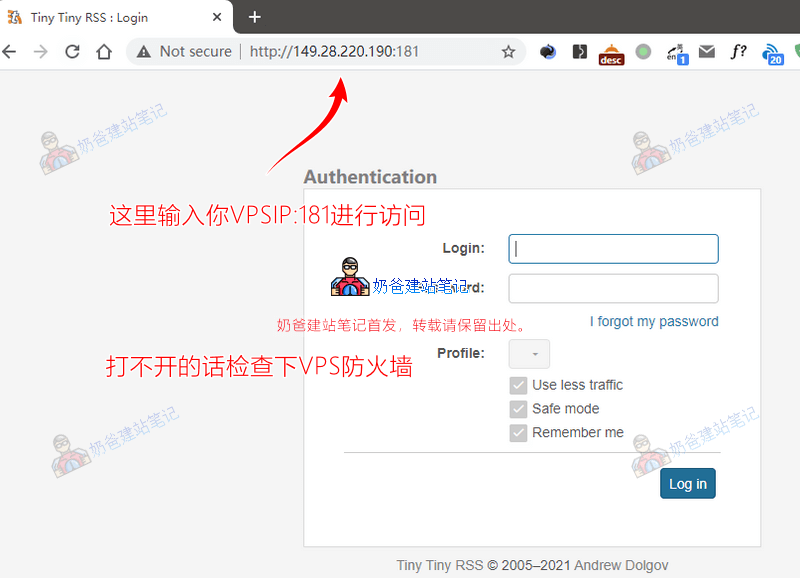
If you find that you cannot access TTRSS by entering VPSIP:181, first check if the firewall has not opened port 181.
Search for 'Firewall' in the Baota Panel app store, then add a TCP rule for port 181 in the firewall settings.
Enter the default usernameadminand passwordpasswordto log in.
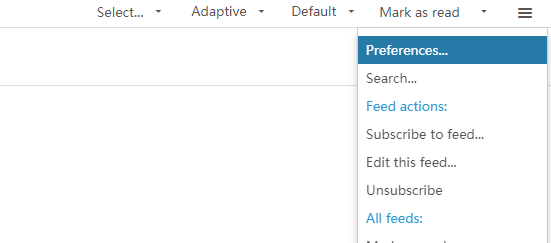
In the upper right corner of the screen, click the three horizontal lines and select 'Preferences' to enter settings.
Select Simplified Chinese in the Language option and save, then the interface will become Simplified Chinese.
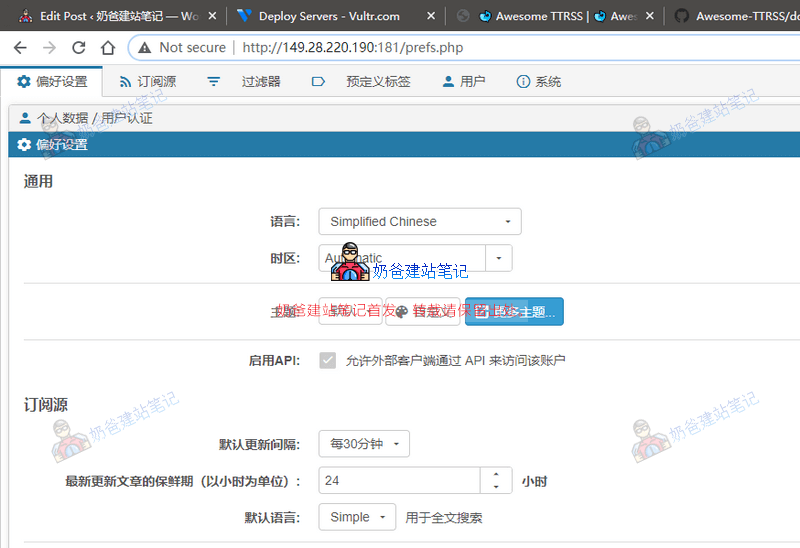
You can configure the remaining settings according to your actual situation.
Bind a Domain Name to Tiny Tiny RSS
Accessing Tiny Tiny RSS via IP+port is not very convenient. Next, we will bind a domain name to Tiny Tiny RSS.
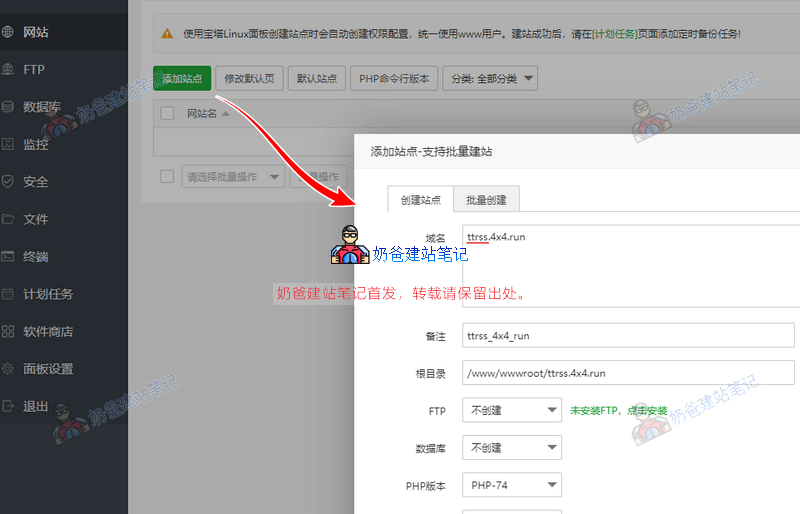
In the Websites section of Baota Panel, add a website. There is no need to create FTP or a database; simply fill in the domain name and confirm.
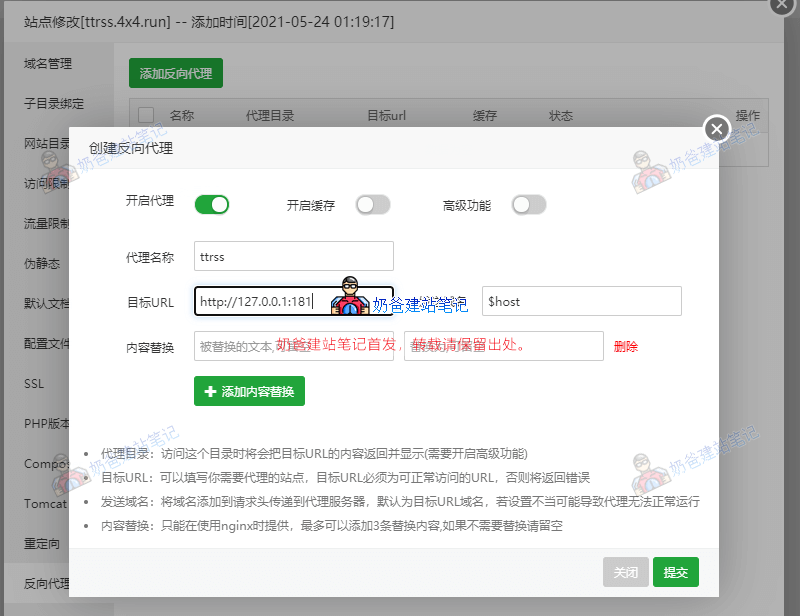
Then click the settings button next to the website, and select Reverse Proxy on the left side of the settings interface.
Fill in the proxy name arbitrarily, fill in the target URL as http://127.0.0.1:181, and submit.
Then go back to the file manager, edit the docker-compose.yml file, change the URL after SELF_URL_PATH= to your bound domain name, and save.
Open the terminal, enter docker-compose up -d to deploy again.
Then access via the domain name to open Tiny Tiny RSS.
Acknowledgments
At this point, the Tiny Tiny RSS installation tutorial is complete. Thanks toimhu和Big Bird BlogThanks to the sharing, Naiba also learned and figured out this tutorial after searching for their articles.
Also, thanks toAwesome TTRSSproject author for their efforts, bringing us novices a Tiny Tiny RSS reader project with a better user experience.
Awesome, it worked!
What should I fill in for OTP login verification? It still shows authentication required after reinstallation.
I haven't encountered this before. It's probably caused by some security settings you made yourself.
Yes. Also, I followed the installation process, but when accessing the domain, the tt-rss login interface appears. However, after logging in, it shows 404 Not Found nginx. Could you please advise?
A 404 error is usually a problem with the pseudo-static settings. See if you can figure it out. If not, the best solution is to reinstall the system and start over.
Okay. Thank you very much.