
When building your own website, the preferred server is definitely a VPS. However, many people feel that VPS operation is too complex and beginners don't know how to use it. Today, Naiba recommends a foreign trade VPS that is even simpler to use than Shared Hosting: Scala Hosting. This article will also introduce how to install a website on Scala Hosting's VPS.
Introduction to Scala Hosting

Scala Hosting is a VPS service provider founded in 2007. There are almost zero articles introducing it in China, mainly becausetheir network is not friendly to China(Foreign trade website users are overseas, so it doesn't matter), but this does not affect Scala Hosting's reputation abroad.
 Scala Hosting has high ratings on some specialized server review websites abroad (similar to Dianping). You can click on the rating image on their official website to view specific details.
Scala Hosting's services include domain registration, email, shared hosting, and VPS. However, they recommend using VPS services. Naiba's opinion is also to recommend everyone to choose VPS for building websites. The price is indeed a bit higher, but the performance, security, and customizability are incomparable to shared hosting.
Advantages of Scala Hosting:
- 7×24-hour customer service online for timely communication (Pre-sales may be off-duty, technical support is 24/7 online, Naiba has contacted them);
- Provides fully managed VPS services, easier to use than Shared Hosting;
- Reasonable prices, supports monthly payments, the official even suggests you pay monthly, they are confident you will keep renewing;
- Provides domain email, optimized for WordPress performance;
- Provides free migration, free SSL, daily automatic backups, and other features (meaning you don't need to worry about website data security, just install the website and use it);
Disadvantages of Scala Hosting:
- Network is not friendly to China, domestic access is relatively slow, so it's best to use your own proxy;
- Fewer network data centers, only two data centers in Dallas, USA and Bulgaria, Europe;
In simple terms,Scala Hosting is suitable for those who don't know how to use VPS but understand the benefits of building websites with VPS; can accept slow domestic access, manage the website using their own proxy, and whose main customer base is foreign trade users in the US or Europe.Its VPS usage is really simple, even simpler than using Shared Hosting or a VPS with Baota Panel installed.
Purchase Scala Hosting
1. Click the button below to enter the Scala Hosting official website.
Scala Hosting Official Website
Small advertisement: If the tutorial makes you dizzy, you can also consider asking Naiba to help you buy the server and install WordPress.
On their official website, you can see the difference between Shared Hosting and VPS. The differences introduced on their official website are realistic and not exaggerated. Naiba has also introduced these contents in the articleDifference between Shared Hosting and VPSThese contents were also introduced in the article.
2. From the top menu, select MANAGED CLOUD VPS
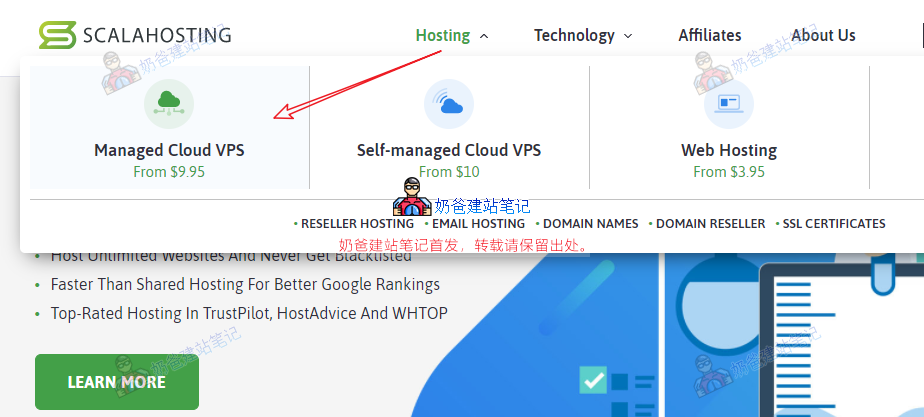
Scala Hosting's VPS is divided into Managed VPS and Self-managed VPS.
The difference is that the managed VPS environment installation, system security, data backup, one-click software installation, SSL certificate configuration, etc., are all handled by Scala Hosting for you. You only need to install the website and handle website-related matters yourself.
Self-managed VPS is our ordinary VPS. You are given a root account and password, and you need to install the environment yourself (e.g.,Baota Panel), and then you have to slowly handle data backup, add SSL certificates, and other operations yourself.
Therefore,it is recommended to purchase MANAGED CLOUD VPS.
3. Choose a suitable MANAGED CLOUD VPS plan and click GET STARTED.
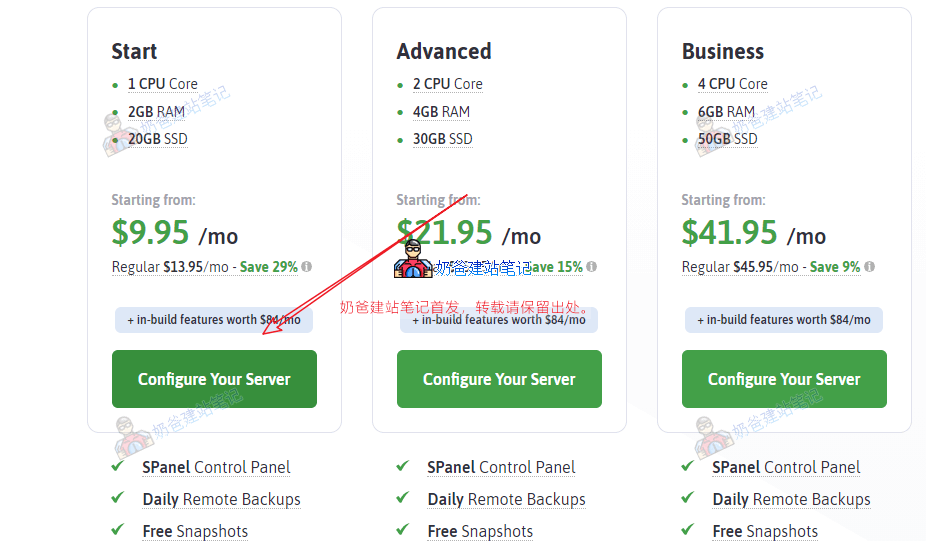
Scala Hosting's basic plan is a 1-core, 2GB configuration, which meetsInstalling a WordPress Websitebasic hardware requirements, so you can directly choose the Start plan to begin.
When purchasing, choose the service duration yourself. It supports payment cycles of 1 month, 3 months, 6 months, 12 months, 24 months, and 36 months. Buying for 3 years at once is the cheapest. Consider the purchase duration based on your actual situation; the monthly difference is not significant.
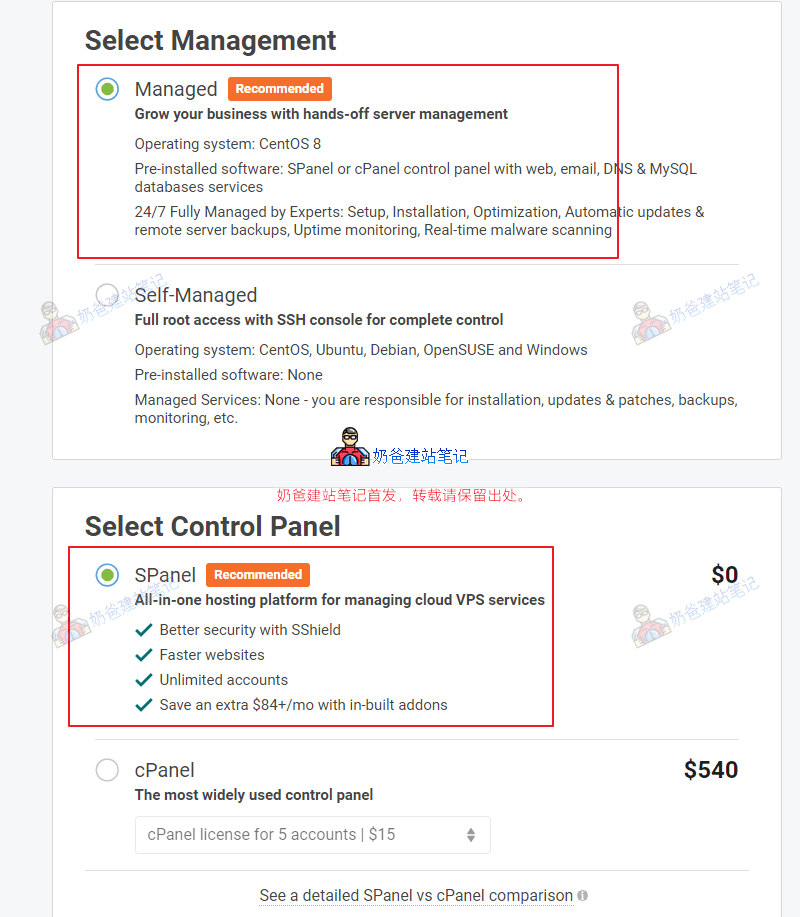
Managed and SPanel are recommended; otherwise, you would be buying a self-managed VPS.
4. Choose the data center when purchasing
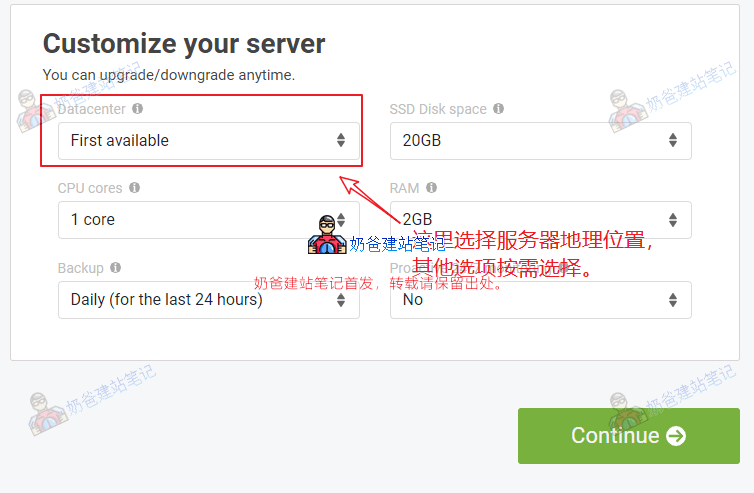
Scala Hosting's data centers are only available in the US and Europe. Choose based on your customer distribution. Of course, if customers access your website slowly, you can later use CDN acceleration services to improve it to some extent.
Other configurations can be left as default. If you think the hardware configuration is insufficient, you can add more for an additional cost.
5. Domain selection
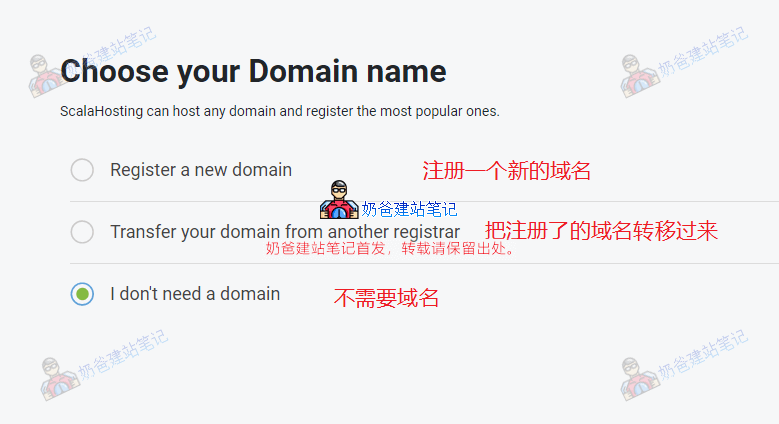
If you already have a domain, for example, purchased from places like following Naiba's tutorials atNamesiloIf you purchased from these places, then directly choose the third option.
6. Register an account and make payment
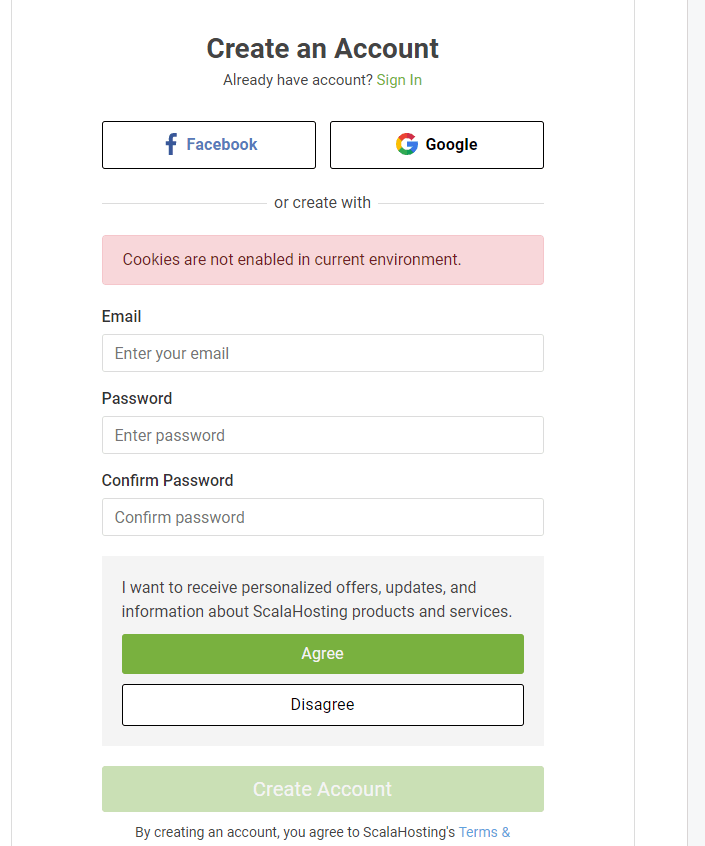
After selecting your VPS configuration, the registration and payment interface will appear. The top section is for registering an account, and the bottom is for payment information.
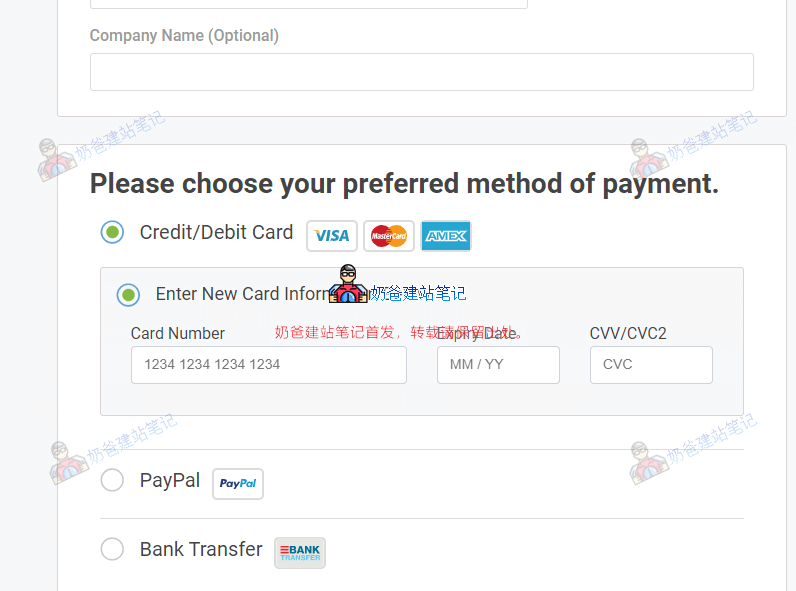
Payment supports PayPal, so there is no problem.
A reminder: PayPal is a subscription payment, meaning it will automatically deduct fees every month. If you do not plan to use Scala Hosting's services anymore, remember to: 1. In Scala Hosting's user center, click cancel on the product you no longer want to use; 2. Go to PayPal settings and cancel the automatic payment setup for Scala Hosting.
Manage Purchased VPS
7. After successful payment, enter the user center
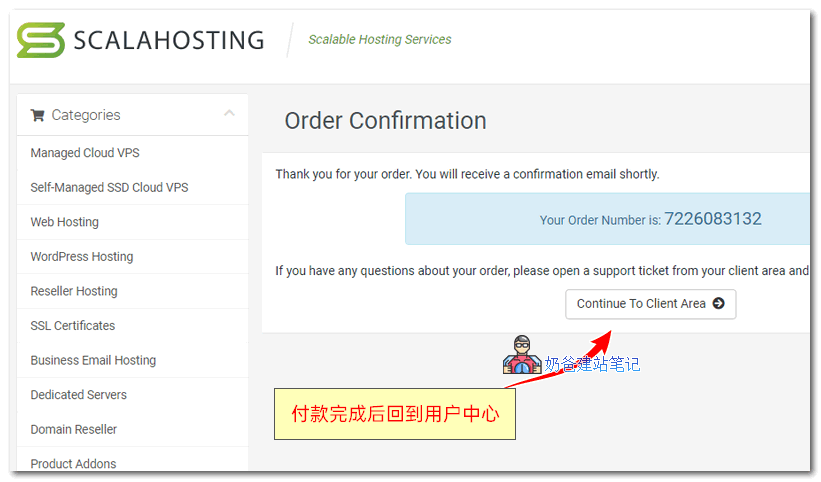
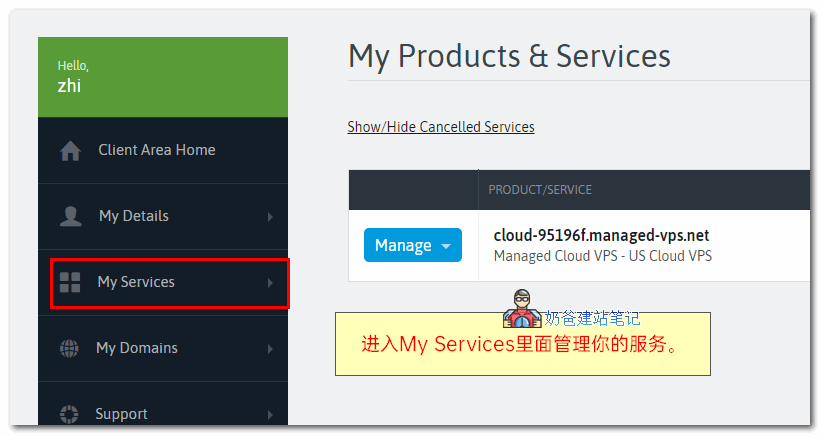
8. Under My Services, you will find the services you have purchased and activated
9. Create an SPanel control panel admin account
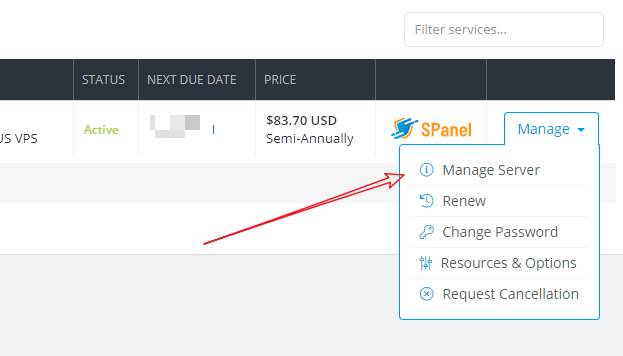
After clicking [Manage Server] under the Manage button in the image above, the following image will appear.
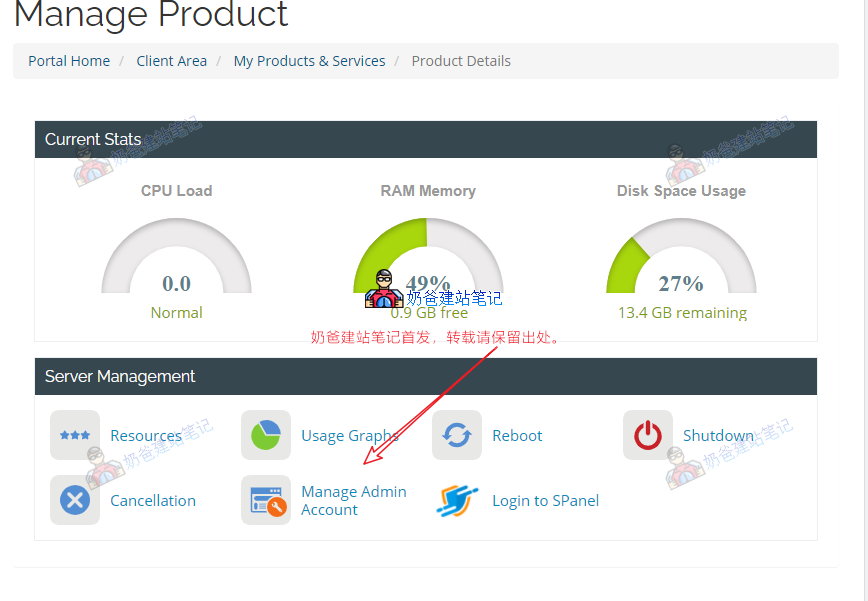
Click the Manage Admin Account button to create an administrator account.
What is SPanel?
Scala Hosting's managed VPS does not provide root access. Instead, it installs a SPanel panel by default. If you have used other virtual hosts before, it is similar to those virtual host panels. You install websites and set up FTP, SSL, etc., all within the SPanel panel.
It means you enjoy the hardware configuration of a VPS with the quick operation experience of a virtual host.
10. Log in to the SPanel panel to create a website account
After modifying the admin account password, return to the product details page and click [Login to SPanel], as shown below:
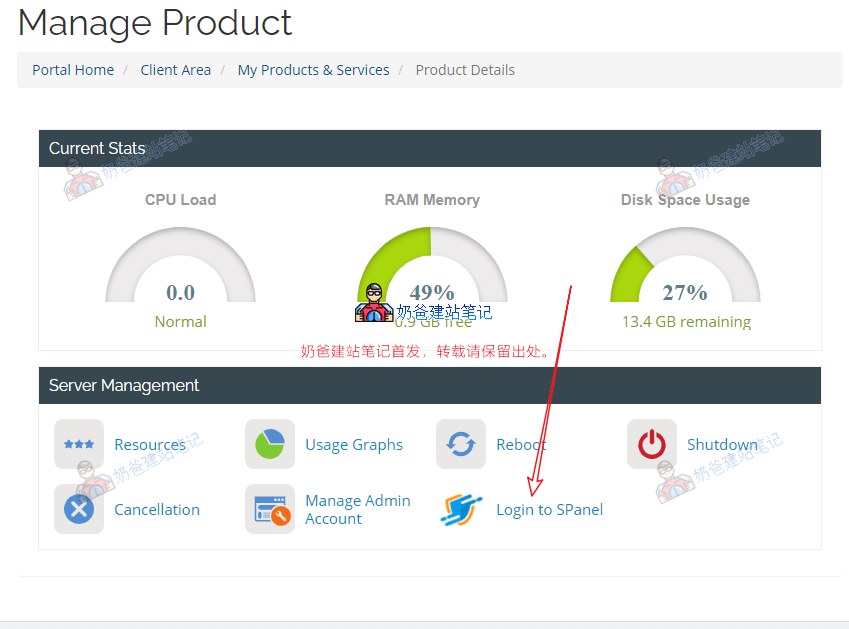
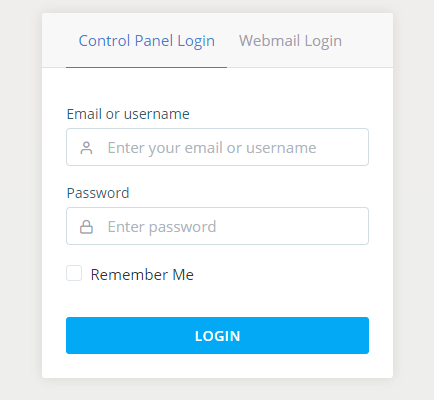
Enter your username and password (Webmail Login is for logging into domain email).
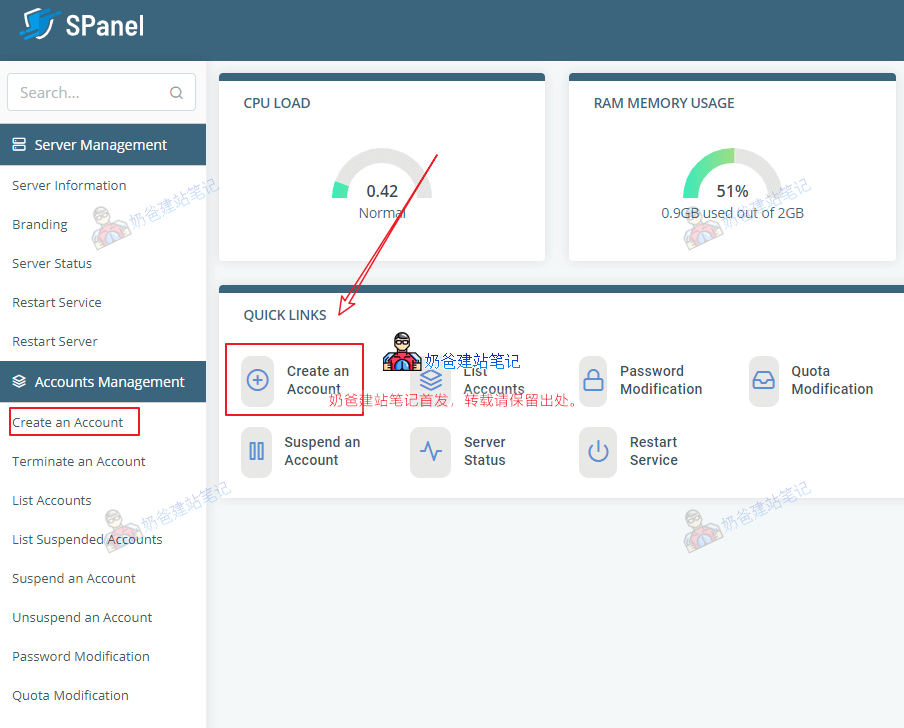
After successful login, click the [Create an Account] button.
Fill in the domain you want to add and the user information, as shown in the image below:
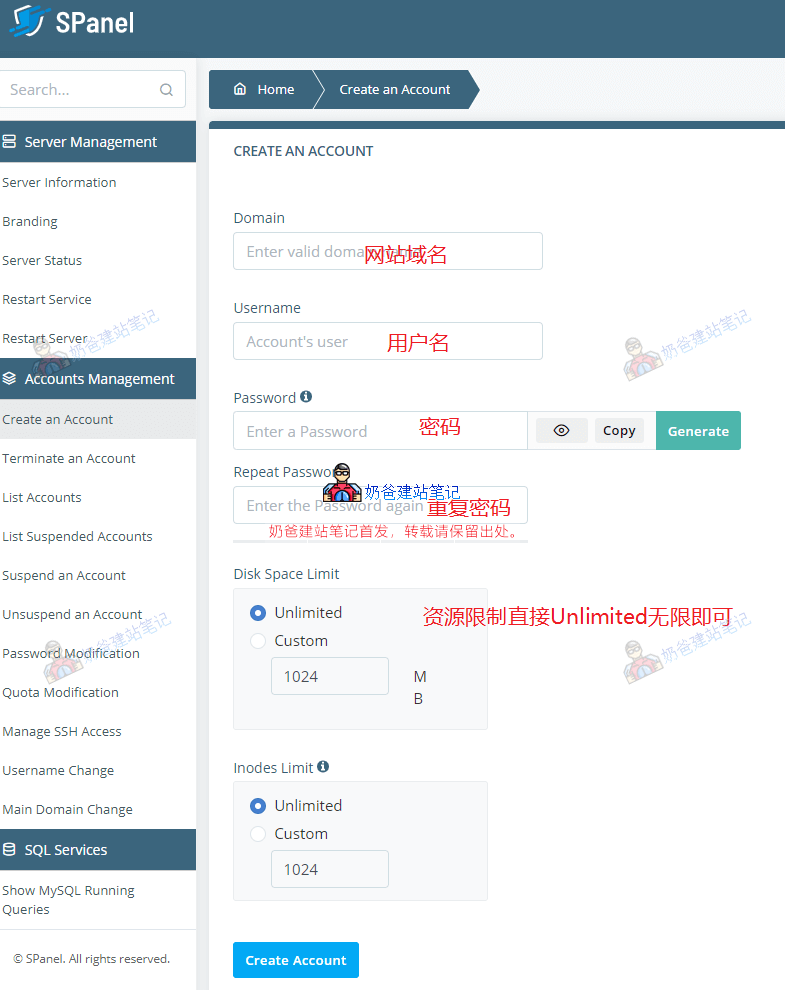
This account is used to install websites individually. The previous admin account is used to manage the SPanel panel and cannot directly install websites.
If you are using the VPS with multiple people, they can log in using the account you created for them. If you are using it alone, after creating it directly, click [List Accounts] to list the users.
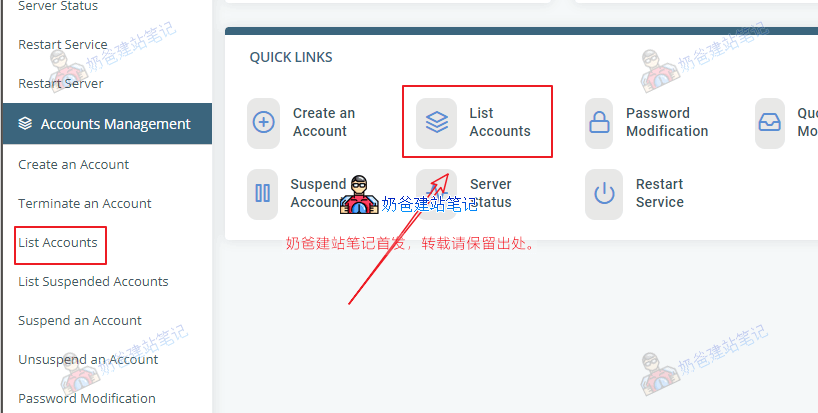
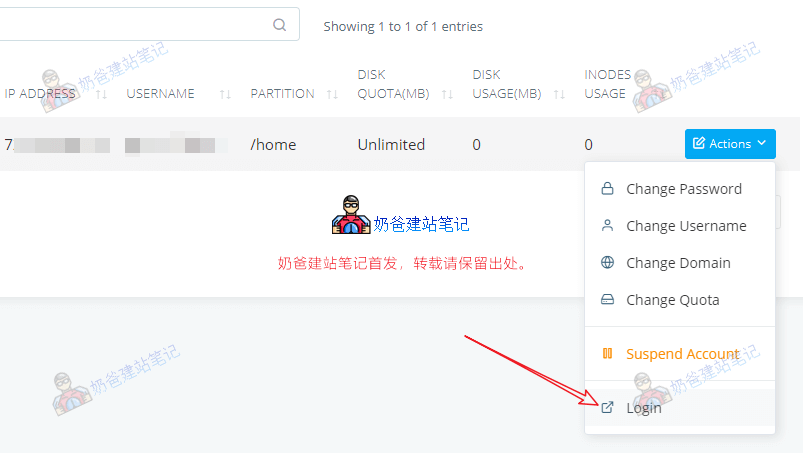
Find the user you just created, click the Actions button next to it, and select Login to access their control panel backend.
The interface after logging in is shown in the image below:
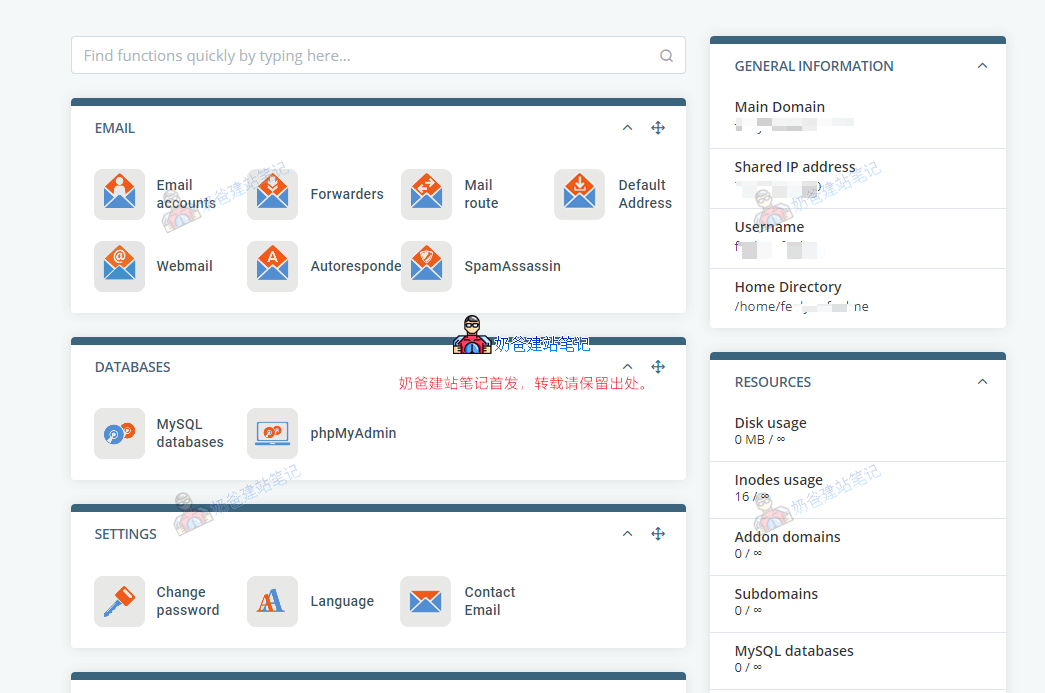
The Shared IP address in the top right corner of the image above is your server IP. Add two A record DNS resolutions for your website domain to point to this server IP: one for www and one without www. (If you don't have a domain or don't know how to set up DNS resolution, please refer toDomain Topicthe articles inside.)
Installing a WordPress Website
Next, we will start installing WordPress to build a foreign trade independent website.
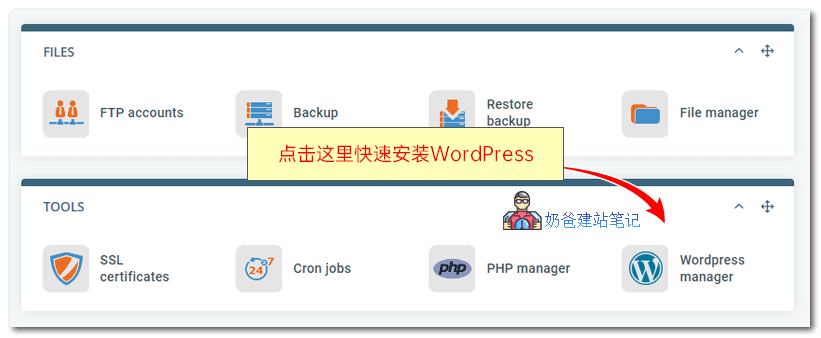 Then click on WordPress manager at the bottom of the page to quickly install WordPress.
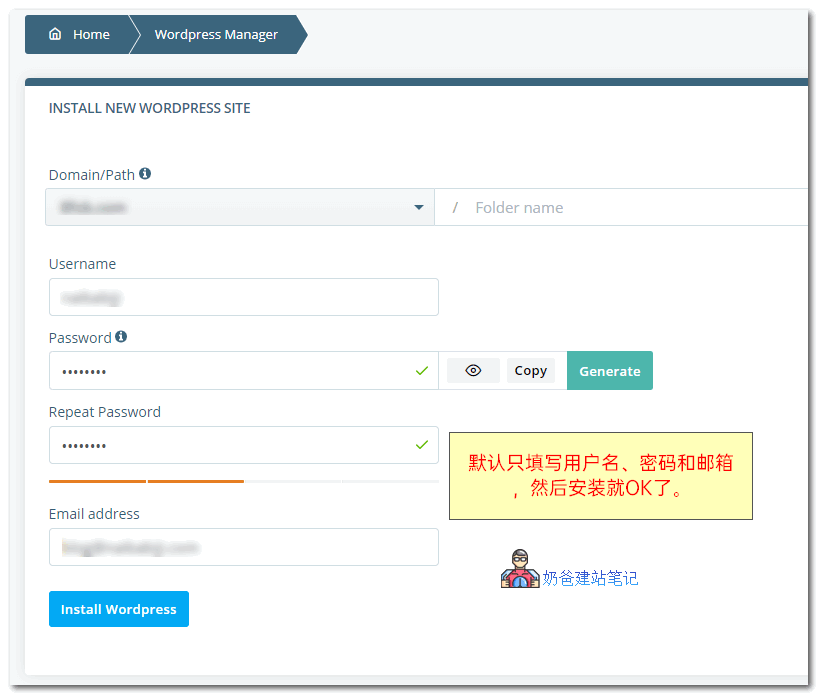
Fill in the username, password, and email, then start the installation.
The website will be installed for you quickly, and an email will be sent to your mailbox.
Once your domain name resolution takes effect, you can access your website via the URL, and the SSL certificate will have been automatically configured.
Next, you just need to log in to the WordPress admin panel, install the required theme (e.g., install a theme used by NaibaAstra Theme), plugins, and then start filling in content, updating the website, etc.
Simple, isn't it?
Don't know how to use WordPress after installation? Please refer tothe usage section of the WordPress installation page。
I've looked at it, it's not simple. The tutorial itself is not simple.
If I want to create two websites, how should I proceed? Should I create two accounts?
You can simply create two accounts in the admin dashboard.
My website was indeed created successfully, but I cannot access the WordPress admin dashboard. What should I do?
This situation is usually a domain name resolution issue.