After purchasing a VPS, you need to install a website environment on the server to install WordPress. Typically, Naiba recommends beginners to directly install Baota Panel (Tutorial click here). If you plan to install only one website on the server, or if the server configuration is low, Naiba suggests directly installing the LNMP environment without a panel, which is Linux+Nginx+MySQL+PHP. This will save more resources.
In previous tutorials, Naiba recommended the LNMP one-click installation script (Tutorial click here). However, there is information online suggesting this one-click package script was poisoned. Regardless of whether it was corrected later, reputation is hard to restore. So, if you really need to install the LNMP environment to build a website, Naiba recommends installing it manually and not using online one-click scripts. This article will use Debian 12 as an example to show how to manually install the LNMP environment and set up a WordPress website.
Preparations
Purchase VPS
To install the LNMP environment, we need to purchase a VPS. For VPS selection, you can refer to Naiba's previous article:
Of course, besides the VPS recommended by Naiba, other VPS you purchase yourself can also be used. The method is the same, just ensure the VPS system is Debian 12.
Connect to VPS
To connect to the VPS, we still need to use SSH software. Naiba recommends Xshell here. If you are a Mac user, you can directly use the system's built-in Terminal.
Xshell is free for personal use. You can also use other similar software to manage the VPS. For using Xshell to connect and manage your VPS, please see the article below:
Tutorial on Using Xshell 7 to Connect to VPS_How to Log into VPS from Computer
One-click WordPress Website Installation
We have written a one-click script to install the LNMP environment and WordPress website, and automatically apply for a security certificate, which is more convenient than the manual method below.
The usage method is very simple:
1. Point your domain name to your server IP (Required. If not pointed, follow the manual configuration method)
2. Copy the command below
apt-get update -y && apt-get install -y curl bash && curl -fsSL https://raw.githubusercontent.com/naibabiji/1kwp-debian/main/install.sh | bash -s -- your@email.com yourdomain.com www.yourdomain.com3. Modify the email and website in the code above with your actual information
| Placeholder | Replace with | Example |
|---|---|---|
your@email.com | Your email | admin@example.com |
yourdomain.com | Your primary domain | example.com |
www.yourdomain.com | Your www domain | www.example.com |
One email and domain are required. If you only want to bind one domain, then fill in only one.
4. Paste the modified code into your SSH software interface and press Enter. It will be installed in about 5 minutes.
If you still don't know how, follow theNaibabiji WeChat Official Accountand reply „One-click WP" to get the video tutorial.

Manually Install LNMP Environment and Set Up WP Website
Install Basic Software
After connecting to the VPS, we firstupdate the system componentsusing the command below.
apt update -y && apt upgrade -y
Then enter the following command toinstall PHP and related components.
apt install php-fpm php-mysql php-gd php-cli php-curl php-mbstring php-zip php-opcache php-xml php-mysqli -y
Next,install NGINX.
apt install nginx -y
Next,Install MariaDB.Some online resources say that compared to MySQL, MariaDB has higher performance, faster replication, better security measures, and additional storage engines.
apt install mariadb-server -y
Use the mysql_secure_installation script to improve database security.
mysql_secure_installation
After entering this command, there are some English prompts. First press Enter, then press Y for all prompts with [Y/n].
If you don't understand English, just remember that the following is asking you to set a new database password.
Change the root password? [Y/n] y
New password:
The entered password information will not be displayed; remember it yourself and don't forget.
Create Database
Next, we need to prepare for installing WordPress. First, create a database.
mysql -uroot -pAfter entering the above command, you need to verify the database administrator password. Then, enter the command interface and input the following commands in sequence.
CREATE DATABASE naibabiji_db;
CREATE USER naibabiji_user@localhost IDENTIFIED BY 'blog_NaiBaBiJi_Com';
GRANT ALL ON naibabiji_db.* TO naibabiji_user@localhost;
FLUSH PRIVILEGES;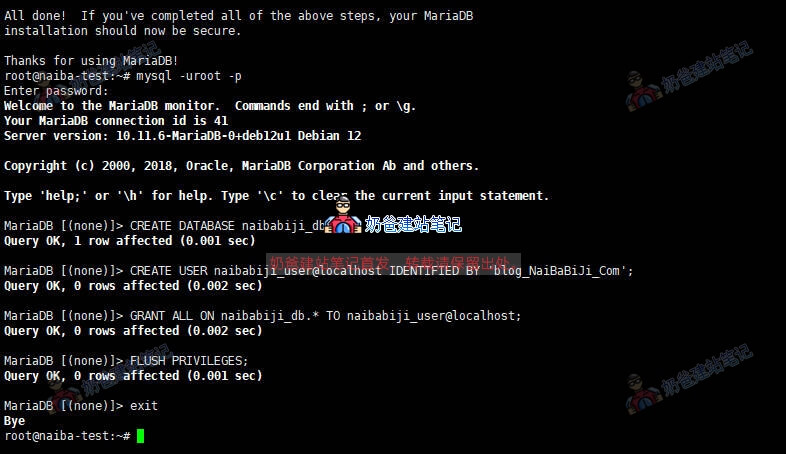
In these codes, 'naibabiji_db' is the database name you want to create, 'naibabiji_user' is the database username you created, and 'blog_NaiBaBiJi_Com' is the database password. Modify them according to your needs.
Configure NGINX
First, create a directory to store the files for our website, which is the website root directory folder.
mkdir -p /var/www/html/test.naibabiji.com/public_html
Create a virtual host configuration file.
vi /etc/nginx/sites-available/test.naibabiji.com.confThen pressi, after pasting the following content, pressESCkey and enter:wqSave
server {
  listen 80;
  server_name test.naibabiji.com;
  root /var/www/html/test.naibabiji.com/public_html;
  index index.html;

  location / {
    index index.php index.html index.htm;
    try_files $uri $uri/ =404;
  }

  location ~* \.php$ {
    fastcgi_pass unix:/run/php/php8.2-fpm.sock;
include fastcgi_params;
    fastcgi_param SCRIPT_FILENAME $document_root$fastcgi_script_name;
    fastcgi_param SCRIPT_NAME $fastcgi_script_name;
    include snippets/fastcgi-php.conf;
  }
}
In the above code, for the part 'server_name test.naibabiji.com;', our tutorial here only binds one domain. Normally, when you are building an enterprise website, this should be changed to 'server_name naibabiji.com www.naibabiji.com;' like this.
Create a symbolic link.
ln -s /etc/nginx/sites-available/test.naibabiji.com.conf /etc/nginx/sites-enabled/
Delete the default site.
rm /etc/nginx/sites-enabled/default
Verify NGINX configuration.
nginx -t
Restart NGINX.
systemctl restart nginx
Configure SSL Certificate
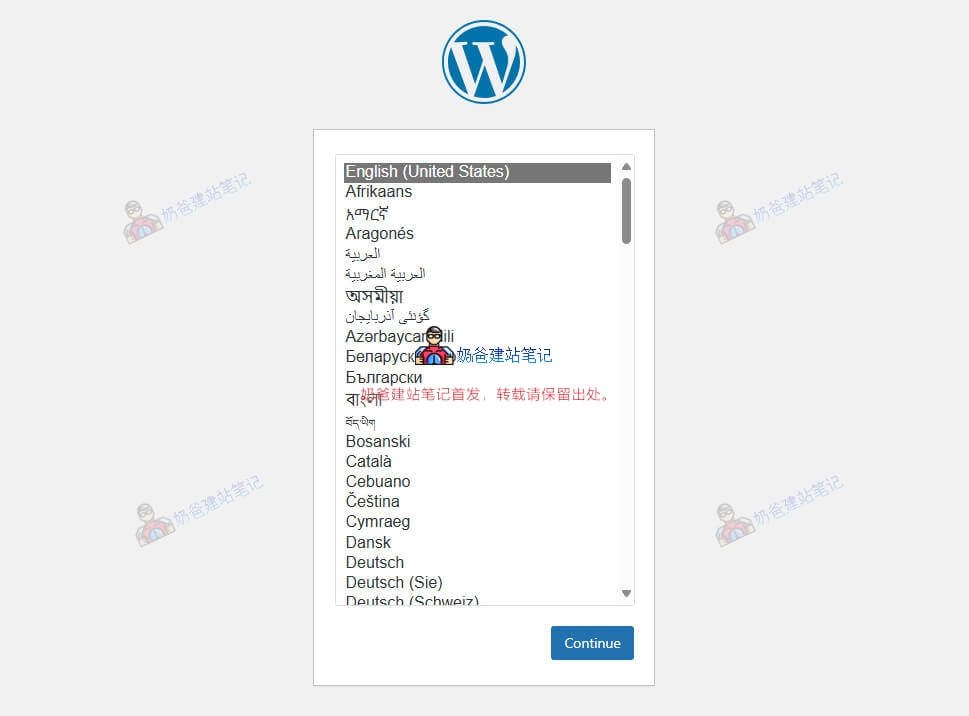
At this point, if you open your website in a browser, the following screenshot will appear. We will first install the security certificate and then proceed to install WordPress. (If you cannot open the website, it means you have not resolved the domain name. Please go and resolve the domain name first. For the tutorial, refer to:Domain Topic)

First, install snapd.
apt install snapd -yIf snapd needs to be updated later over time, use the following command.
snap install core; snap refresh coreInstall Certbot.
snap install --classic certbotRun certbot to apply for an SSL security certificate.
/snap/bin/certbot --nginx -d test.naibabiji.comTo apply for security certificates for both the www and non-www URLs simultaneously, please use the following code.
/snap/bin/certbot --nginx -d naibabiji.com -d www.naibabiji.com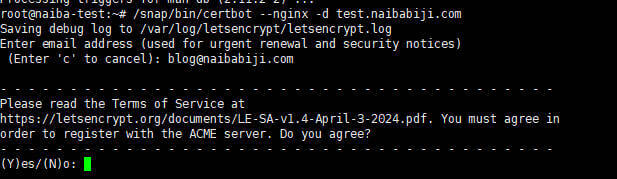
After entering the command, you will be prompted to input an email address. Press Enter, and for the next few prompts, simply press Y and then Enter.
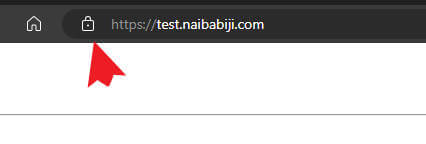
When SSL renewal is needed later, run the following command.
certbot renewAfter the application is complete, open the website and you will see a small lock icon.
Install WordPress Website Program
Switch to the website root directory.
cd /var/www/html/test.naibabiji.com/public_html/Use wget to download the WordPress installation package file.
wget https://wordpress.org/latest.zipExtract the installation package.
unzip latest.zipIf the command is not found, first install it using 'apt install unzip -y'.
Enter the extracted folder, move all files to the parent directory, and switch to the parent directory.
cd wordpress
mv * ..
cd ..
Modify file permissions.
chmod -R 755 /var/www/html/test.naibabiji.com/public_html
chown -R www-data:www-data /var/www/html/test.naibabiji.com/public_html
Open your URL to enter the WordPress installation interface.
Configure Pseudo-static Rules
If you are familiar with the vi editor, you can directly use `vi /etc/nginx/sites-available/test.naibabiji.com.conf`.
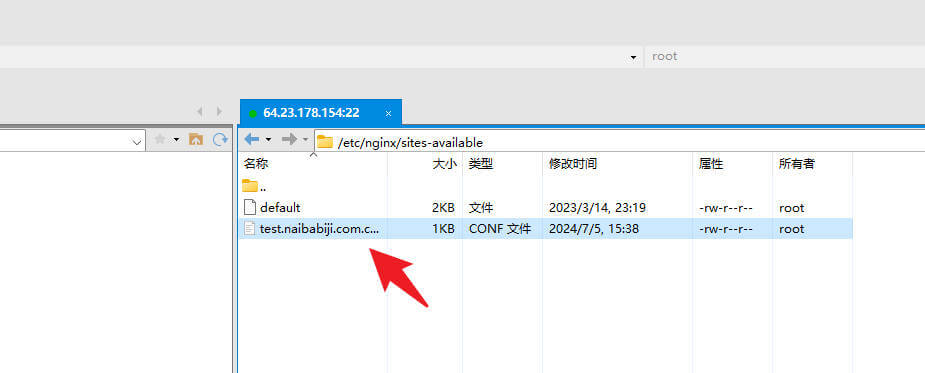
Considering that many beginners follow Naibabiji, you can modify files by downloading them via SFTP, making changes, and then overwriting the original files.

After opening it, find the `/etc/nginx/sites-available/` folder on the right side, download your website's configuration file to your computer, and open it with Notepad or another text editor.
Replace the section of code highlighted in the box in the image below.
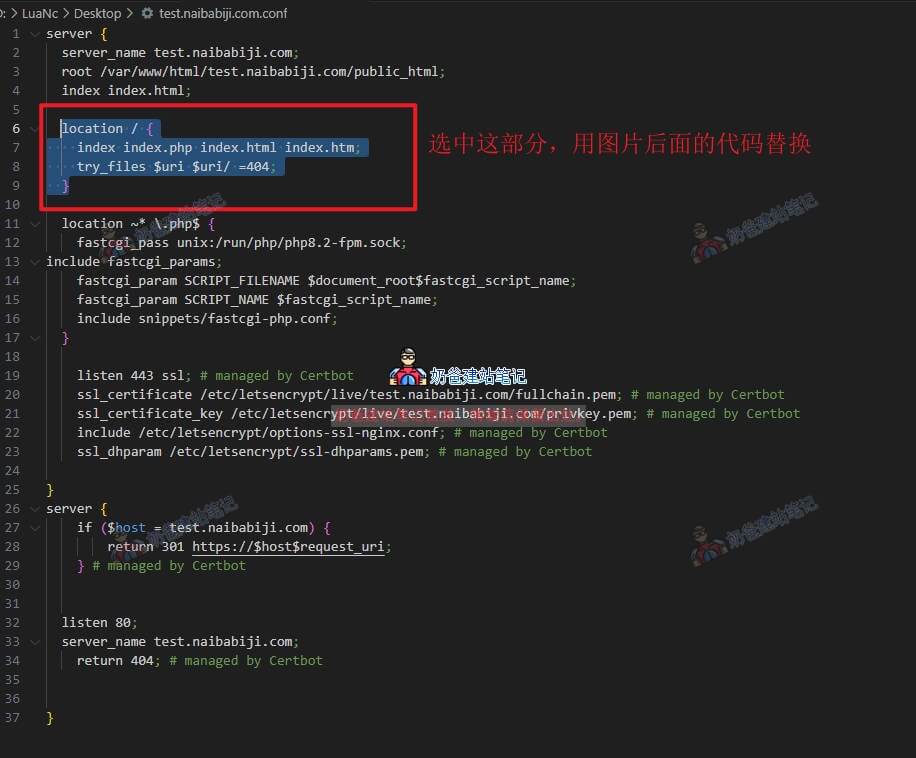
location / {
    index index.php index.html index.htm;
	try_files $uri $uri/ /index.php?$args;
}

# Add trailing slash to */wp-admin requests.
rewrite /wp-admin$ $scheme://$host$uri/ permanent;
After saving, upload it to the server to overwrite the original file.
Then, in Xshell, enter `systemctl restart nginx`.
After the restart is complete, refresh your webpage, and the pseudo-static rules will take effect.
Resolve 404 Error When Accessing Without HTTPS
The tutorial above uses a subdomain for demonstration. In actual practice, you might be adding a primary domain and a www subdomain, such as naibabiji.com and www.naibabiji.com.
If your default access URL is set to https://naibabiji.com, directly opening www.naibabiji.com in a browser will show a 404 error. This is because the code automatically loaded when applying for the SSL certificate writes a 404. We just need to do the following.
Similarly, edit the file that needs to be modified for the pseudo-static rules mentioned above, and change the section shown in the screenshot above.
listen 80;
server_name pinenut.net www.pinenut.net;
return 404; # managed by Certbot
Finally, modify the line with 404 to: return 301 https://naibabiji.com; # managed by Certbot
Then restart nginx. This way, accessing URLs without https will redirect to the primary domain with https.
The above is the method for manually installing the LNMP environment and then installing WordPress. If you still don't know how, Naiba offers paid deployment services.Welcome to contact us。
Supplement: Enable Redis Object Cache for WordPress Website
1. Install the Redis server and PHP Redis extension
# 安装Redis服务器
apt install redis-server -y

# 安装PHP Redis扩展
apt install php-redis -y

# 重启PHP-FPM使扩展生效
systemctl restart php8.2-fpm
2. Verify the installation
# 检查Redis服务状态
systemctl status redis-server

# 验证PHP Redis扩展是否加载
php -m | grep redis
3. Install the WordPress Redis caching plugin
Log in to the WordPress admin panel, go to „Plugins“ → „Add New“, search for „Redis Object Cache“, install and activate.
4. Go to the plugin settings page to enable caching.
Management Commands
How to restart PHP?
First, enter `php -v` to check your PHP version. For example, Naiba's prompt is as follows:
php -v
PHP 8.2.20 (cli) (built: Jun 17 2024 13:33:14) (NTS)
Copyright (c) The PHP Group
Zend Engine v4.2.20, Copyright (c) Zend Technologies
with Zend OPcache v8.2.20, Copyright (c), by Zend Technologies
To confirm the installation of php8.2 version, then enter the following command to restart PHP
systemctl restart php8.2-fpm
Where is the PHP.INI file located?
/etc/php/your-php-version-folder/fpm/php.ini
How to restart the database?
systemctl restart mariadb
How to restart Nginx?
systemctl restart nginx
Add Swap Space
Tutorial on Increasing Swap Space in Debian 12
Error: 413 Request Entity Too Large
Open the Nginx configuration file, located at /etc/nginx/nginx.conf
Add `client_max_body_size 20M;` inside the http block.
Then restart nginx (`systemctl restart nginx`)