When we use WordPress to build a foreign trade website, we usually
purchase premium WP Themes, and these theme installation packages can be quite large. Uploading/installing them via the Admin Dashboard may result in a „
The link you followed has expired" prompt, indicating the link is invalid or expired. This issue is caused by upload size limitations. As shown in the figure below:

Problem Diagnosis
We can select Media from the left menu in the WP Admin, then choose Add. You will see an interface like the one shown in the figure below.
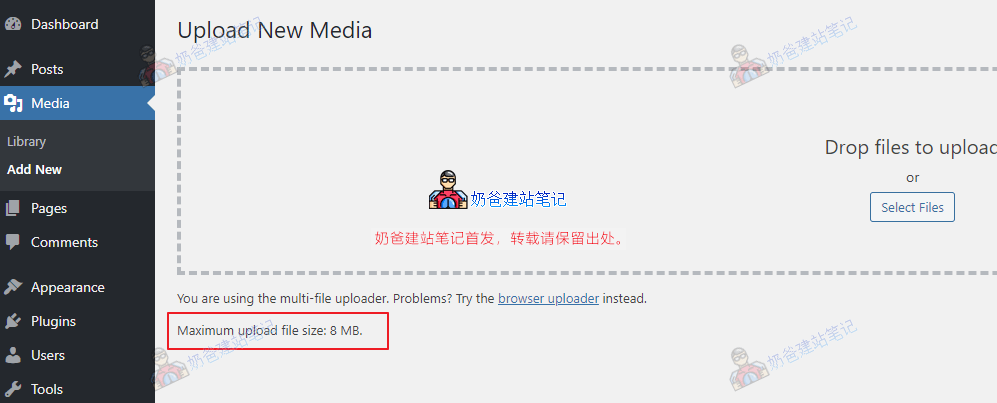
At the bottom left of the upload page, there is information about the maximum file upload size. You can see it is currently only 8M, while the theme file is 17M, so the upload will fail.
Solution
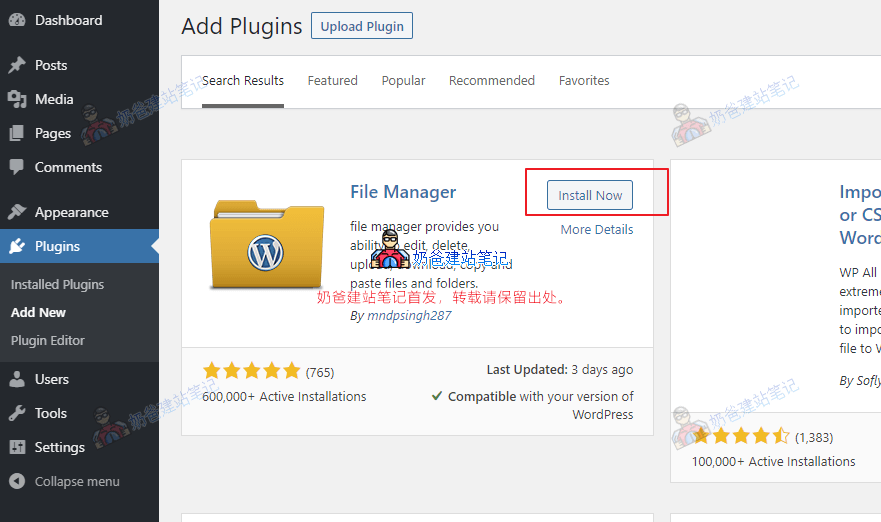
The solution is simple: we just need to modify the configuration file to increase the upload file size limit. The specific method is as follows:1. In the Admin Dashboard plugin installation interface, install a File Manager Plugin. (You can also upload it via the Shared Hosting management backend, but it's a bit more troublesome and may confuse beginners, so we'll handle it directly in the WP Admin here.)
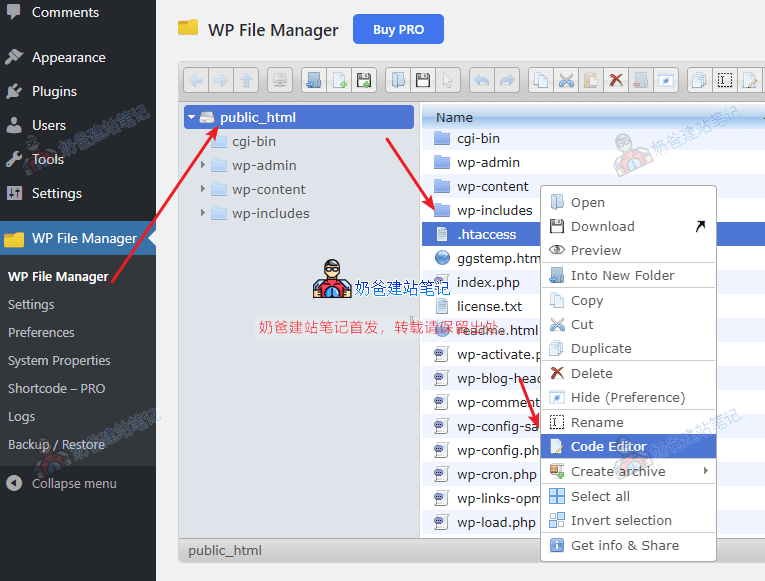
2. Activate the File Manager Plugin you just installed, navigate to the website root directory (the root directory for Shared Hosting is usually public_html), find the .htaccess file, right-click and select Code Editor.
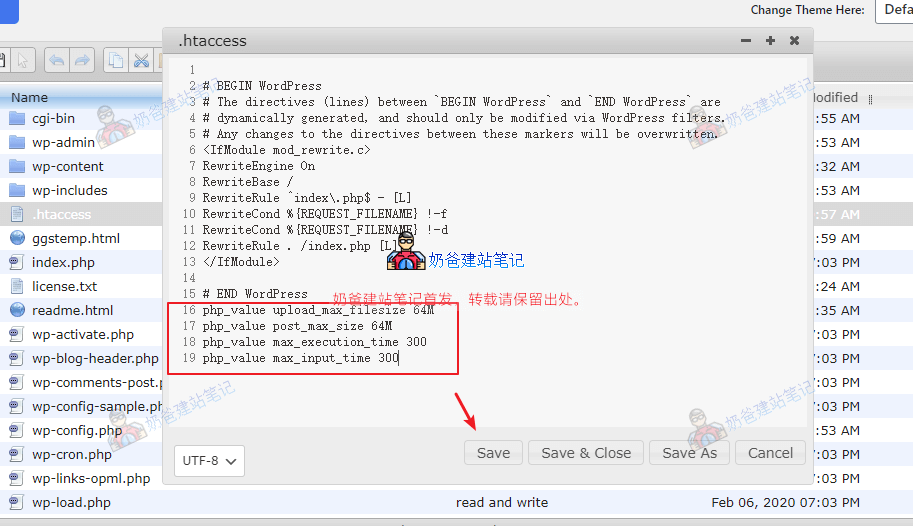
3. Enter the following content in the editing window, then save.
php_value upload_max_filesize 64M
php_value post_max_size 64M
php_value max_execution_time 300
php_value max_input_time 300
4. After the modification is complete, your server upload size will be changed to 64MB, and then reinstalling the Theme will no longer prompt the „The link you followed has expired“ error.
Other Solutions
Most Shared Hosting environments use Apache, so the corresponding configuration file is .htaccess. If you find that you cannot locate the .htaccess file, you might not be using an Apache server. In that case, we can use the following methods to handle it.
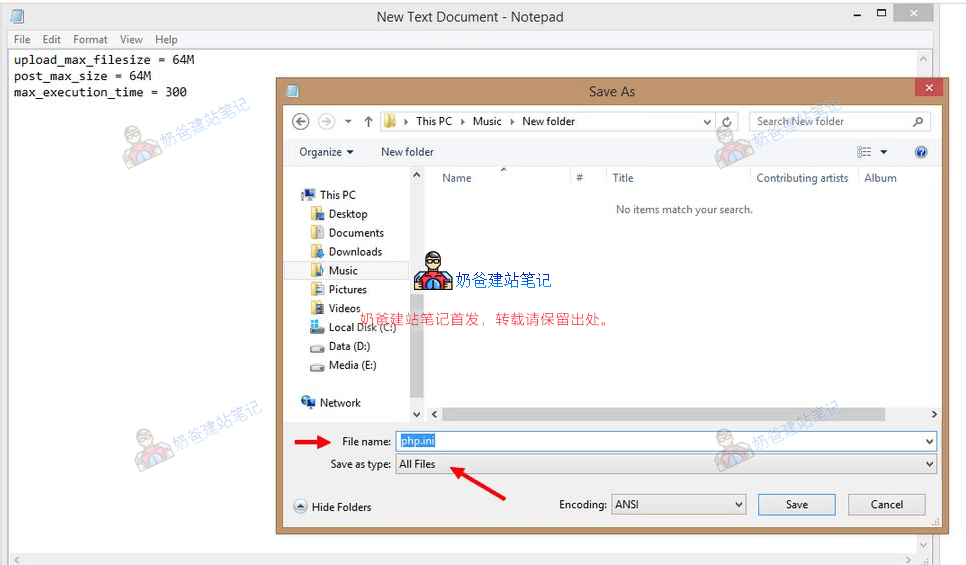
Create a php.ini file
Create a text file locally with the following content, save it as php.ini, and upload it to the website root directory (if you find this file already exists in the root directory, just edit it directly).
upload_max_filesize = 64M
post_max_size = 64M
max_execution_time = 300
Modify via Baota Panel Backend
If you are using
Baota Panel, then find the website in the backend, click on the website's settings, select modify configuration, increase the upload size, and save.

Comments are closed
The comment function for this article is closed. If you have any questions, please feel free to contact us through other channels.