WordPress Website Not Receiving Inquiry Emails? Post SMTP Plugin Setup Tutorial
After building a website with WordPress, the site cannot receive emails. Especially for foreign trade websites, if you cannot receive inquiry email notifications, you have to check the backend every time, or you cannot receive user messages, which greatly affects conversion. This problem occurs because WordPress's email sending system is not working properly. Principle Analysis Why does WordPress...
Updated on December 24, 2025About 5 minutes read
Due to browser security restrictions, the webpage cannot directly add bookmarks for you. You can manually bookmark the current page using the following methods:
Windows / Linux: Press Ctrl + D.
macOS: Press Command + D.
Mobile browser: Open the browser menu and select „Bookmark“, „Add Bookmark“, or „Add to Home Screen“.
Open WeChat, scan the QR code to view the current page.
UseWordPress Website BuildingAfter using WordPress to build a website, if the site cannot receive emails, especially for foreign trade websites, failing to receive inquiry email notifications means having to check the website backend every time, or not receiving user messages. This significantly impacts website conversion. This problem occurs because WordPress's email sending system is not functioning properly.
WordPress itself cannot send emails; it requires the server to have a mail system.
For typical shared hosting, such asSiteGround、GreenGeeks、HostingerThis type of shared hosting usually has a mail system installed on the server by default (you can think of it as a program), and WordPress's default email sending function calls the system's built-in mail system.
When we use a VPS to build a website, the web environment we install (for example,Baota Panel) does not have a mail system installed by default. Therefore, we need to rely on an external email service to send emails, typically using SMTP.
Can I install a mail system on my own server?
The answer is yes, but this method is not recommended.
Due to spam issues, many server providers block email ports by default, and you need to apply separately to open them; most importantly, a self-built mail system is unstable, and sent emails are easily intercepted.
Using SMTP for email delivery has a higher accuracy rate than the server's built-in mail system.
Solution
To enable WordPress to send emails normally, we just need to configure an SMTP sending plugin. Previously, in the article „Recommended WordPress SMTP Email Plugins I Have Used", several were introduced. This article will provide aPost SMTP Plugin Setup Tutorial。
Post SMTP Plugin Setup Tutorial
First, we can install the plugin by searching for Post SMTP in the WordPress Admin Dashboard.
Many WordPress Theme demos may come with the WPForms inquiry/contact form plugin, and the recommended SMTP plugin is WP Mail SMTP by WPForms. However, to view sending logs with this plugin, you need to pay, whereas Post SMTP allows you to view sending logs for free. This is a very useful feature, so it is recommended to prioritize using Post SMTP.
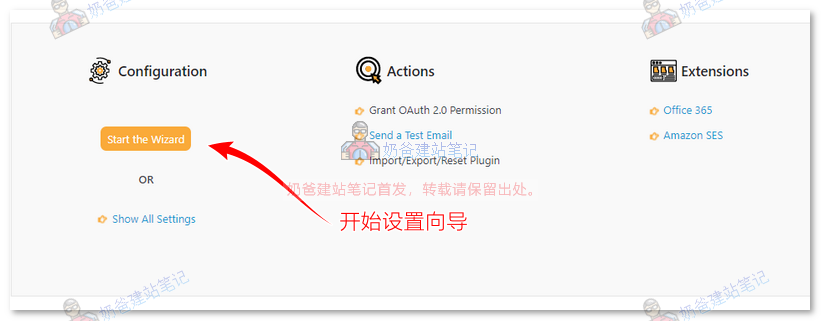
After installation and activation, you can find the Post SMTP settings entry in the left-hand menu bar.
Click the 'Start the Wizard' button to begin account setup.
Then, enter the email account you want to use to send emails.
If you have a B2B website, it is recommended to use a Gmail account directly for higher stability.
If you have a B2C website, since it involves the website sending emails to customers, using a corporate email gives a better impression, but you need to enable the SMTP function in your corporate email first.
Here, we will configure using a Gmail account.
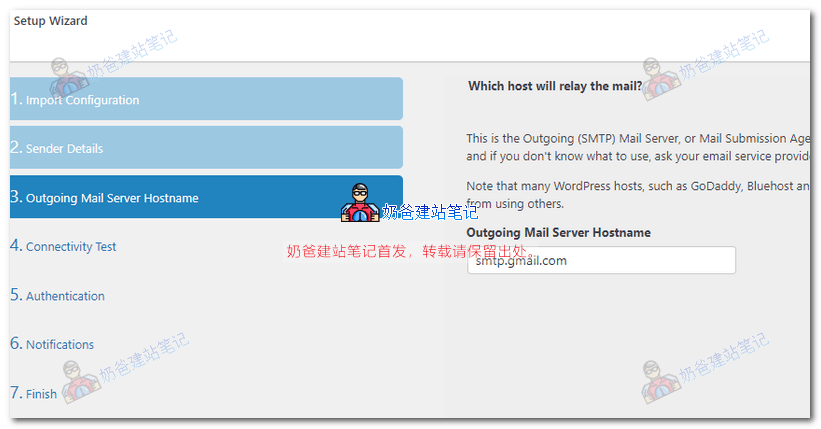
Fill in the SMTP server address.
Since we entered a Gmail account, Google's SMTP address was automatically recognized. If using another email service, ensure the address here is correct.
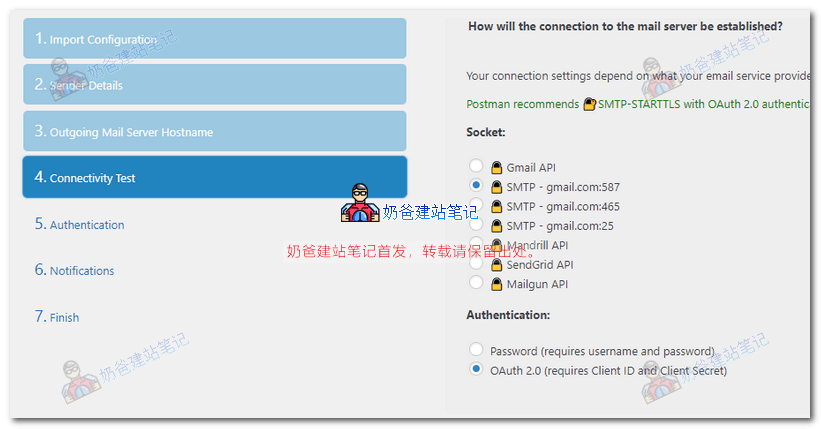
Select the email sending method, then click Next.
For Gmail, it is recommended to use port 587 and OAuth 2.0 for authentication.
Go to Google to create authentication credentials.
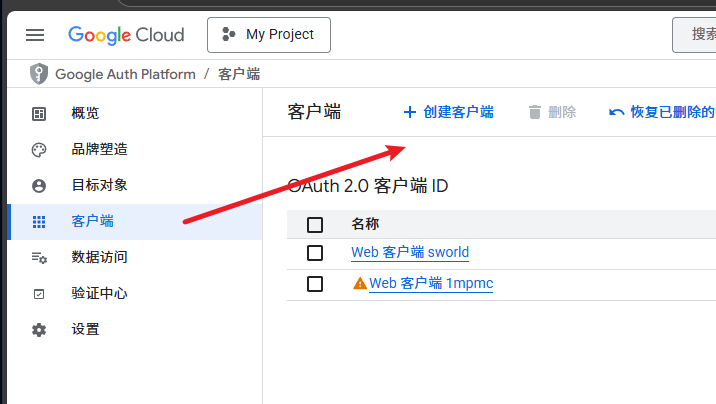
Click the button below to go to the Google API Console to create credentials.
Google has been updated, and the interface differs from the tutorial below. Find the location shown in the image below to create it. If you really can't figure it out, contact Naiba for help.
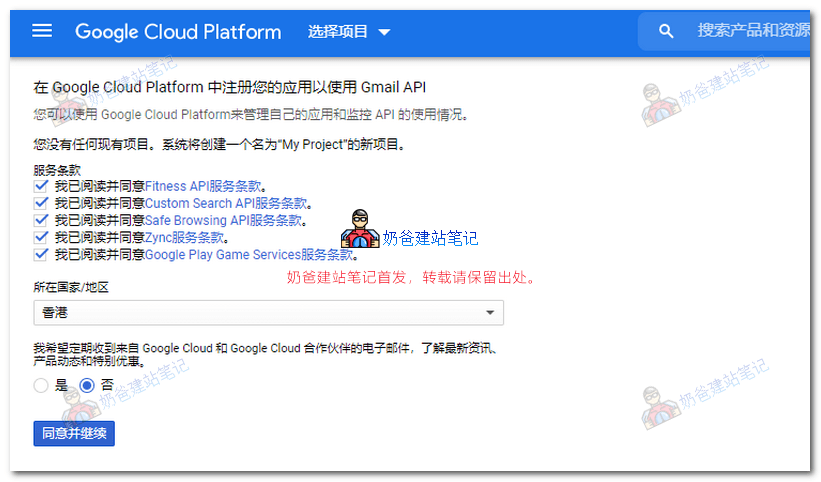
The first visit requires agreeing to the Terms of Service.
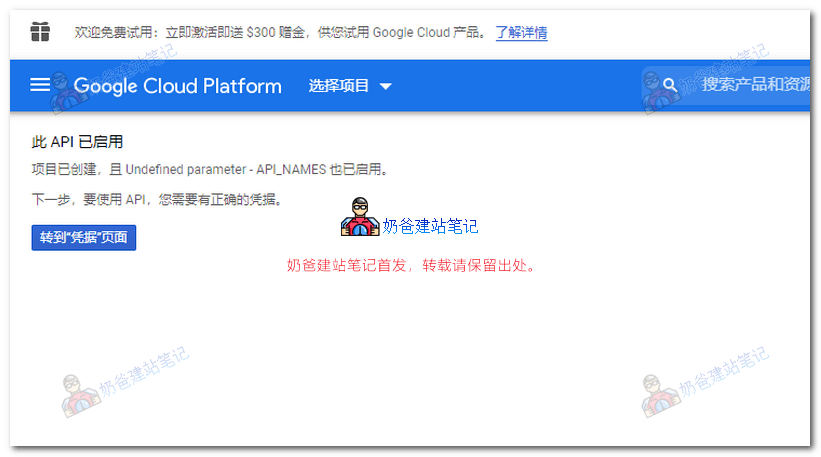
Navigate to the Credentials page.
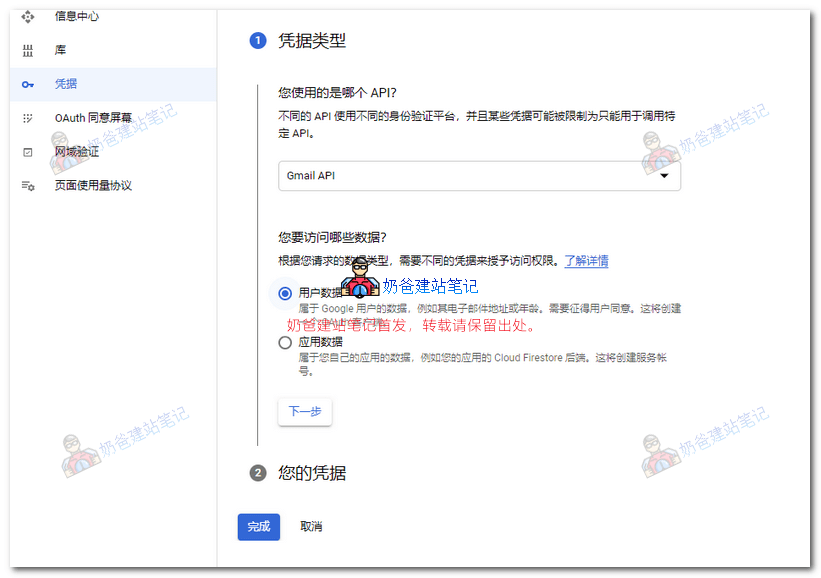
Select Gmail API, User Data, then click Next.
Fill in the application information.
Enter any name for the application, and use your own Gmail address for the email address.
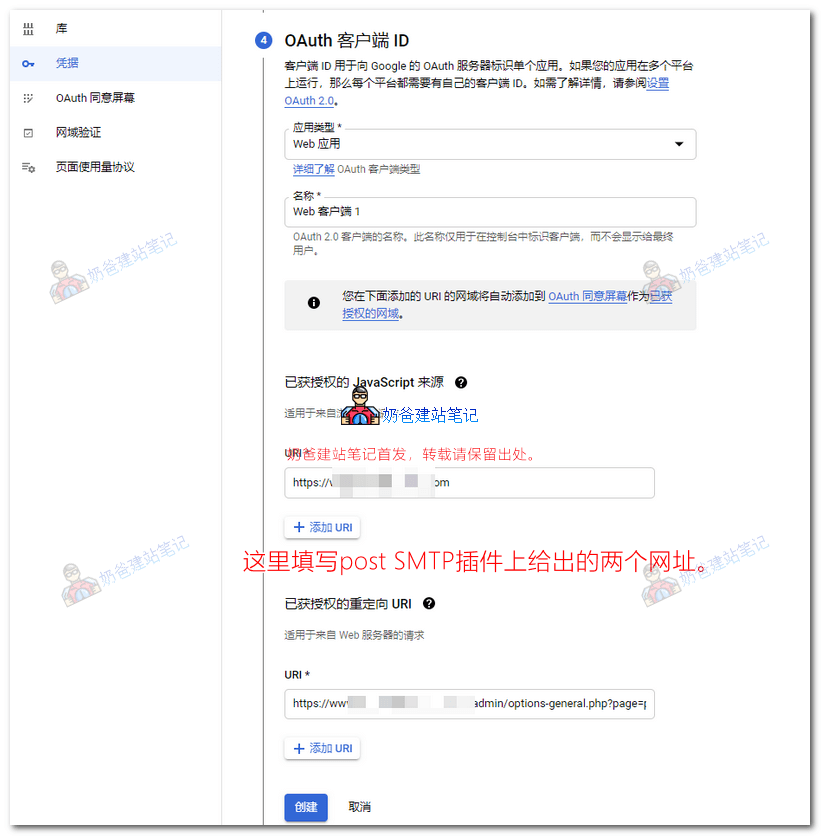
Configure OAuth information.
Here you need to fill in two URLs. Simply copy the two URLs provided by the Post SMTP Plugin, then click Create.
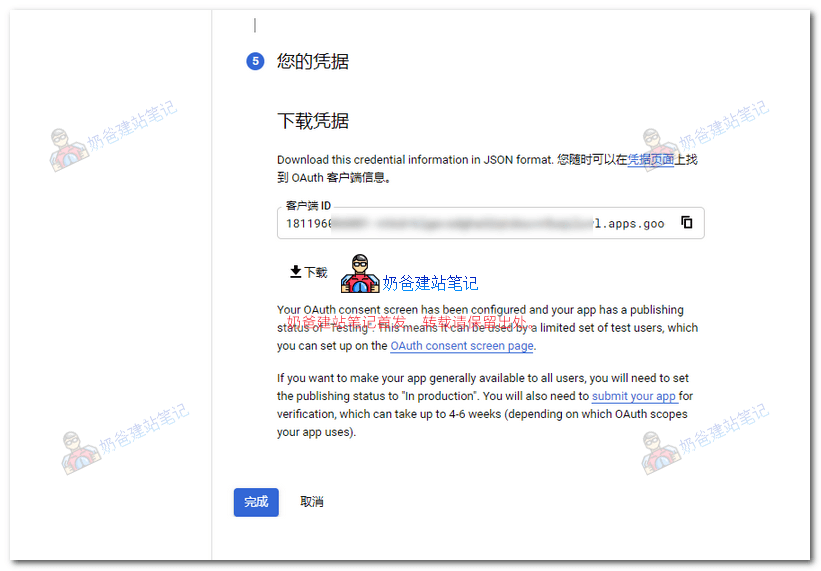
Creation completed.
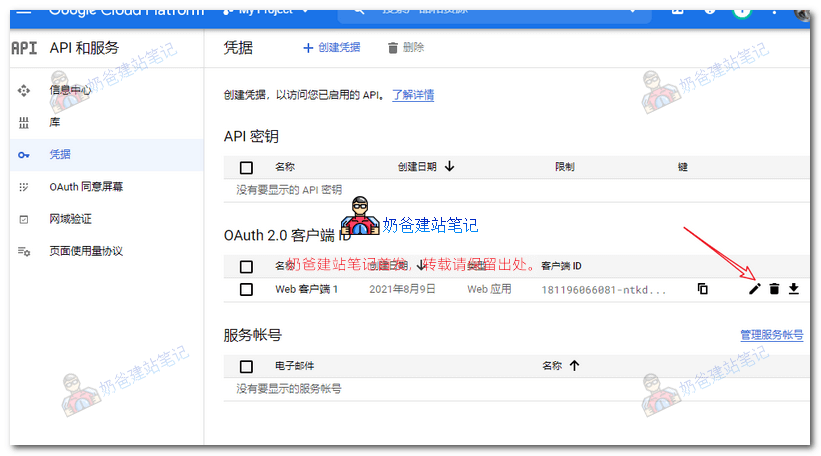
Click to modify the OAuth 2.0 client.
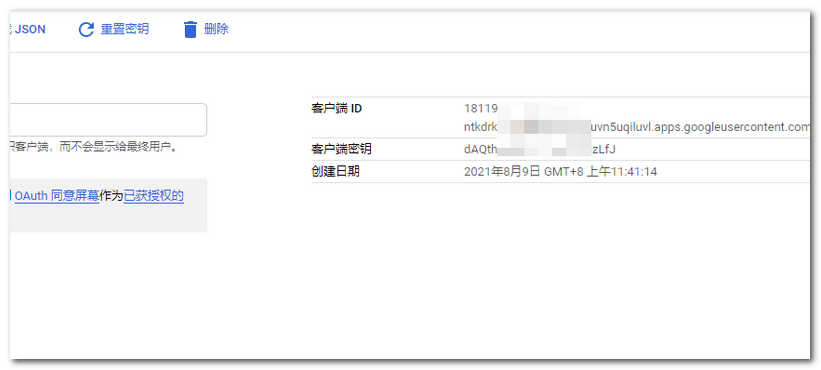
Copy the Client ID and Client Secret, and fill them into the Post SMTP Plugin settings.
After filling them in, simply proceed to the next steps in Post SMTP until the setup is complete.
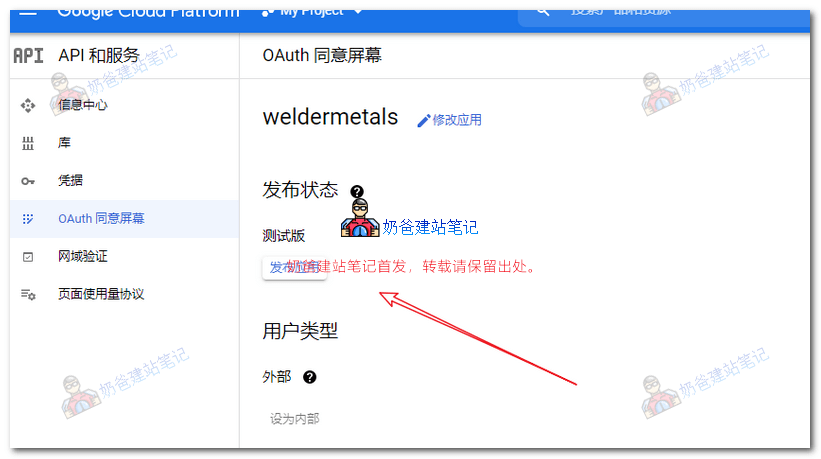
Publish the application.
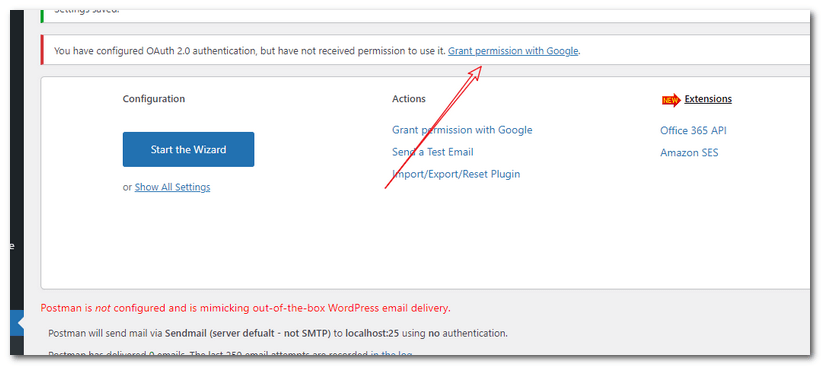
Then, on the Post SMTP Plugin page, click 'Grant permission with Google' to authorize.
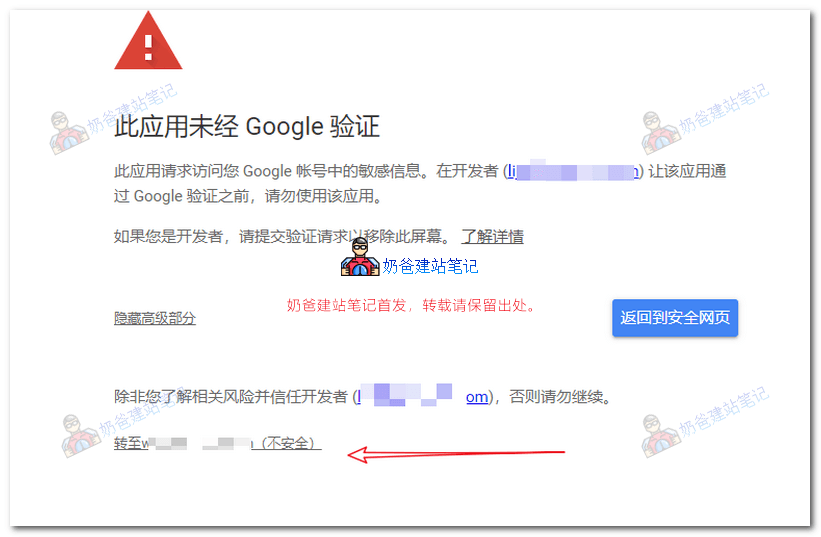
You can directly ignore the security prompt and continue.
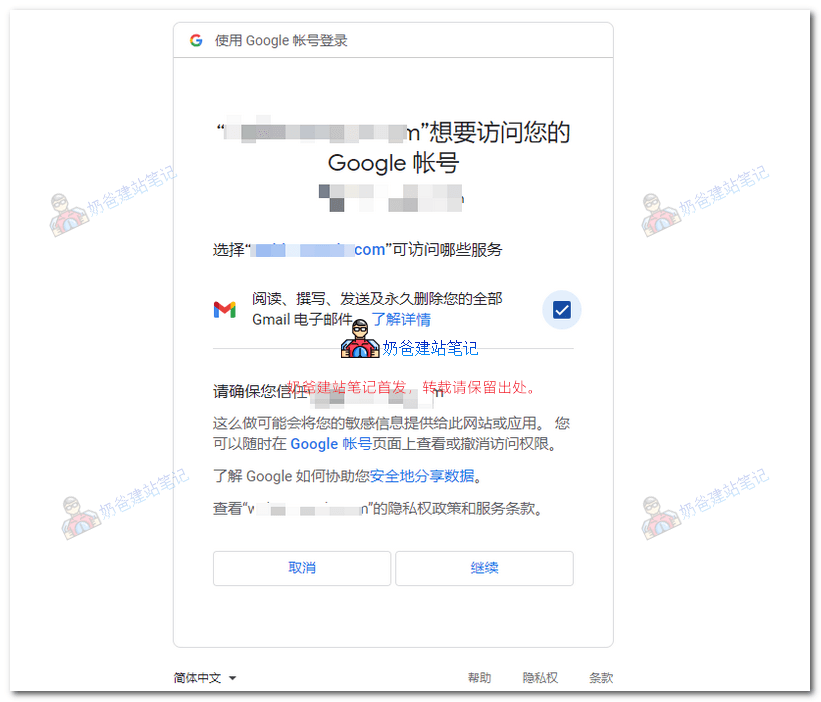
Check the permissions, then continue.
At this point, the entire configuration is complete. You can click 'Send a test email' on the Post SMTP interface to send a test email.
If you can receive the email, then send a test inquiry to see if it can be received.
If everything is normal, our WordPress SMTP email sending setup is complete. If you don't receive emails, first check the email logs in the Post SMTP Plugin to see if it was sent. If sent successfully, it likely went to the spam folder. If sending failed, analyze the issue based on the logs, check, reconfigure, and test again.
3.2/5 - (12 votes)
NB
Author of This Article
Author: Naiba
Since 2009, I have been using WordPress long-term, focusing on VPS, server maintenance, theme and plugin selection, Google SEO, and building foreign trade independent websites. The tutorials on this site are mainly derived from real-world experience in website building, migration, troubleshooting, and long-term maintenance.