
This article from Naibabiji introduces how to install the Blocksy Theme on a WordPress website to build an enterprise website.
Blocksy Theme Introduction
Blocksy is a fast, modern WordPress Theme, supports advanced WooCommerce, and is fully compatible with the Block Editor.

Naiba hasn't done a specific comparison, but intuitively feels that Blocksy is more lightweight than Astra. Naiba also frequently uses Blocksy to build websites.
Blocksy comes with a free version and a Pro version. Naiba sells the Pro version here. If needed, you canPurchase Here。
Advantages of Blocksy:
- Extreme loading speed (lightweight code architecture)
- Perfectly compatible with the Gutenberg Editor, Elementor, Brizy, and other page builders
- Live Customizer provides an intuitive visual editing experience
- Optimized for WooCommerce, suitable for e-commerce websites
- Fully responsive design, adapts to all devices
Blocksy Theme Installation and Basic Configuration
Blocksy Theme Installation Tutorial
In the WordPress Admin Dashboard (if you don't have a WordPress website yet, go build one first, seeWordPress Tutorials):
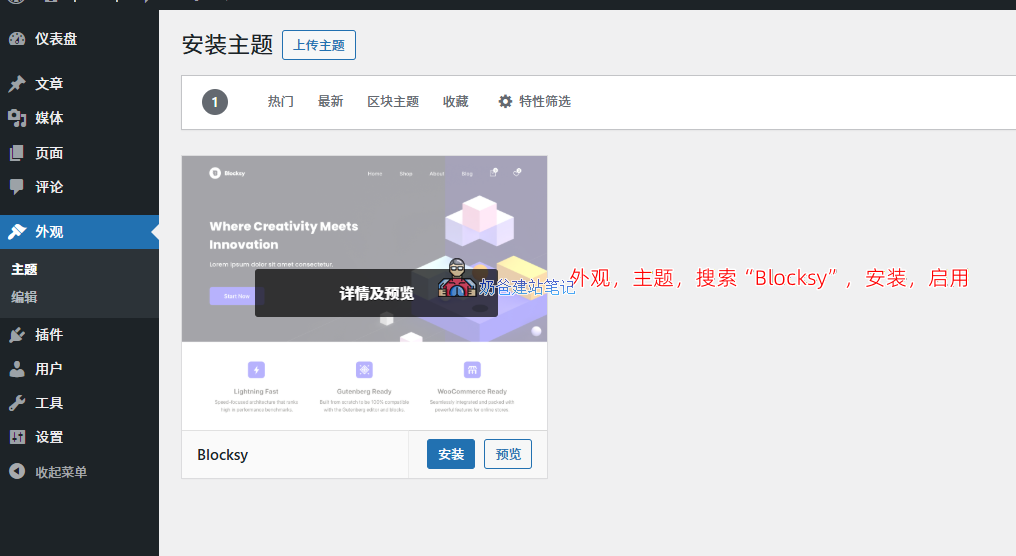
- Log in to the WordPress Admin Dashboard, go to „Appearance“ > „Themes“
- Click „Add New Theme“, search for „Blocksy“
- After finding the Blocksy Theme, click the „Install“ button
- After installation is complete, click „Activate“ to enable the theme
Activate Theme Companion Plugins
Blocksy's theme features are implemented through companion plugins. Like the Astra Theme, it is divided into free plugins and paid plugins. If you purchased the Pro version, simply upload the Pro plugin in the Plugins section.
If using the free version, just click the Install Blocksy Companion button to install the plugin.
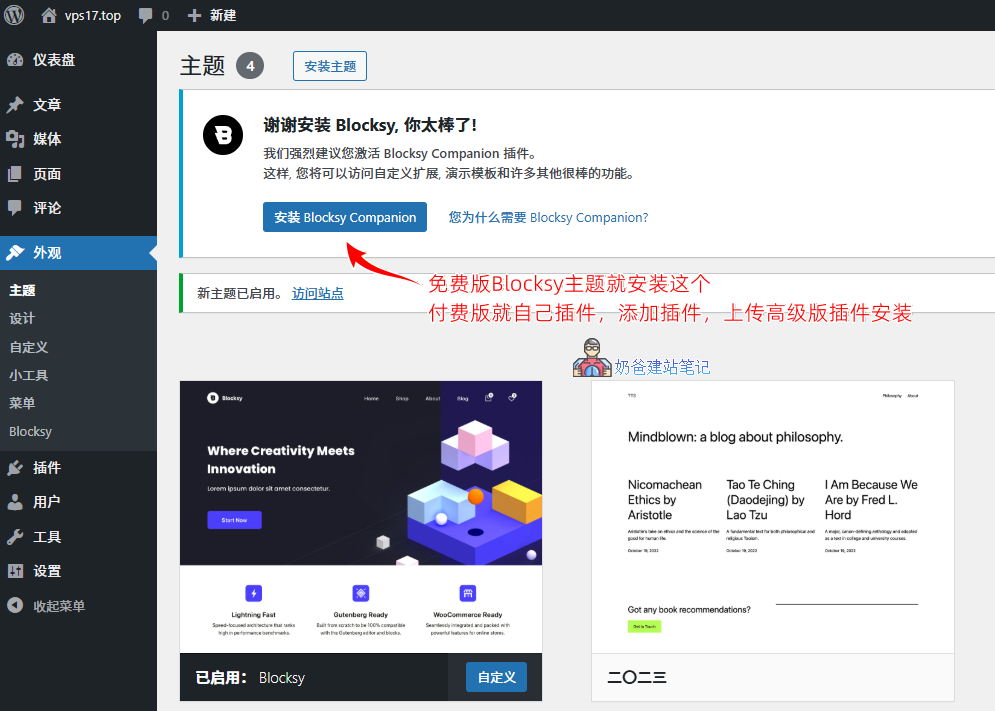
The Pro version has more features, so we uploaded the Pro version. If you don't see the corresponding settings mentioned in the tutorial below, it means the free version does not support them.
Blocksy Companion Plugin Introduction
After installing and activating Blocksy Companion, you can see the Blocksy menu in the admin menu.
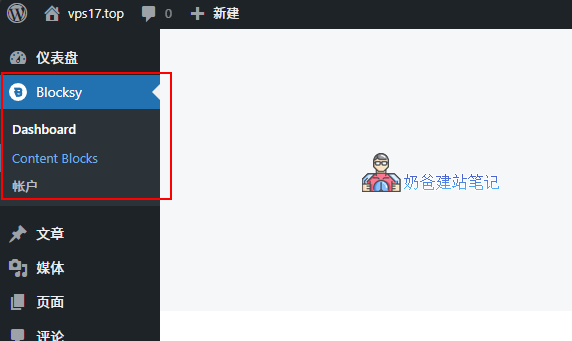
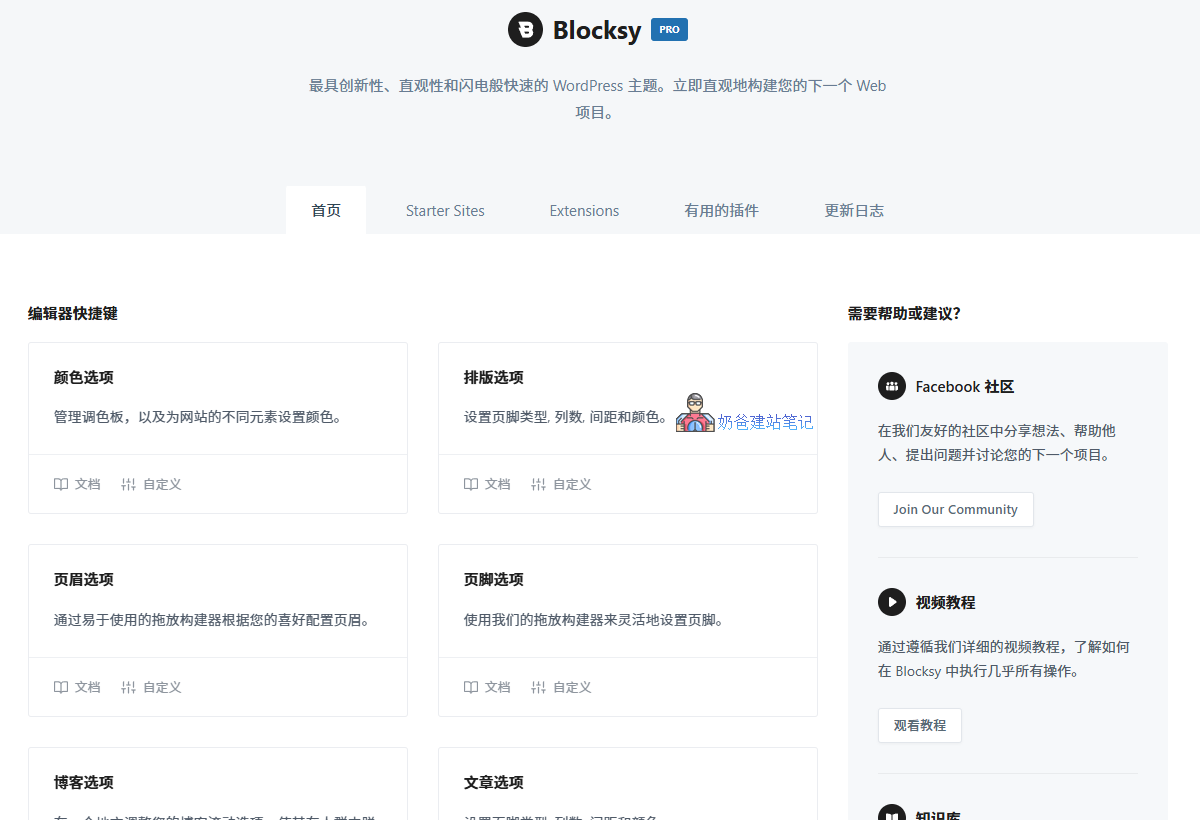
The Dashboard menu is the interface for all Blocksy Theme settings, features, and documentation.
- Home – Quickly access theme settings interface and related documentation
- Starter Sites – Pre-made demo templates
- Extensions – Some features that can be individually enabled in the theme
- Useful Plugins – Plugins recommended by the theme
- Changelog – Theme update records
If you are a beginner and don't know how to design your website's appearance, it's a better choice to import a design you like from Starter Sites and then modify it.
In Extensions, if you need a cookies notice, you can enableCookies Consent, so the website will have a cookies popup.
If you need a mega menu, you can enableAdvanced Menufeature to all customers.
Shortcuts Barcan also be enabled, so that when accessing the website on mobile, there is a quick contact information bar at the bottom.
Building a Website from Scratch with Blocksy
Considering that the vast majority of viewers of this tutorial are beginners, starting from a blank website for decoration is quite difficult, and the result may not look professional, so we recommend importing from a pre-built template and then making detailed modifications.
Import Demo Data
Path to import demo data: WordPress Admin Dashboard → Blocksy → Dashboard → Starter Sites
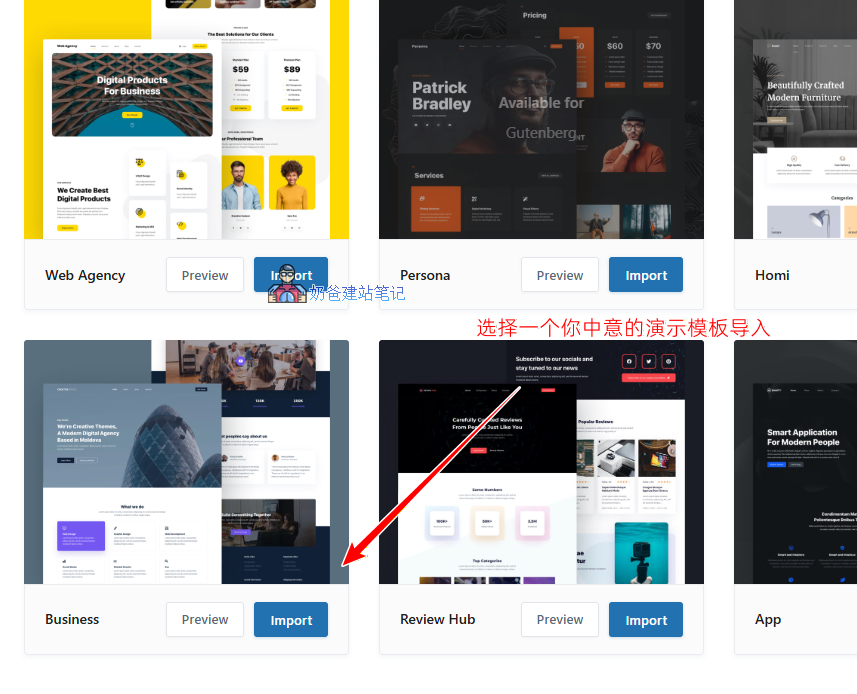
Considering most friends are in the foreign trade industry, we have chosen the free Business template to import here.
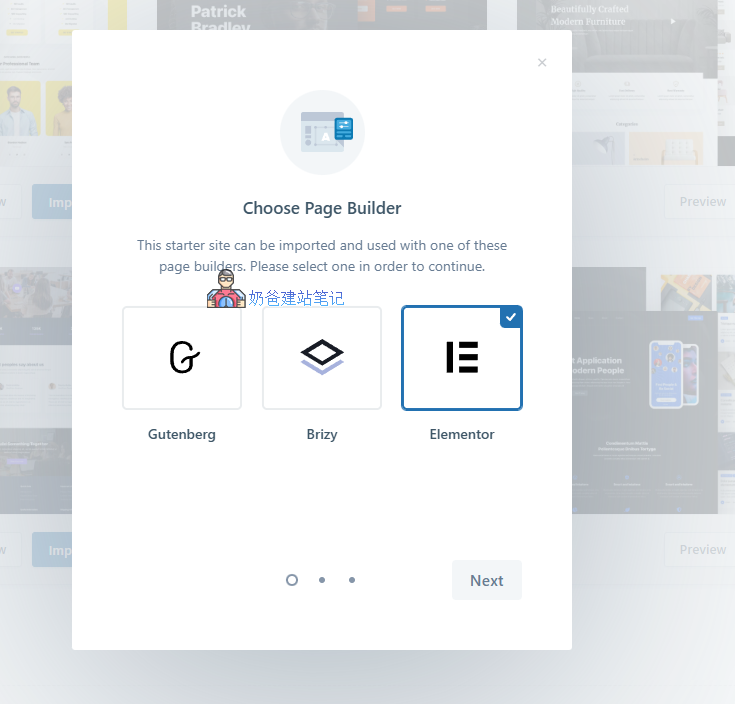
During import, you will be asked to choose a Page Builder. In the articleBasic Concepts and Terminology of WordPress, we introduced what a Page Builder is:
A WordPress page builder plugin is a tool used to create and edit website pages. It helps users easily create and edit website pages without writing code. Page builder plugins typically have a visual interface, allowing users to create and edit pages by dragging and dropping.
The Blocksy Theme supports three page builders: Gutenberg, Brizy, and Elementor.
Beginners are advised to choose Elementor。
In terms of performance, Gutenberg should be the fastest, and it is the editor currently promoted by WordPress officially, so compatibility will also be better.However, Gutenberg's current operation method is not as flexible as Elementor. What a beginner can figure out with Elementor in a day might take several days with Gutenberg. So, beginners should not worry about that slight performance difference. A black cat or a white cat, the one that catches mice is a good cat. The builder you can use is the best builder.
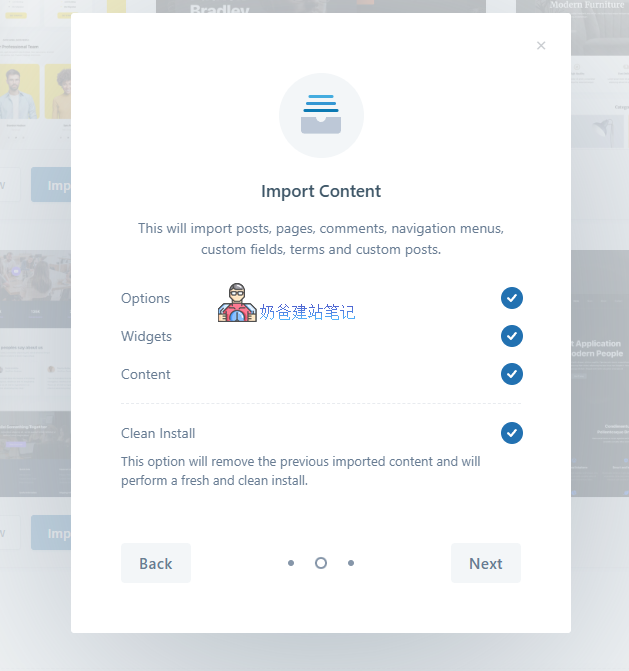
Select all to import this content, directlyNext
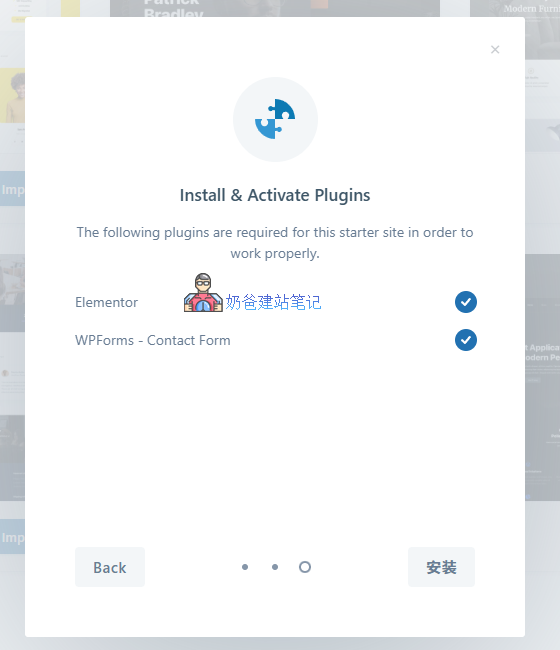
thenInstallPlugins needed.

Create Pages & Modify Navigation Menu
Create Page
The demo data pages certainly do not match the pages required for your business website, so we will first create the necessary pages and modify the navigation menu.
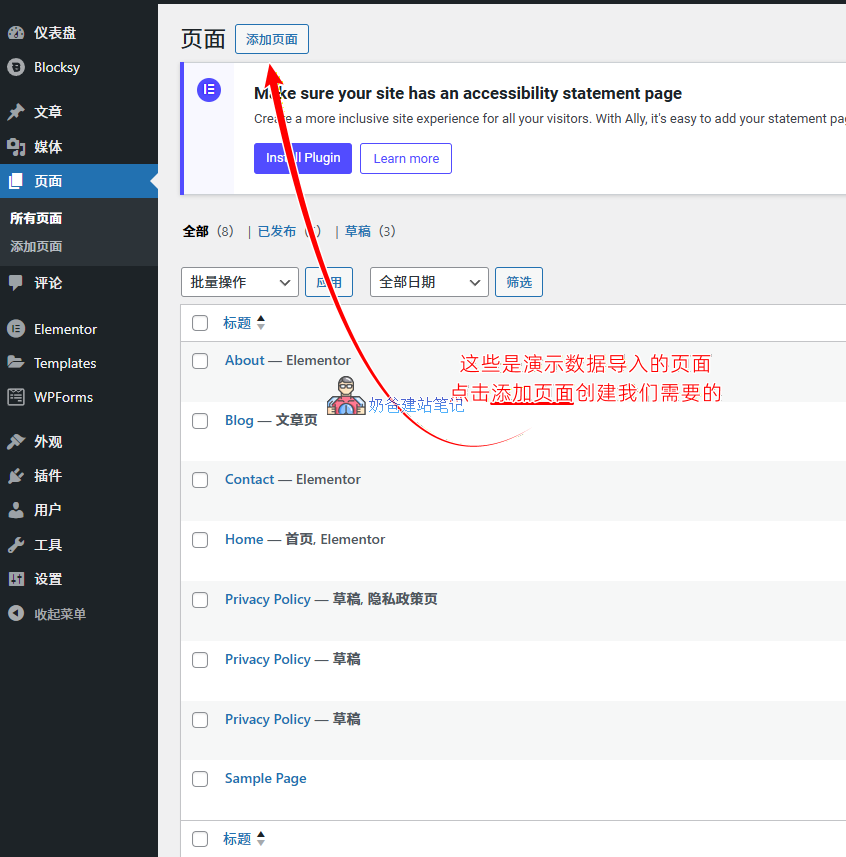
We can see that the imported demo data includes four main pages: Home, About, Blog, and Contact. However, business websites typically also need Product and Service pages.
Here, we will first add a Service page. Products will be covered separately later.
For this tutorial demonstration, we have created three pages: Our Services, Service 1, and Service 2. You only need to add the page title and publish it. Specific styling will be introduced later.
The 'Sample Page' and any unnecessary pages like 'Privacy Policy' can be deleted.
Modify Navigation Menu
Modification Path: WordPress Admin Dashboard → Appearance → Menus
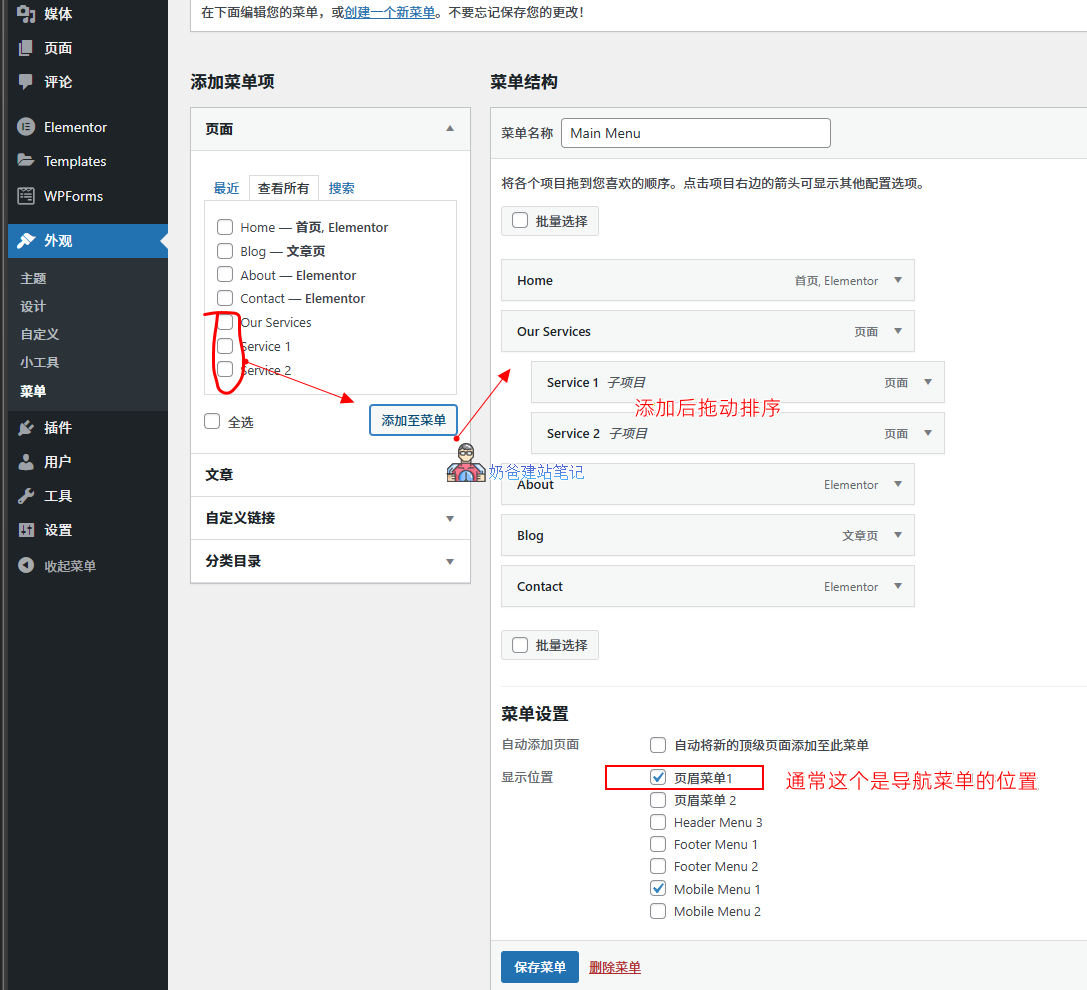
We will add the service page we just created to the navigation menu and drag to sort it. ThenSave Menu。
At this point, returning to the website frontend, you can see the updated navigation menu in effect.
Modify Theme Colors
Modification Path: WordPress Admin Dashboard → Appearance → Customize → Colors
You can also quickly enter by clicking 'Customize' in the top navigation menu on the frontend.
After making these changes, some colors on the webpage may not have updated. This will be covered later when introducing Elementor page editing. Please follow the tutorial carefully.
Modify Header
Modification Path: WordPress Admin Dashboard → Appearance → Customize → Header
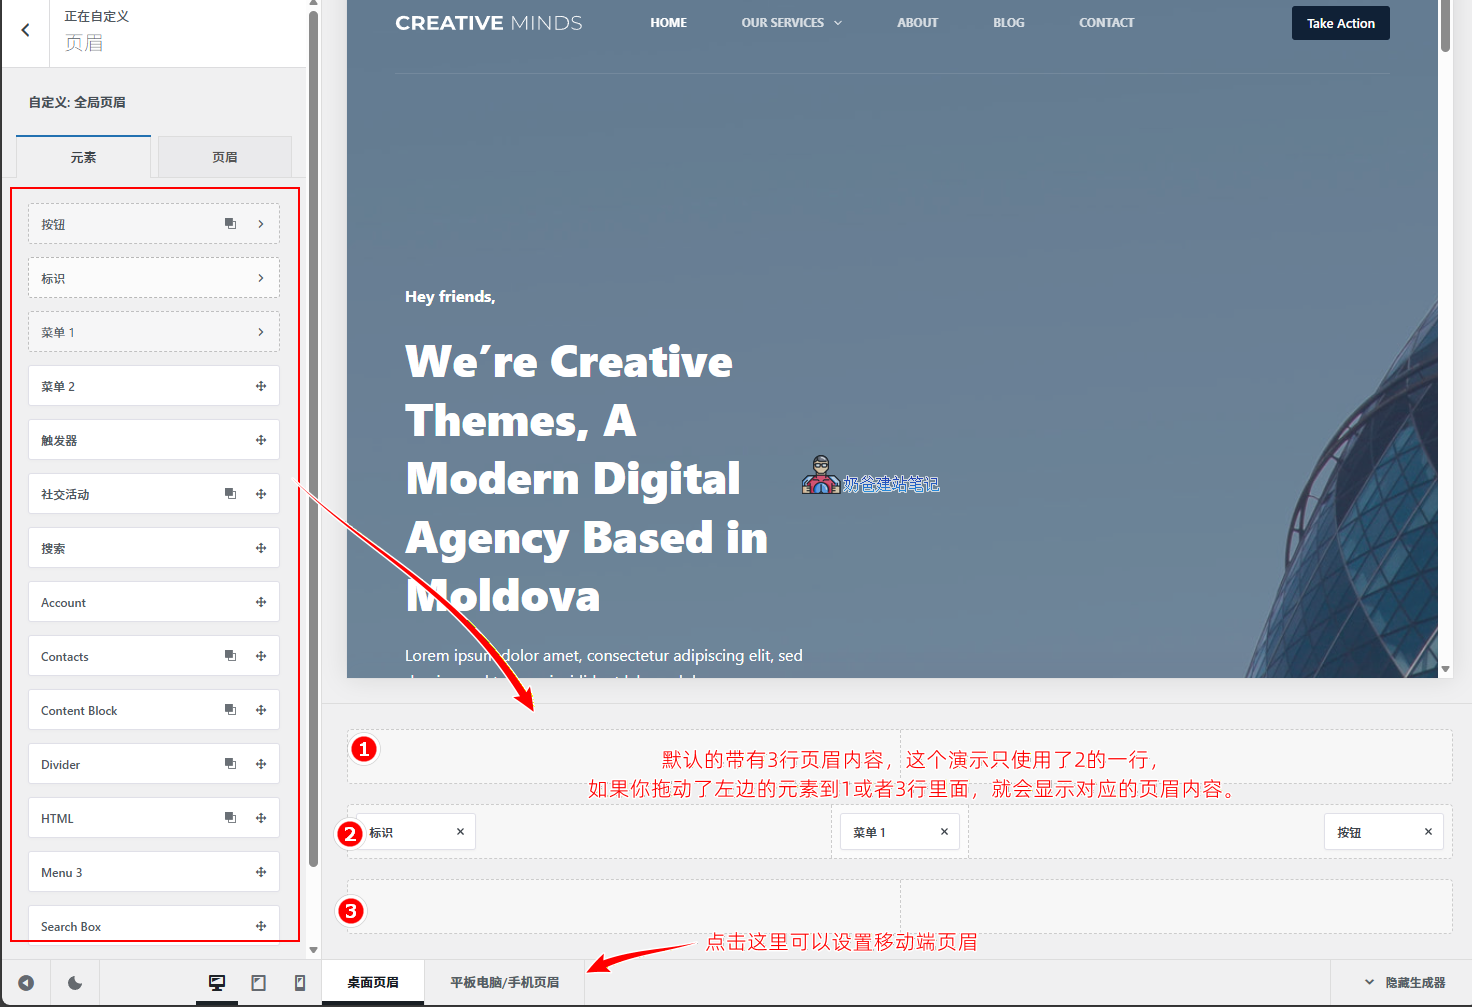
The default header consists of three rows: Top Row, Main Row, and Bottom Row.
- The Top Row, often called the topbar, is conventionally designed to hold contact information and social media links.
- The Main Row is for placing the navigation menu and buttons.
- The Bottom Row is generally used less frequently.
Select each row to see its settings interface.
To add any element to the header, simply drag and drop it into the corresponding position.
Clicking on the header next to the elements in the left screenshot reveals more header settings options, such as:
- Sticky Functionality – Whether to stick to the top of the screen
- Transparent Functionality – Whether to be transparent
Modify Footer
Modification Path: WordPress Admin Dashboard → Appearance → Customize → Footer
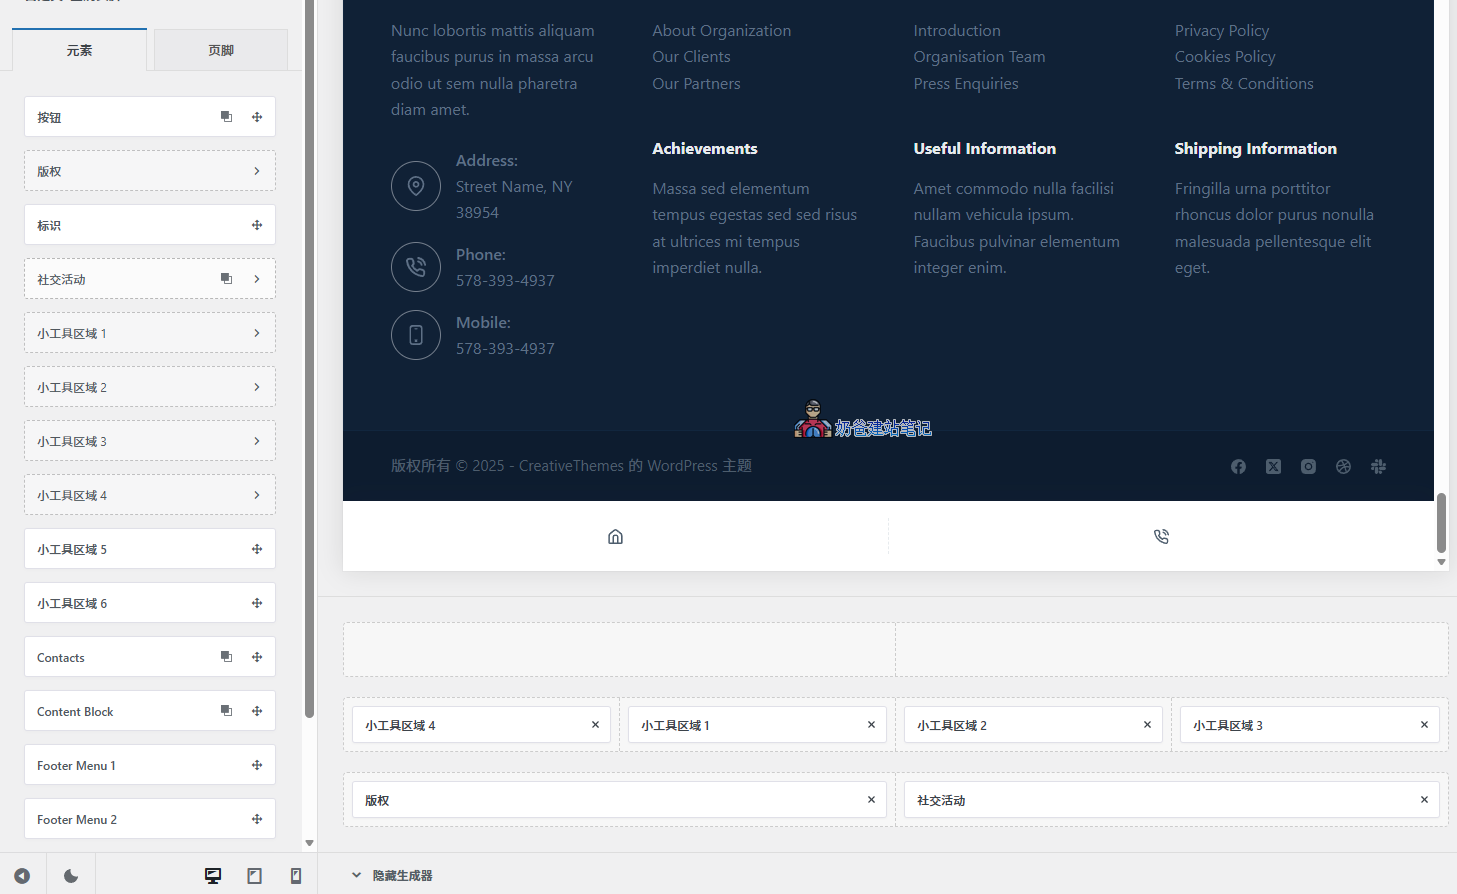
The footer setup method is similar to the header. The content in the widget area shown in the image above can be set more conveniently via WP Admin Dashboard → Appearance → Widgets.
If you find designing with the theme's built-in footer effects troublesome, you can also create one using Elementor, which will be mentioned later.
Modify Page Content
After setting up the header and footer, we can begin modifying specific pages.
Modification Path:
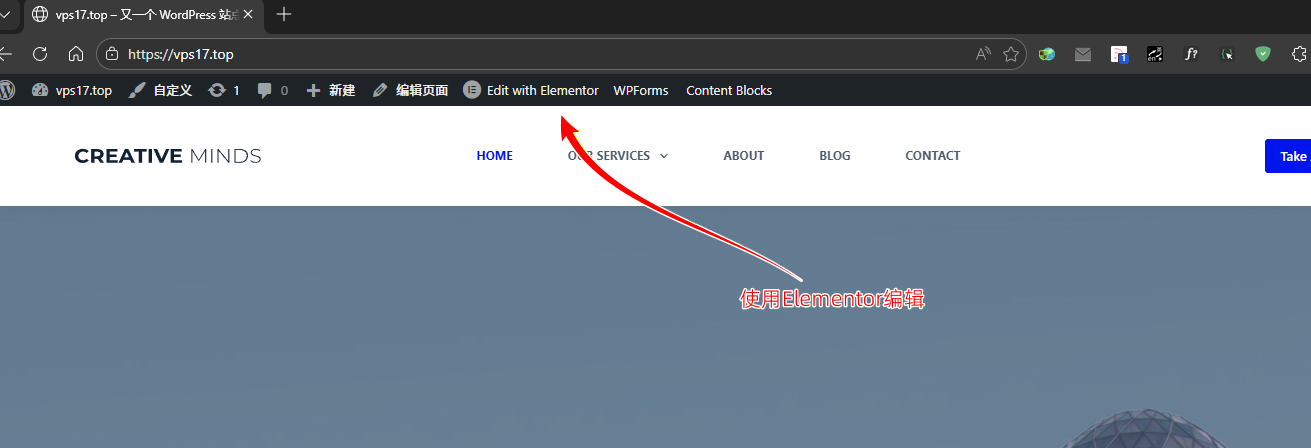
- Website Frontend → Top Admin Bar → Edit with Elementor
- WP Admin Dashboard → Pages → All Pages → Edit with Elementor
Before modifying the page content, let's first adjust Elementor's global colors and fonts.
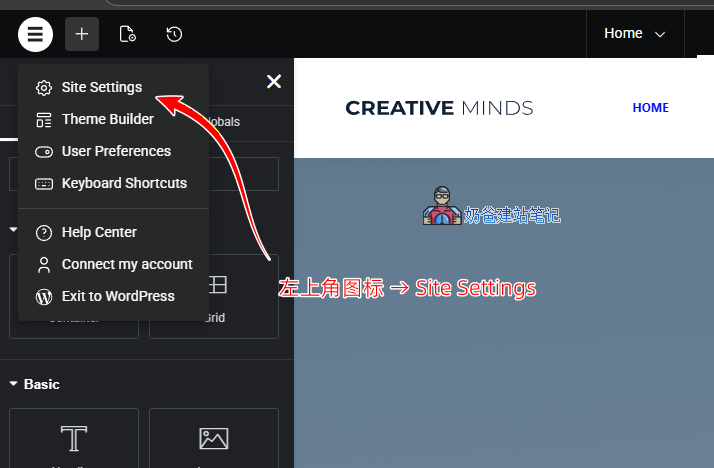
After entering the Elementor editing interface, click the Elementor icon in the top-left corner, then select Site Settings.
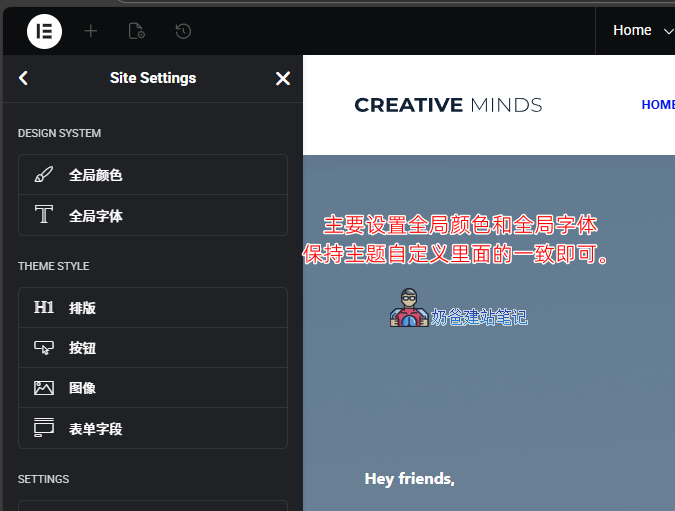
Primarily set the global colors and global fonts. You can set other items if you wish; if you're unsure, leave them at their defaults for now.
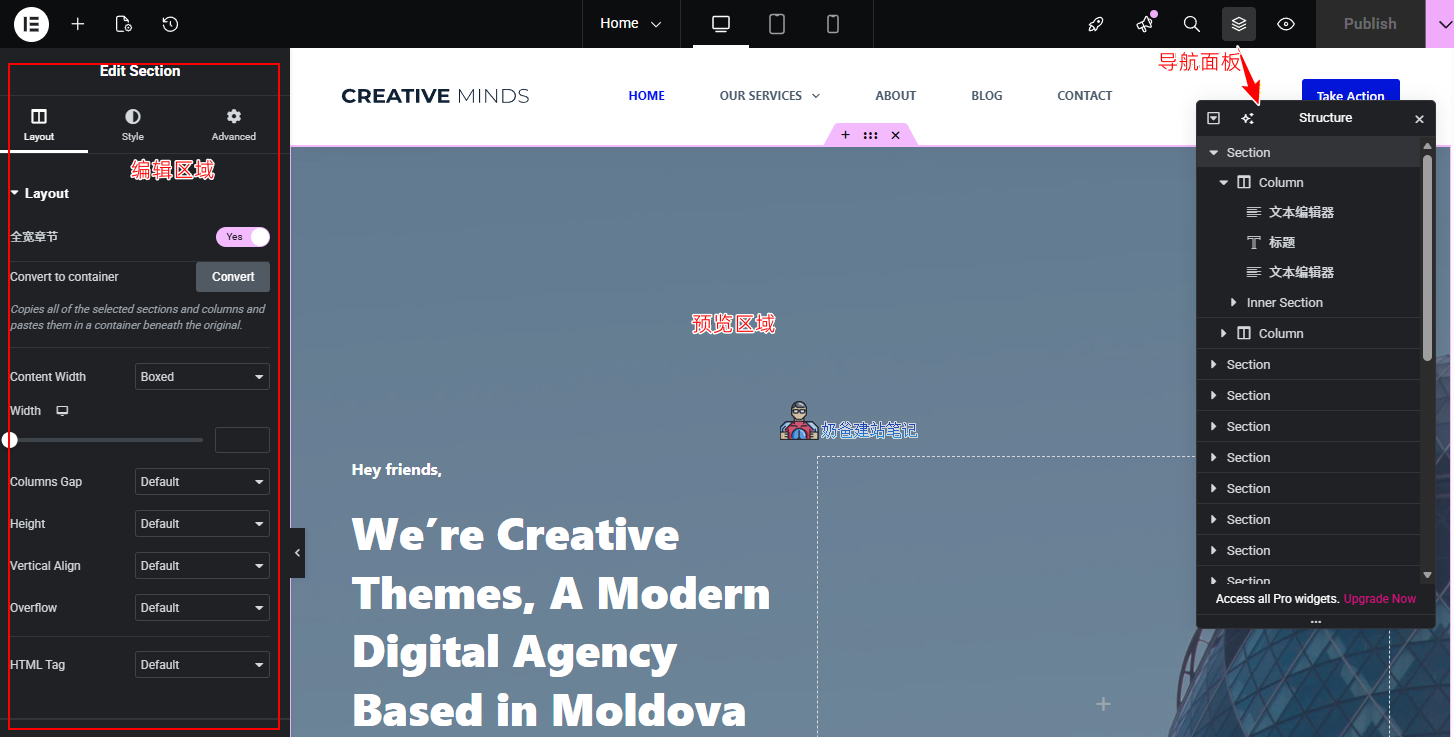
The theme demo data we imported still uses the Section design. The latest Elementor has fully adopted the Container layout, so you will see a 'Convert to container' button. You can click this button to convert.
After conversion, delete the previous Sections. (Some styles may change after conversion and require manual adjustment. If you don't know how to adjust, do not convert—keep using Sections for now, or pay Naiba to handle it for you.)
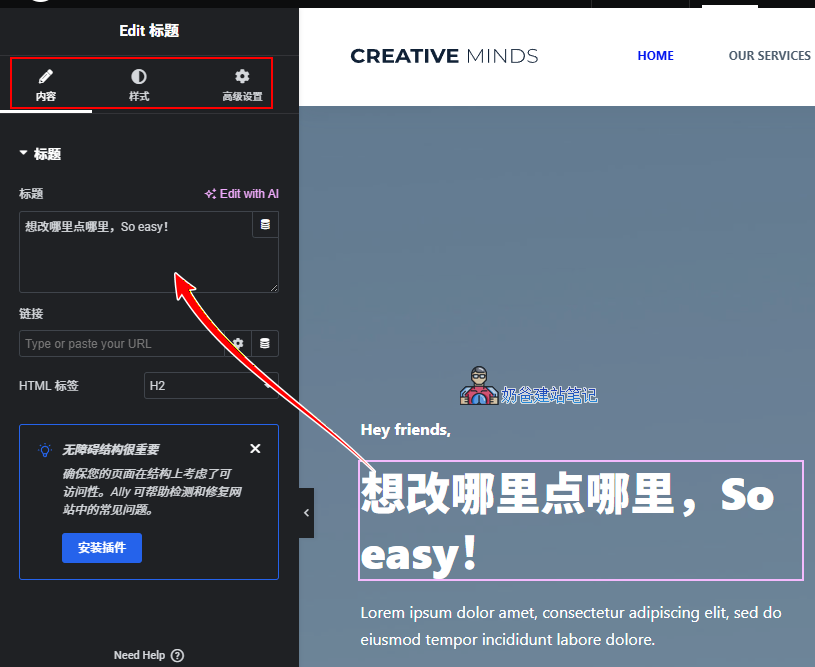
The basic use of Elementor is very simple. To modify something, just click on it, then make content changes and style adjustments in the editing area on the left.
After adjustments, click the Publish button in the top-right corner to update the page.
Design for Blank Pages
Let's take the Our Services page we created earlier as an example to show you how to use Elementor to edit page designs.
Modification path: WP Admin → Pages → All Pages → Edit
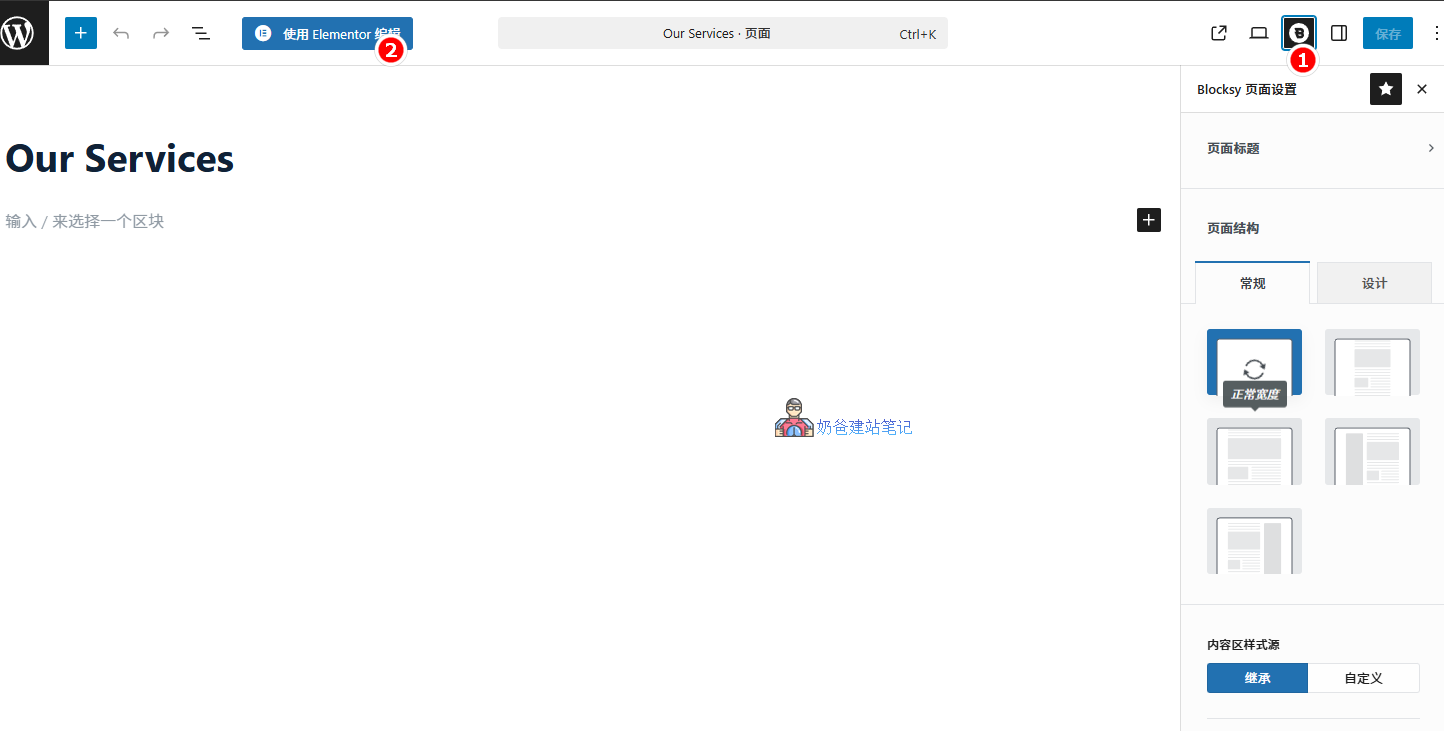
After opening the edit page as shown in the image above, first click the Blocksy page settings button at position 1. The items that usually need to be set are as follows:
- Page Title → Disable
- Content Area Vertical Spacing → Disable
After completing the settings,Save, then „Edit with Elementor”
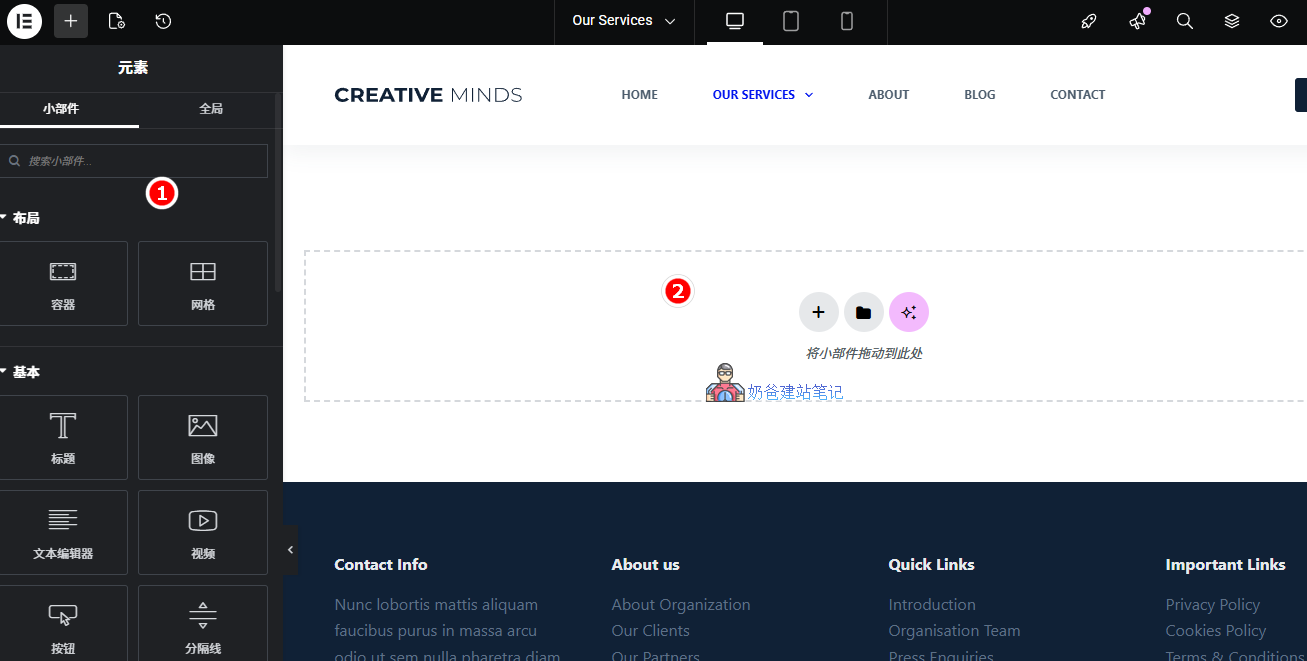
After entering the Elementor editing interface, the content is empty, so you need to create it yourself.
For beginners, creating from scratch might be troublesome. A simple method is to find a page already designed with Elementor in the theme, right-click to copy a design you like, then return to this new page, right-click to paste, and finally modify the content.
If you need to design it yourself, first select a container or grid from position 1, then drag the required elements into the container.
Add Product Management Functionality
As introduced in the „Adding Product Management" section of the WordPress tutorial article, there are several ways to implement product management:
- WooCommerce Plugin
- Portfolio
- Custom Page
- Using ACF Custom Fields
- Naibabiji B2B Product Management Plugin
The simpler methods here are to use WooCommerce orNaibabiji B2B Product Showcasethese two methods to implement it.
| Solution | Technical Difficulty | Disadvantages |
| WooCommerce | Medium | Bloated, hardware-intensive |
| Portfolio | Simple | Design limitations, more case-oriented |
| Custom Page | Simple | Requires design skills, not suitable for large numbers of products |
| ACF Custom Fields | 难 | Not beginner-friendly |
| B2B Product Management Plugin | Simplest | May not be compatible with your Theme, requires style adjustments |
If you plan to sell products directly later or want more customization options, consider WooCommerce. If you only need simple product management and display, considerNaibabiji B2B Product Showcase
Website Optimization
After the website is built, the optimization work required. New users don't need to overthink it, just do what you can.
1. Install an SEO Plugin
Operation path: WordPress Admin Dashboard → Plugins → Add New, search for SEO, any of the popular plugins that appear can be installed.
The principle of SEO plugins is the same, there's no guarantee that using a specific one is better, just install any one.
2. Clean up unused Pages
Not every Page imported with demo data is needed, delete the ones you don't need.
3. Install speed optimization plugins
Operation path: WordPress Admin Dashboard → Plugins → Add New → search for „Converter for Media“
To convert images to webp format, you can install Converter for Media. If you are a Baota Panel user, you need to manually modify the nginx configuration, refer to:Modifying Baota Panel nginx configuration to support Converter for Media plugin
Cache plugin: WordPress Admin Dashboard → Plugins → Add New → search for „cache“, install any popular one that appears.
If your hosting comes with a built-in cache plugin, use the hosting's built-in cache plugin directly. Don't blindly believe in paid cache plugins (it's fine to buy and use them if you have money, they have some effect).
If you are a Baota Panel user, you can also consider using:Enabling Nginx FastCGI Cache for WordPress in Baota Panel
Summary
This concludes the Blocksy Theme tutorial. If you have any questions, please leave a comment.