
Z-Blogis a domestically developed blog website building system. The earliest Z-Blog was ASP-based, and later a PHP version was released. This article introduces the Z-BlogPHP versionInstallation Tutorial。
Z-BlogPHP supports PHP 5.2 – 7.2 and can run on many operating systems such as Windows, Linux, and macOS.
It can be used as an ordinary blog program, or even as a CMS. It has strong customizability and a wealth of third-party applications, which will surely meet your needs.
Z-BlogPHP Installation Tutorial
Z-BlogPHP supports three installation methods: online installation, Baota Panel installation, and local upload installation. The specific methods are as follows:
Online Installation
The online installation method is very simple: just upload an install.php file to your website root directory.
You can directlyconnect to the VPS server via SSHandexecute the following command. (You can alsomanually download the install.phpfile and upload it to the website installation directory)
Related Tutorials:#建站#Xshell 6 Basic Tutorial: Connecting to a VPS
// 先wgetinstall文件到服务器
wget https://update.zblogcn.com/onlinephp/install.zip
// 然后使用下面的命令解压zip文件
unzip install.zip
Note: Execute the above command in your website installation directory.
If the download fails, it is due to folder permission issues. Change the folder permissions to 755 and the user group to www.
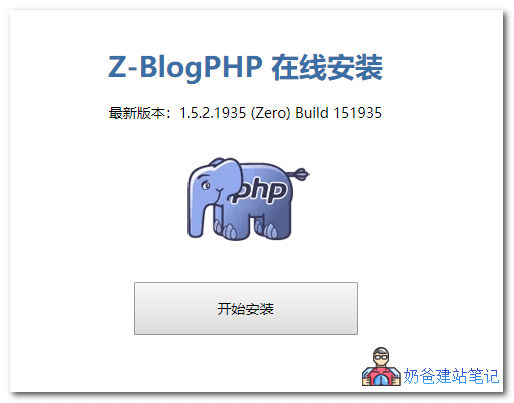
Then visit your URL/install.php to proceed with the installation. The installation process is shown below:
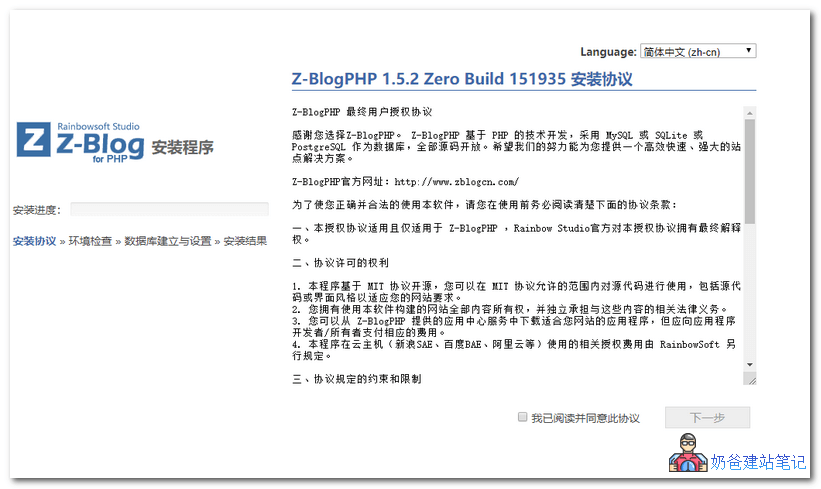
Agree to the license agreement, click Next, and then the system will check if your server environment meets the installation requirements.
If the installation environment meets Z-Blog's requirements, the database configuration interface will appear. Enter your database information.
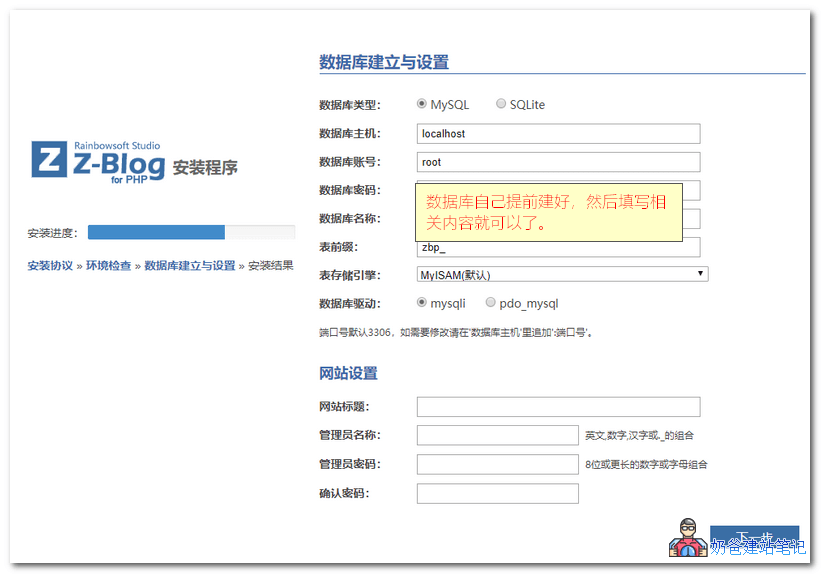
After setting up the database and administrator information, click Next to complete the installation.
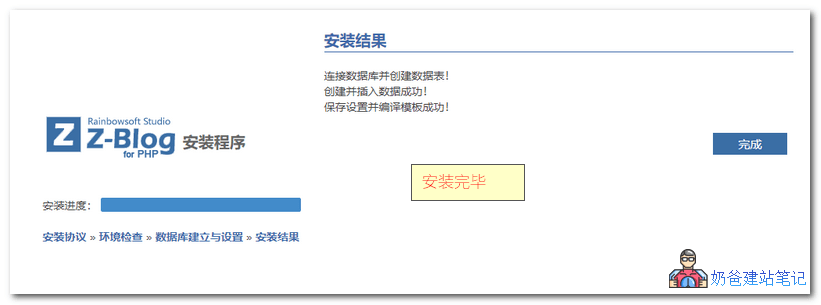
This interface indicates that Z-Blog installation is complete.
Baota Panel installation
Baota Panel is a VPS management panel suitable for beginners. If you haven't installed it yet, refer to the tutorial below to install one first.
- Website building video tutorial: Baota Panel beginner installation and website setup tutorial
- #WebsiteBuilding# Beginner-friendly Baota Panel setup tutorial
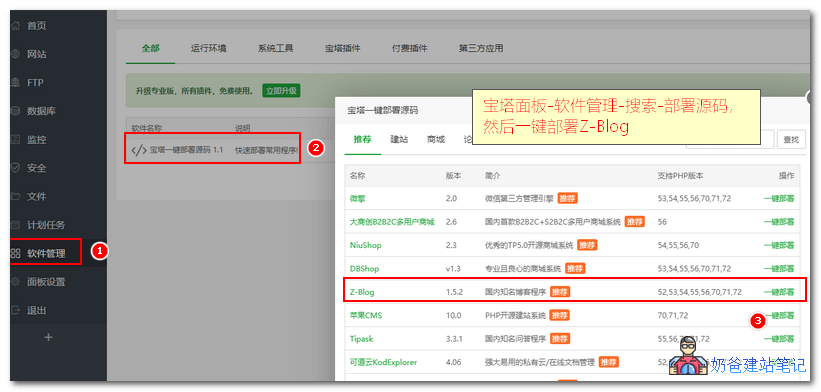
Go toBaota Panel, click on theSoftware Management, search forDeploy Source Code, then findZ-Blogand click One-Click Deployment.
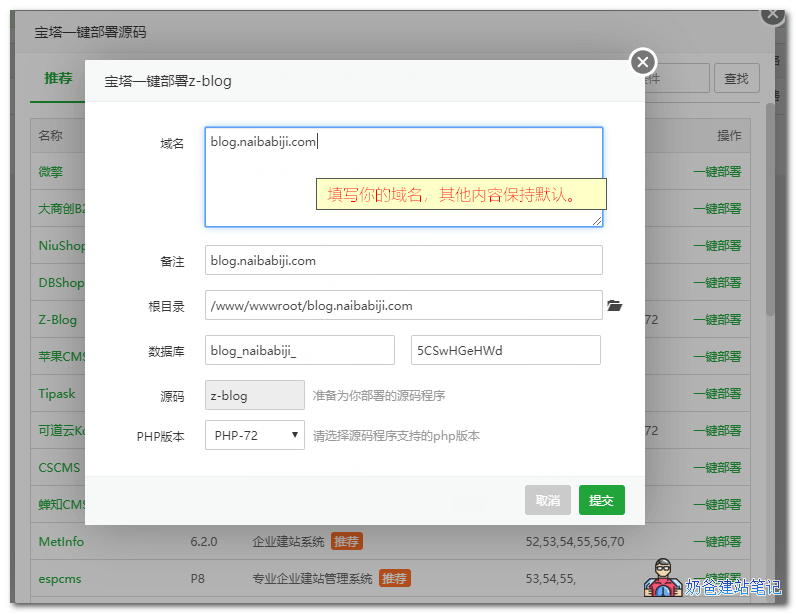
In the pop-up interface, fill in the domain name, leave other settings as default, and submit.
Local FTP Upload Installation
If you are using shared hosting and cannot download via online SSH or use Baota's one-click installation, you can also upload and install via FTP.
- click here to downloadZ-BlogPHP 1.5.2 Installation Package
- Extract the compressed package
- Upload the extracted files and folders to the website root directory via FTP
- Visit your website URL to proceed with installation.
Reasons for Installation Failure
If your Z-Blog installation fails, it may be due to the following reasons.
① Server environment does not meet requirements.
If the installation interface checks and finds something that does not meet the requirements, fix it to meet the requirements.
② Incorrect folder and file permissions.
If you find that files cannot be downloaded during online installation, it is a folder permission issue. Change it to www user and 755 permissions.
③ Domain not bound to the website.
If you have not bound a domain to the website, you cannot install via URL. See:
- #Website Building# LNMP One-Click Package Adding Virtual Host Graphic and Video Tutorial
- #WebsiteBuilding# Adding your own website in Baota Panel (Baota add virtual host)
- Tutorial on how to purchase and configure DNS for a domain at the foreign domain registrar Dynadot
- Tutorial on DNS resolution for domains registered on Alibaba Cloud
- Tutorial on DNS resolution and DNS server modification for NameSilo domains
- Tutorial on domain registration and DNS resolution on Tencent Cloud
If you really don't know how to install it, you can also consider Naiba'swebsite hosting service。