Previous Tutorial#建站#Building a WordPress Website Tutorial in Baota PanelAfter that, starting from this tutorial, we will introduce WordPress-related content, teaching you how to use WordPress to build your own website.
How to Log in to the WordPress Admin Dashboard
By default, the address to log in to the WordPress Admin Dashboard is your website/wp-login.php For example: https://blog.naibabiji.com/wp-login.php
If the rewrite rules are configured, you can also directly access via your-website/wp-admin, for example: https://blog.naibabiji.com/wp-admin
The login account is the information you filled in when installing WordPress yourself. If you purchased SiteGroundthis type of Shared Hosting, you can also log into the WordPress Admin Dashboard with one click from the hosting control panel.
The Admin Dashboard address can be modified to other links by yourself using plugins to enhance security:Hide WordPress Admin Login Address to Enhance Security: WPS Hide Login
What to Do If You Forget Your WP Admin Password?
If you have forgotten the WordPress Admin Dashboard login password, you can refer to the following article:
WordPress Password Forgotten_Three Methods to Recover Administrator Password – Naibabiji
WordPress Admin Dashboard Interface Introduction
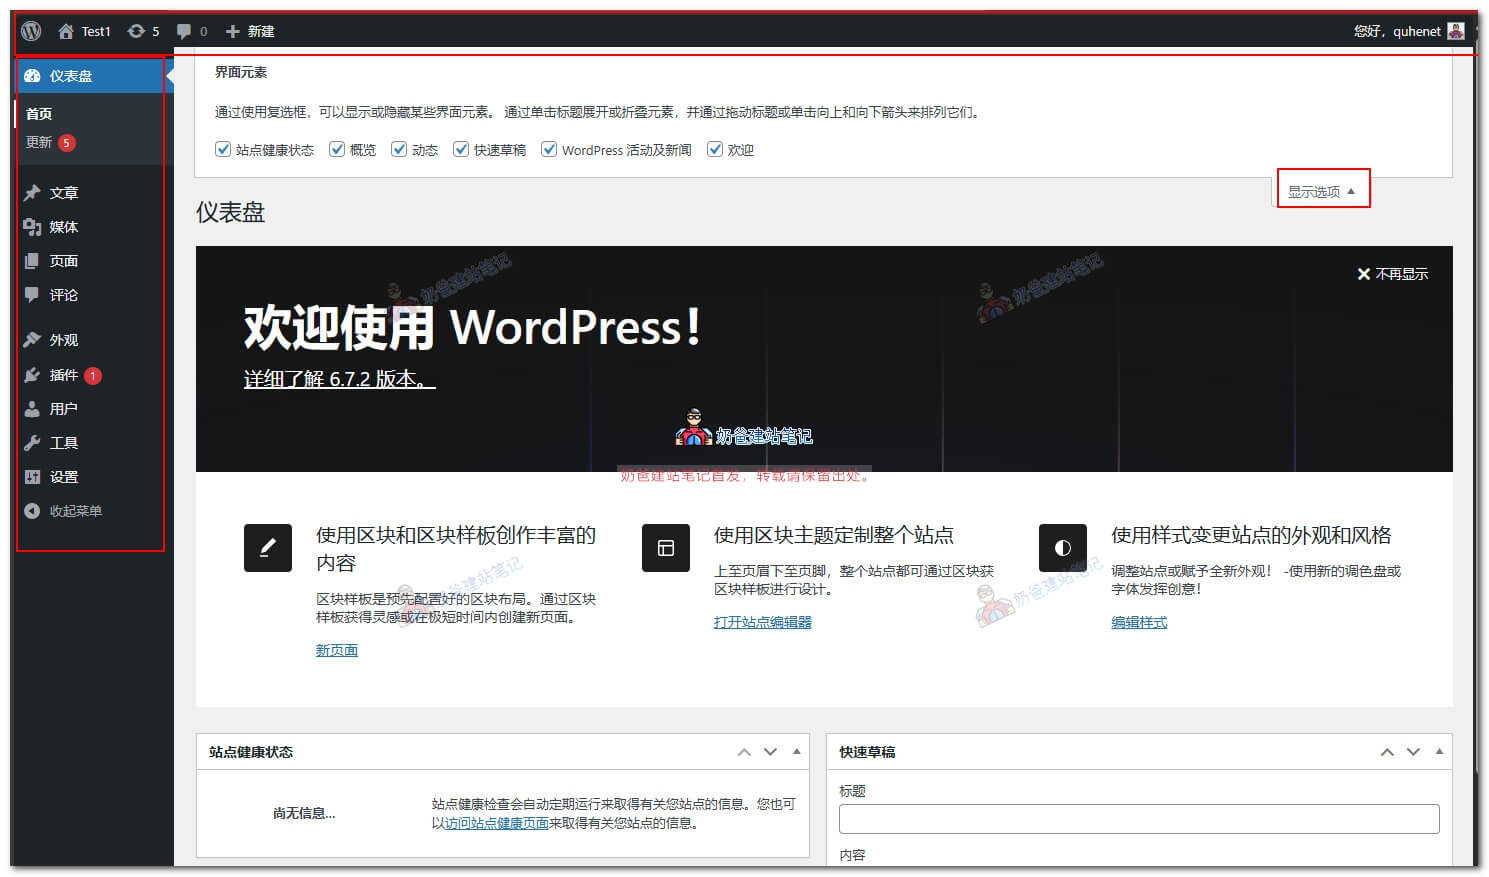
Compare with your own Admin Dashboard here. Naiba will explain what each section does. First, the 'Screen Options' in the upper right corner can be opened, allowing you to choose which content to display in the default Dashboard. Later, when you install many plugins, many items may appear here, making it look cluttered.
Then, all WordPress options are in the left menu bar. Below are some explanations.
- Dashboard — Just think of it as the backend homepage.
- Updates — When there are new versions of plugins or themes, a prompt will appear, similar to software update notifications on your phone.
- Posts — Related to posts, you need to set categories for the first time
- Media — This is where images, files, etc. that you upload are stored.
- Pages — Similar to posts, but they don't appear in the website's homepage post updates, such as an About page.
- Comments — Well, it's for comments and messages.
- Appearance — This is where you set what your website looks like to others. You can set themes, widgets, etc.
- Plugins — Where you manage plugins. Different plugins allow your WordPress to achieve different functions.
- Users — Most sites only have you as a user. You can add users here, or allow user registration. However, for a personal blog, registration by others is not very useful unless your site has commercial needs.
- Tools — Rarely used. Some plugins add their settings menu here.
- Settings — Here you can set some content for your entire site. Naiba will introduce it below.
Essential Settings for First-Time WordPress Use
The above introduced the functions of each menu item. Now, let's start configuring your own website.
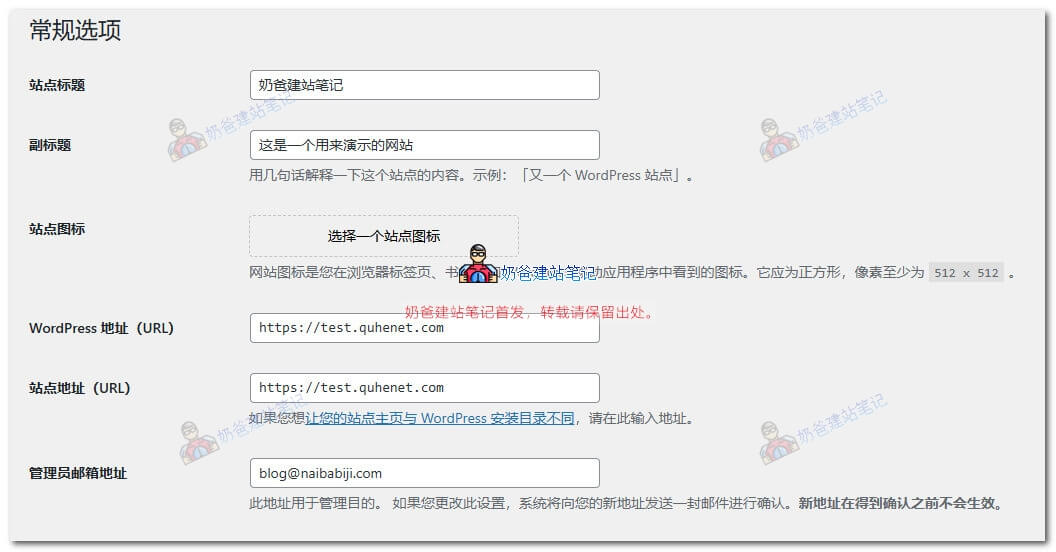
In the General Settings, what you need to set are „Site Title„, “Tagline”
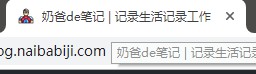
The Site Title is your website's name. The Tagline, for example, Naibabiji's tagline is 'Recording Life, Recording Work'. By default, the browser tab will display Site Title + Tagline (some themes may not display it this way, and the display content can also be controlled via plugins).
WordPress Address (URL) Site Address (URL)
These two items usually don't need to be modified; they are set when building the site. If you want to enable HTTPS access later, just change them to the HTTPS domain here. (Tutorial on Installing SSL Security Certificate for Websites)
Administrator Email Address
This is the administrator email of the website. Some website notifications will be sent to this email. (Receiving emails requires server support for sending mail. Typically, shared hosting like SiteGround can send emails directly. For self-purchased VPS, you need to rely on an SMTP plugin to send emails.)Recommended WordPress SMTP Email Plugins I've Used – Naibabiji)
Membership
By default, this is not checked. Unless you have enabled 'Users must be registered and logged in to comment', you don't need to enable this here. (Generally, B2C websites need to enable it, while B2B websites are not recommended to enable it.)
Other settings can be kept at their defaults; no need to introduce them one by one.
Writing OptionsThere is nothing that needs to be set by yourself; you can skip it directly.
Reading OptionsYou can make some settings here according to your needs.
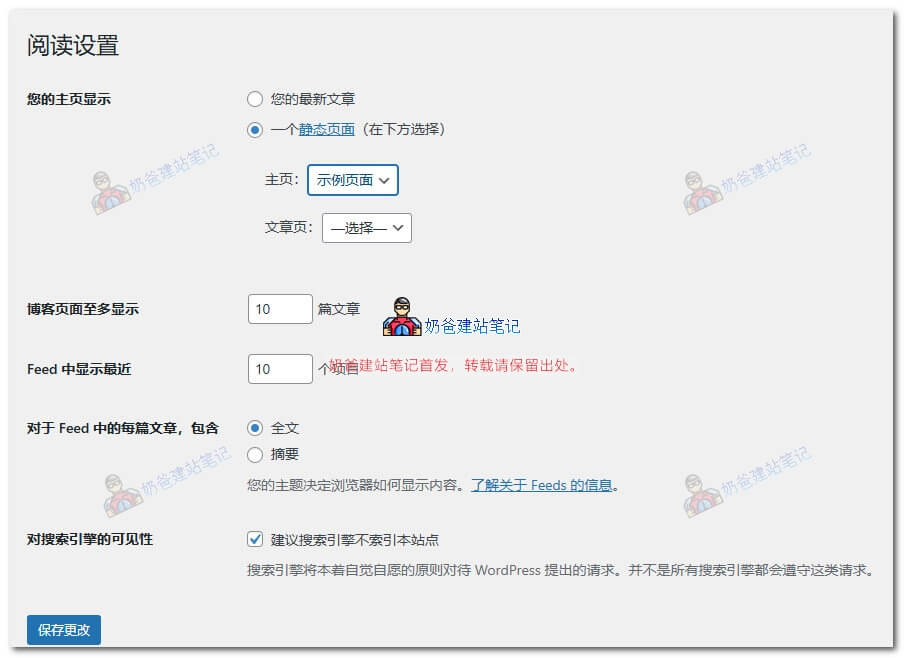
The default is „Your latest posts“ checked. However, if we are building an enterprise website, we usually choose „A static page“, which means you create a page with a homepage effect using the page function, and then select that page as the homepage.
For the posts page, you can create a page yourself to design a blog summary page, or simply create a blank page and select it as the posts page, which will automatically call the latest posts.
Visibility to search engines: if checked, search engines will not index your website.(It is recommended to check this item before the website is fully built.)
Discussion Settings
If you have a B2B website, it is recommended not to check „Allow people to submit comments on new posts“. According to our experience, 99% of the post comments received by enterprise websites are spam advertisements.
If your website has excellent article output and can attract significant traffic, you can enable comments, which should yield some normal comments. However, you must implement spam protection for comments; otherwise, you will still be harassed by advertisements.
Media SettingsInside
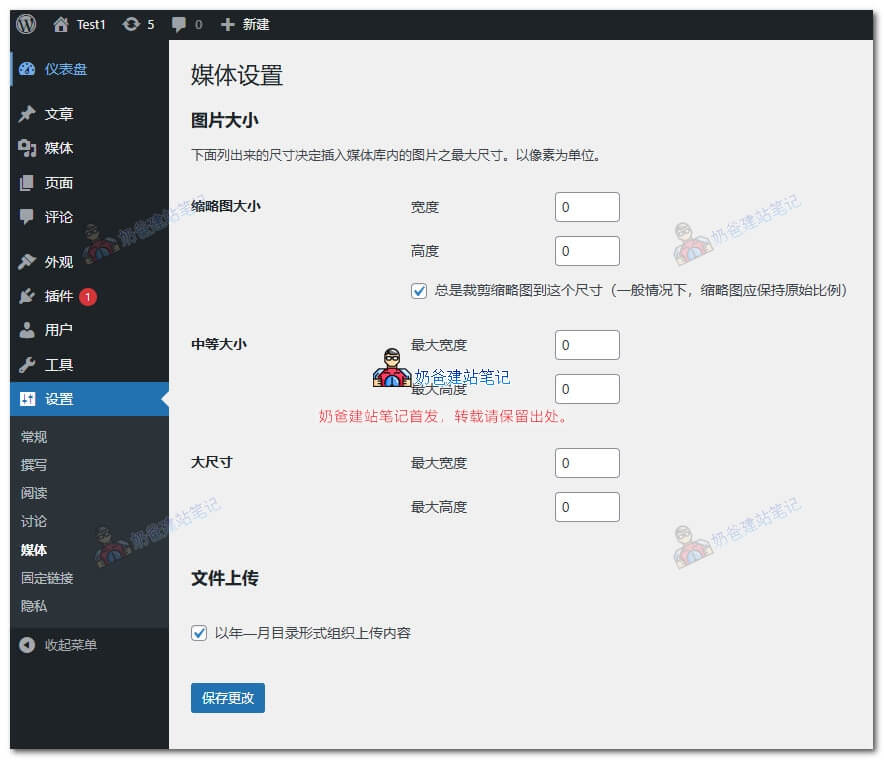
It is recommended to set the medium and large sizes to 0, so that WordPress will not automatically generate medium and large-sized images for you. (By default, WordPress generates several sizes of images for each uploaded picture, wasting space. Of course, if you don't mind the space usage, you can keep the default settings here.)
Permalink
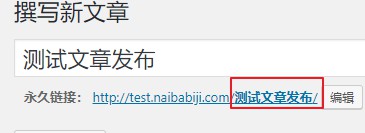
If you are lazy, just follow Naiba's choice and select 'Numeric'. If you are diligent, you can choose 'Post name' (recommended priority for foreign trade websites is 'Post name').
'Post name' means that each time you publish a post, you can customize the content in the red box in the image below, changing it to English or Pinyin, which is friendly to search engines.
Posts - Category Settings
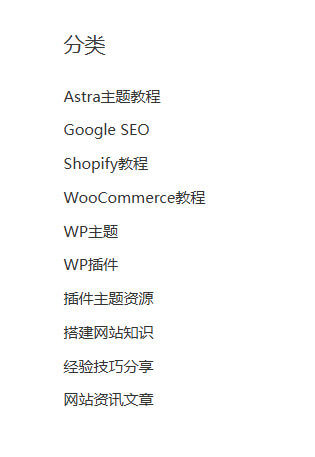
Categories are the types of content your website will publish, just like the categories on the right side of the Naibabiji website.
Appearance Settings
Under Appearance, the default menus are only Themes and Editor. In the Themes section, you can install new themes yourself. The default theme is not suitable for enterprise websites; most people will install a new theme. After installation, the menus under Appearance will have more changes.
在Naibabiji Website Building NavigationThere are some theme recommendations on the page; interested parties can go take a look.
Plugin Settings
The default installed „Akismet Anti-Spam: Spam Protection“ plugin can be activated to apply for an API key to intercept some spam on the website, or it can be deleted first and reinstalled later if there is advertising.
„Hello Dolly“ is not very useful and can be deleted directly.
If you are designing the website yourself, it is recommended to install the Elementor plugin, which is relatively simple to operate. Refer to the article:Elementor Tutorials