
Building a WebsiteWe usually buy a VPS, but using a VPS alone is wasteful, so we can create several virtual hosts for others to share.
The common Baota Panel can also partition virtual hosts for others, but they cannot log in to the panel for self-management, and the paid Cpanel is certainly not something amateur users want to buy. So this article recommends a free virtual host management panel called VestaCP.
VestaCP Introduction
VestaCP is an open-source virtual host control panel. Open source address: https://github.com/serghey-rodin/vesta
VestaCP can be installed on CentOS, Debian, and Ubuntu systems, supports custom installation scripts, and optionally installs nginx, apache, vsftpd, proftpd, exim, dovecot, spamassassin, clamav, named, iptables, fail2ban, softaculous, mysql, postgresql, etc.
VestaCP supports Chinese. See the demo address at the link below:
VestaCP Installation Tutorial
Installing VestaCP is very simple. The default installation method is just three steps:
# 使用ssh连接上你的vps
ssh root@your.server
# 下载安装脚本
curl -O http://vestacp.com/pub/vst-install.sh
# 运行安装脚本
bash vst-install.sh
Related articles:#建站#Xshell 6 Basic Tutorial: Connecting to a VPS
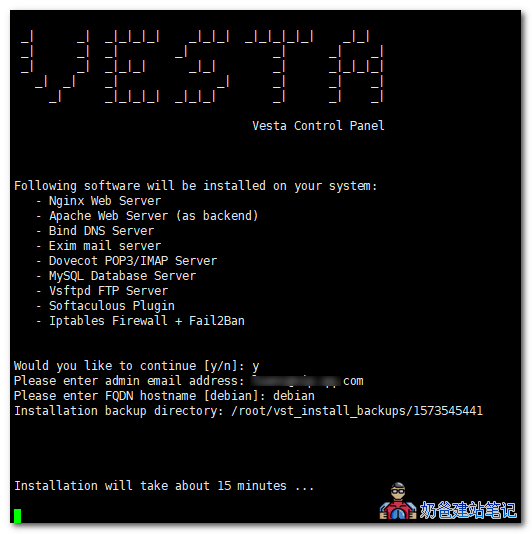
Installation Interface:
Installation Completion Interface:
 After VestaCP installation is complete, the backend login address and account password information will be displayed.
Log in via browser to manage virtual hosts and users. (The browser will prompt an SSL certificate error; ignore it.)
If you want to customize the installation components, you can select them at the bottom of the official installation page.
Switch to Chinese: After logging in, click your username in the top right corner, then select the language 'cn'.
VestaCP Integration with WHMCS for Automatic Setup
WHMCS is a very popular financial system. Most VPS providers we purchase from online use WHMCS. You can refer to previous articles:Building a Hosting Sales Website Using WHMCS
VestaCP supports integration with WHMCS to automatically set up web hosting. The official provides WHMCS interface files. The specific usage method is as follows:
cd /home/user/web/billing-site.ltd/public_html/modules/server
mkdir vesta
wget http://c.vestacp.com/0.9.8/rhel/whmcs-module.php -O vesta.php
The above 3 commands mean: switch to the server folder under the WHMCS installation directory, create a vesta folder, then download the whmcs-module.php file and rename it to vesta.php.
Then go toWHMCS Admin Backend– System Settings– Product Settings– ServerAdd inside:
The server name can be arbitrary; for the hostname and IP address, fill in the IP of the server where you installed the Vesta Panel.
For the type below, select Vesta, then enter the username and password for your Vesta management backend.
After adding, click 'Login to Control Panel' in the server list to see if you can log in successfully, testing whether the server settings are correct. If unsuccessful, check the account credentials and firewall permissions.
In the Vesta Panel backend, click User Plans, then modify or add a plan content yourself, and remember the plan name.
Then return to the WHMCS management backend, clickSystem Settings – Product Settings – Product Settings. Add a product group, then add a product.
In the product details, fill in the product name and product description; these can be arbitrary.
The key pointis that in the interface settings here, the Package Name must match the plan name from your Vesta Panel backend exactly to enable integration and provisioning.
Once all configurations are complete, you can save the product and test purchasing a web hosting service on the WHMCS frontend to see if it is automatically provisioned.
How to Uninstall the VestaCP Panel
NaibabijiNote that friends who usually tinker with Vesta panel integration with WHMCS will encounter some problems after using it for a while. If the official forum has no solution, they will most likely give up. So you can use the following command to uninstall the Vesta panel.
1. Stop services
service vesta stop
2. Delete Vesta packages and libraries
RHEL/CentOS:
yum remove vesta*
rm -f /etc/yum.repos.d/vesta.repo
Debian/Ubuntu:
apt-get remove vesta*
rm -f /etc/apt/sources.list.d/vesta.list
3. Delete data directory
rm -rf /usr/local/vesta
Finally, delete the cron automatic tasks.
Related Articles
- What are the relationships and differences between cloud shared hosting, VPS, and Baota Panel
- Website building video tutorial: Baota Panel beginner installation and website setup tutorial
- #WebsiteBuilding# Beginner-friendly Baota Panel setup tutorial
- #Website Building# LNMP One-Click Package Installation Illustrated Tutorial