
Naiba inVPS Recommendations Suitable for BeginnersIntroduced the hosting provider RamNode. Although the price isn't particularly advantageous, the stability and service are still worthwhile. Coincidentally, Naiba's test site's server is about to expire, so I'm repurchasing a RamNode annual VPS to use. If you are a user engaged in foreign trade, you can consider this provider's servers.
RamNode Purchase Process Illustrated Tutorial
Note: RamNode launched a new cloud platform in July. This tutorial has been updated accordingly. If you have any questions, please leave a comment to discuss.
The new version of the RamNode cloud platform also adopts a pay-as-you-go billing model, charging only for the time used.
RamNode Cloud Platform Registration Address:Click here to visit
1. Create a Cloud Platform Account and Top Up
RamNode launched a new cloud platform in July. The previous old tutorial is no longer applicable, so you need to register a cloud platform account first.Click here for the registration address。
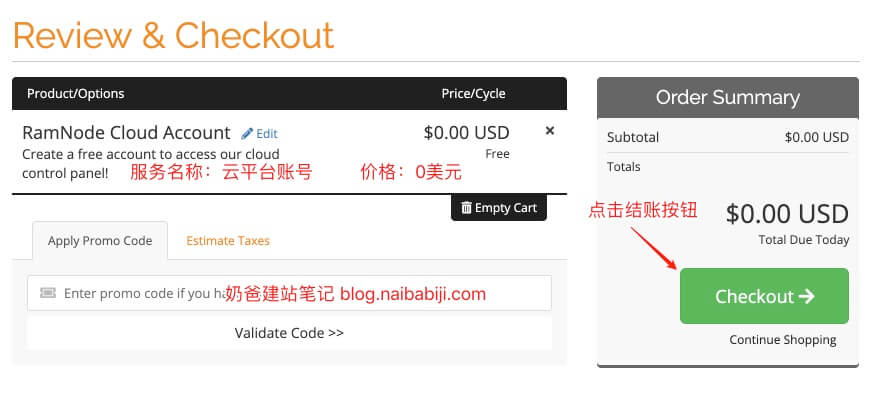
1. Click the RamNode cloud platform registration link, and the interface below appears. Directly click the Checkout button.
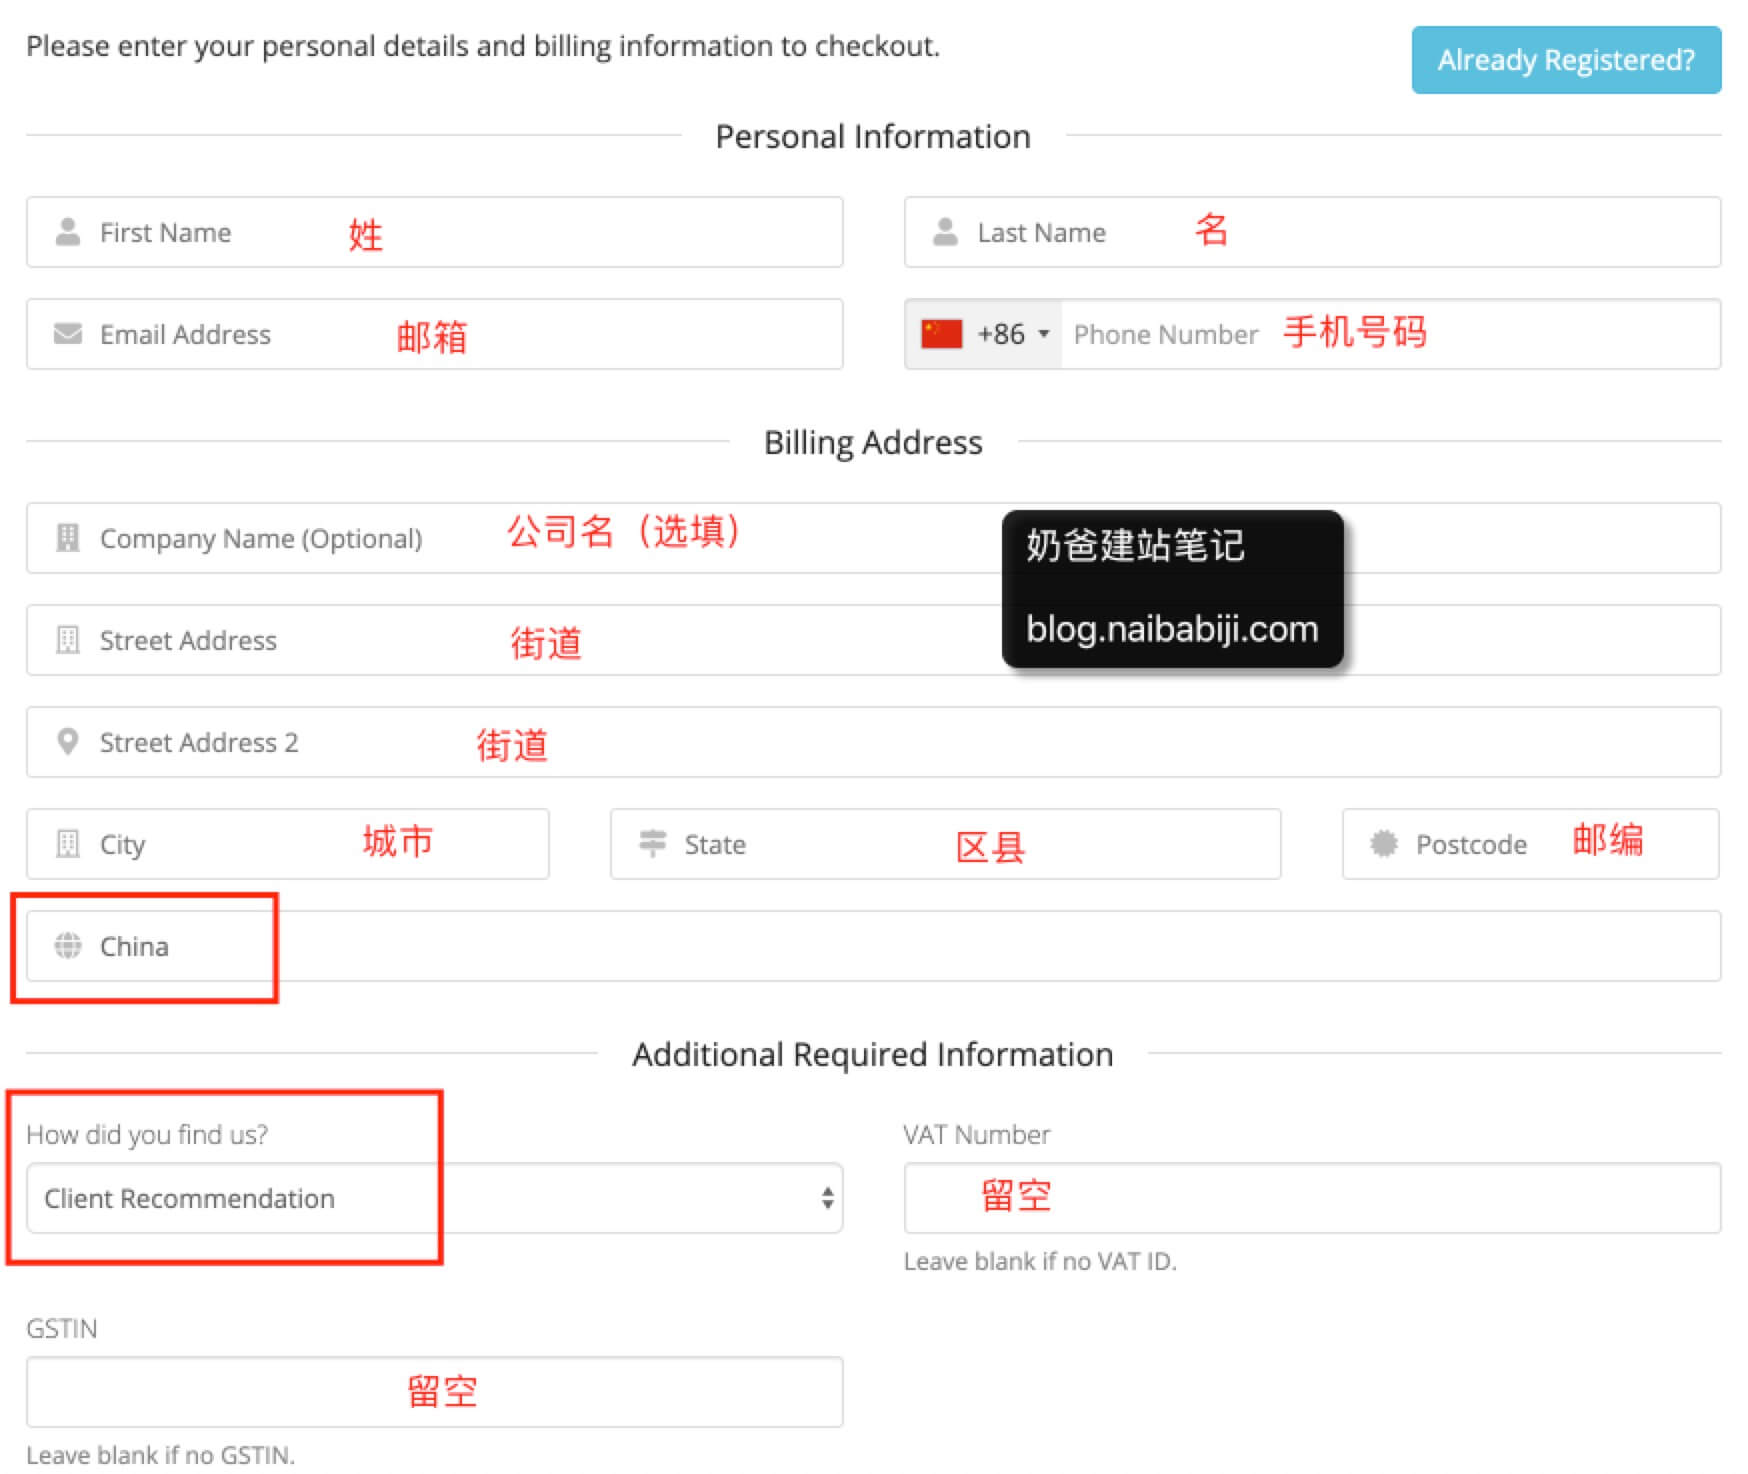
2. On the new page that appears, fill in the relevant information as annotated in the image below:
3. At the bottom of the registration page, select the payment method you want to use, then click the Complete Order button.
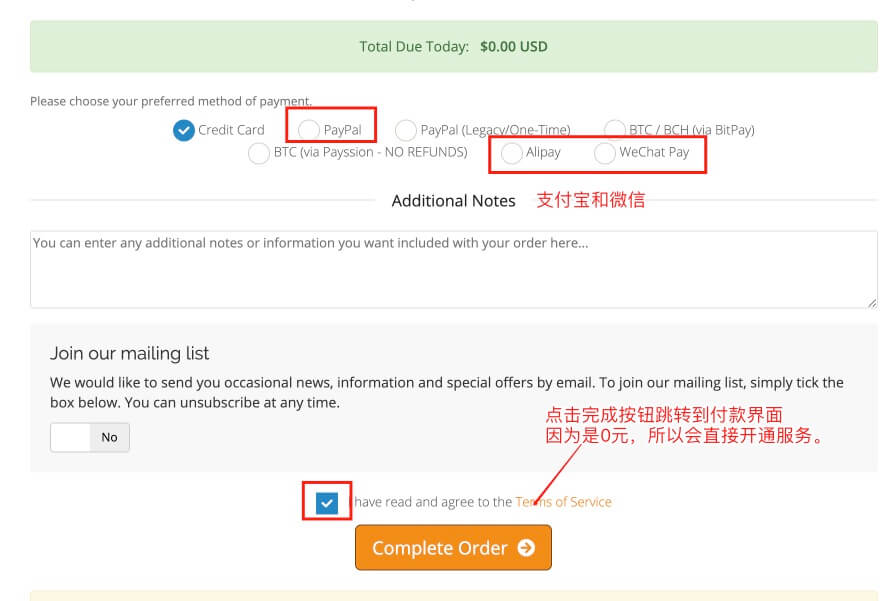
4. Because it's a $0 bill, it will be activated automatically. Then, in your services, you can see the cloud platform account information you just purchased, as shown in the image below:
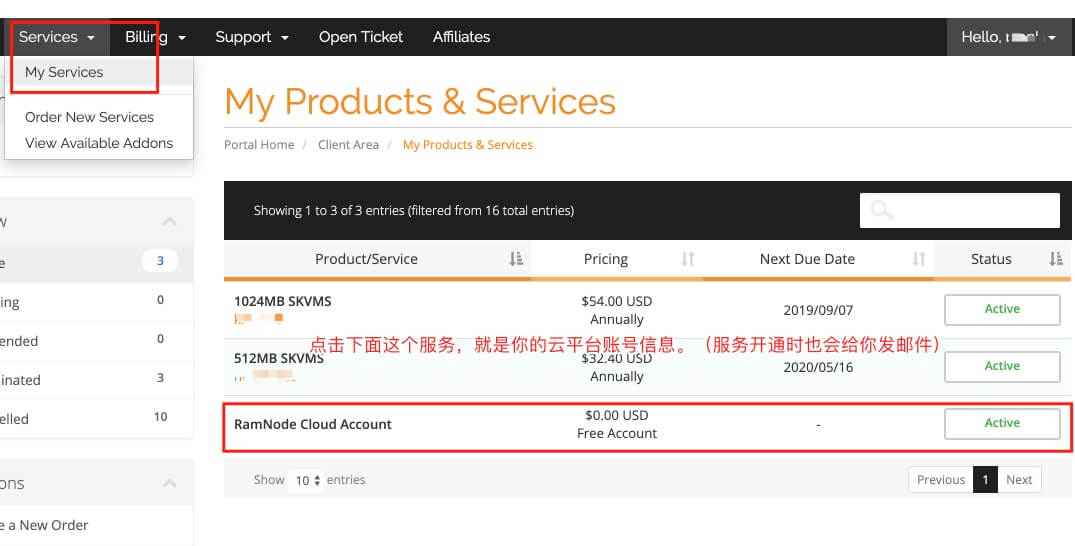
5. Click on RamNode Cloud Account (anywhere in the red box in the image above) to enter the service details page, and the interface shown in the image below will appear.
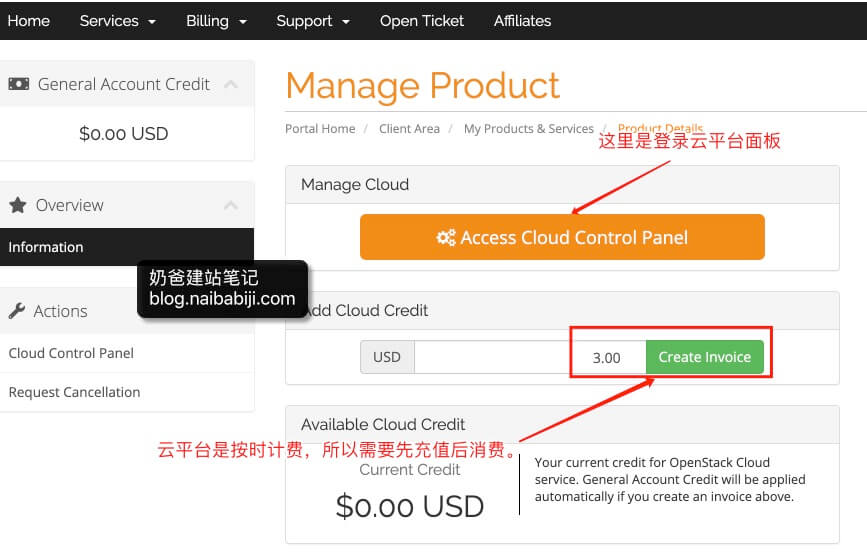
6. Top up the account. Because the revamped RamNode also uses an hourly billing model (with a monthly price cap), you need to have a prepaid balance to provision a server. Click the top-up button in the image above (you can enter the amount yourself. The cheapest plan has a monthly cap of $3. Naiba recommends buying at least a $5 machine for better performance.)
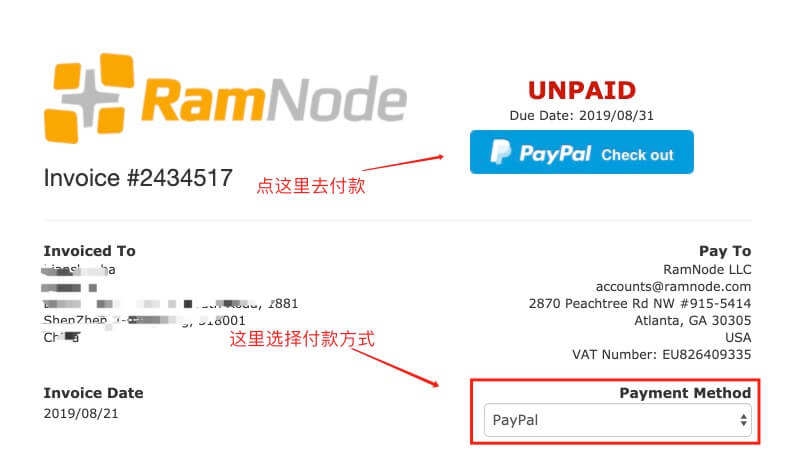
7. After clicking the top-up button, the image above appears. Select the payment method and click the payment button. Naiba used PayPal for payment here.
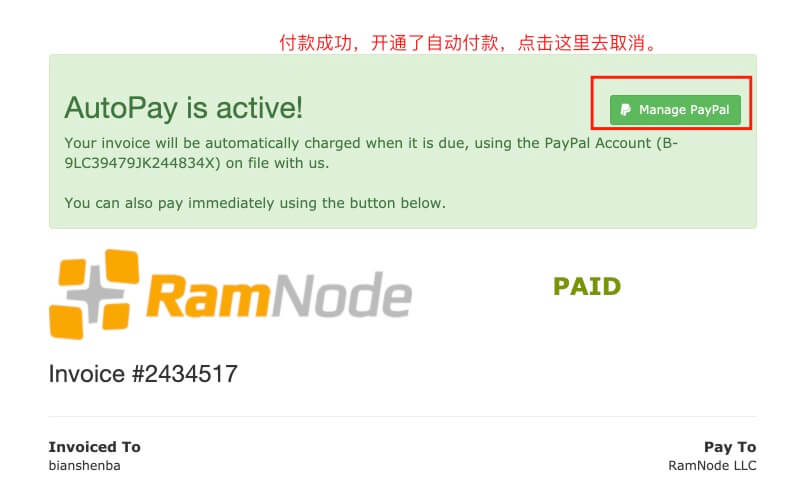
8. After payment is complete, click Manage PayPal (PayPal automatic payments are automatically activated. You can skip this step if you need to.)
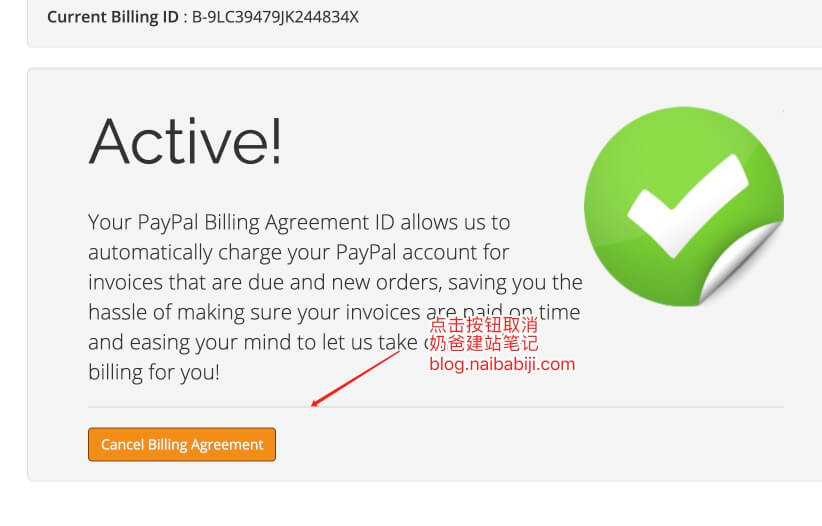
9. Cancel automatic payment button.
2. Purchase a server
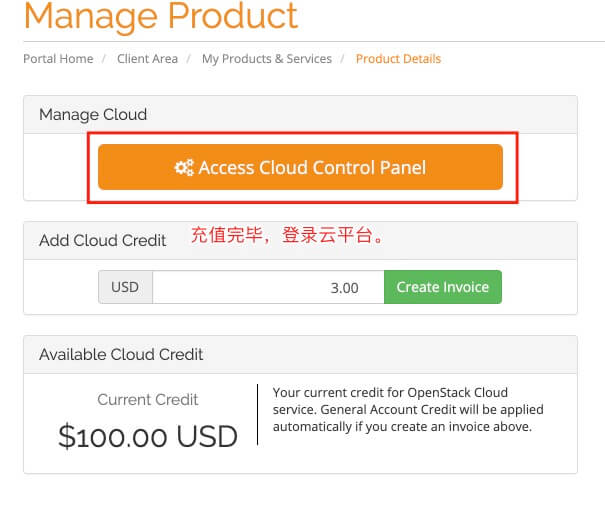
① After topping up, click the cloud platform login button as shown in the figure below:
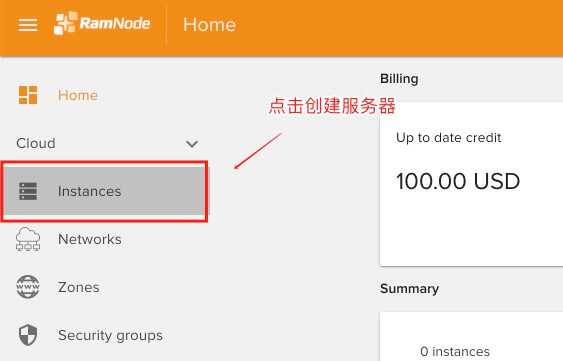
② Click the Instances button on the left side of the page, then click the + sign in the lower right corner to create a cloud server.
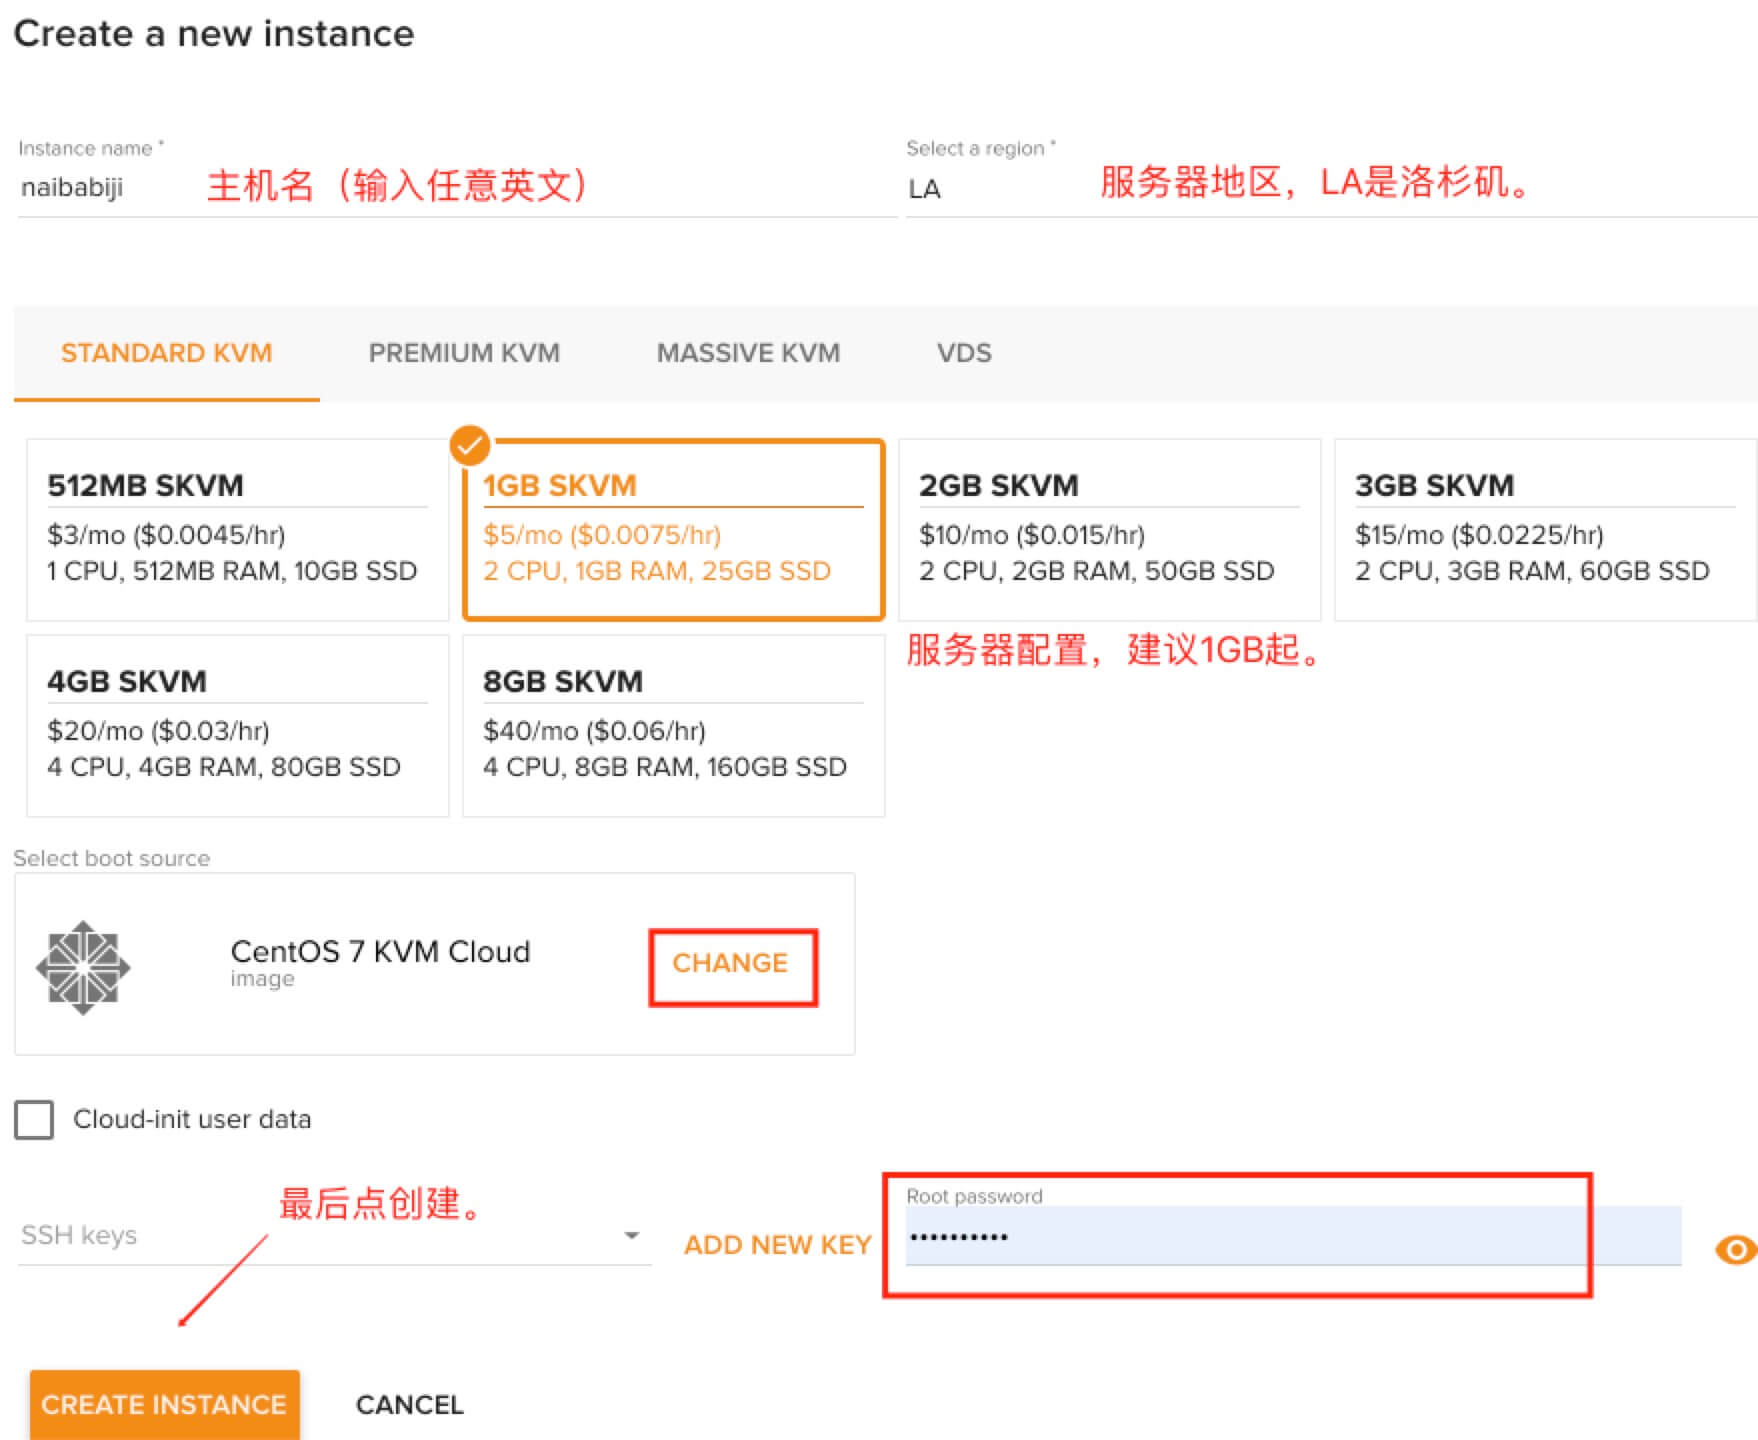
③ The cloud server creation page is as shown below. It is recommended to purchase a configuration of 1GB or higher (if you are reluctant to spend money, 512MB can also be used temporarily.)
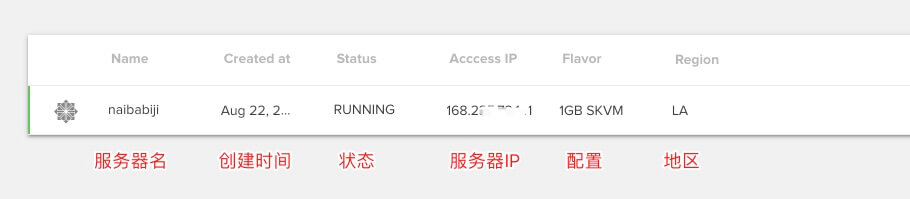
④ After creation, it looks like the figure below. When RUNNING appears, it means the server has been successfully created.
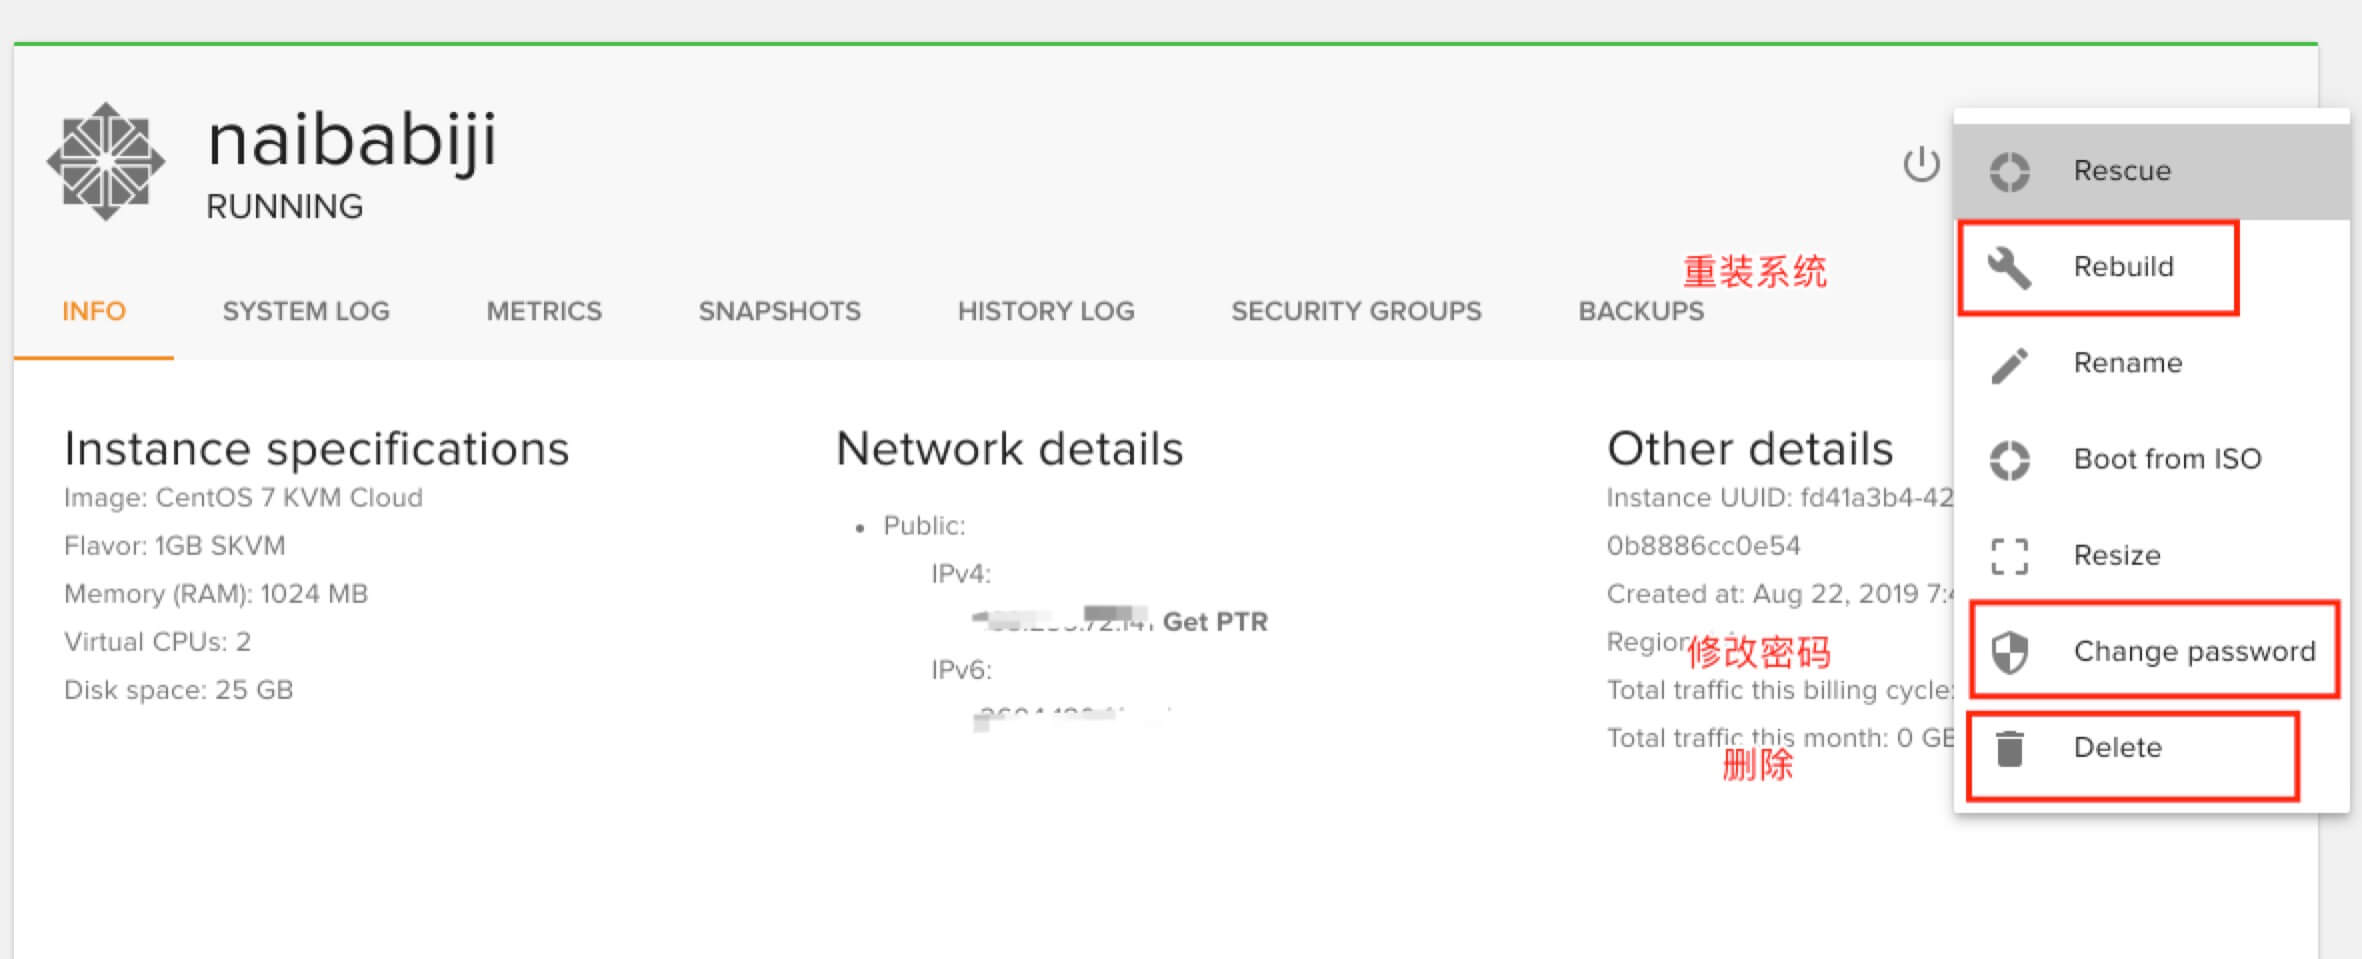
⑤ Click on the server to enter the details page. Clicking the button in the upper right corner reveals more function buttons.
Using SSH to Manage the Server
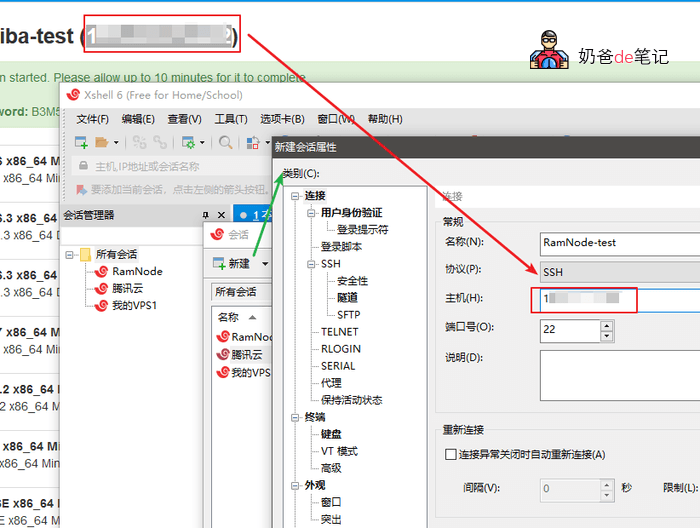
Open Xshell, create a new session, then fill in the IP in the host field. For VPS management, you can also refer to:
#WebsiteBuilding# Free VPS Management Software Xshell6/Xftp6 Chinese Version
#建站#Xshell 6 Basic Tutorial: Connecting to a VPS
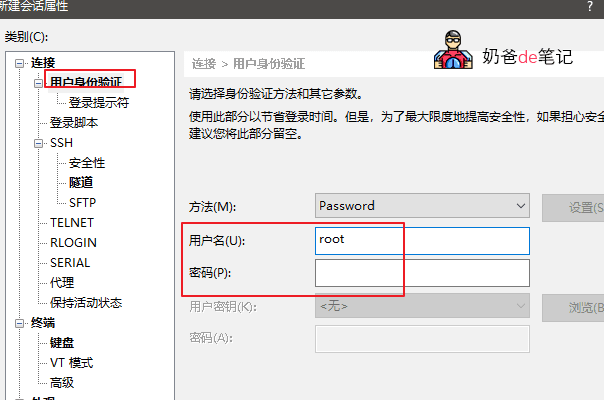
For user authentication, enter the root username. It is not recommended to save the password, but you can save it if you are sure your computer is secure.
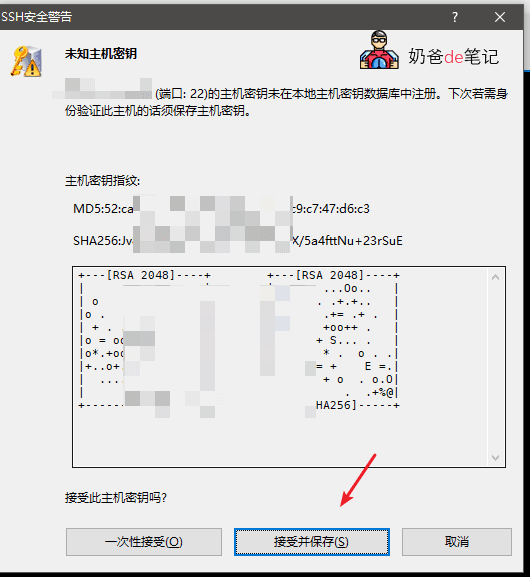
For the SSH security warning, choose to accept.
Change VPS Password (if you need to)
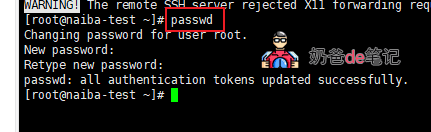
If you need to change the VPS password, connect to the VPS using Xshell, then enterpasswdPress Enter, and enter the same password twice. (The password will not be displayed)
Building a Website with RamNode
Next, you can install Baota Panel on the VPS and create a new website. Refer to previous articles:
- #WebsiteBuilding# Beginner-friendly Baota Panel setup tutorial
- #建站# Add your own website in Baota Panel
- #建站# Tutorial on building a WordPress website in Baota Panel
If you are also interested in building websites, click here to viewBasic steps for individuals and businesses to build a website