WordPress is an open-source website building program that continuously releases new versions over time. For website security, we also need to perform WordPress update and upgrade operations. This article introduces several methods for updating WordPress, divided into automatic updates and manual updates. Details are as follows:
Automatic WordPress Update
Auto-updating WordPress is very simple. Just click the update button in the backend. If you are using a foreign virtual host, you usually don't need to click the update button; when a new version is available, the system will automatically update to the new version.
Of course, your virtual host provider may not have enabled the automatic update feature, so you can just click the update button once yourself.
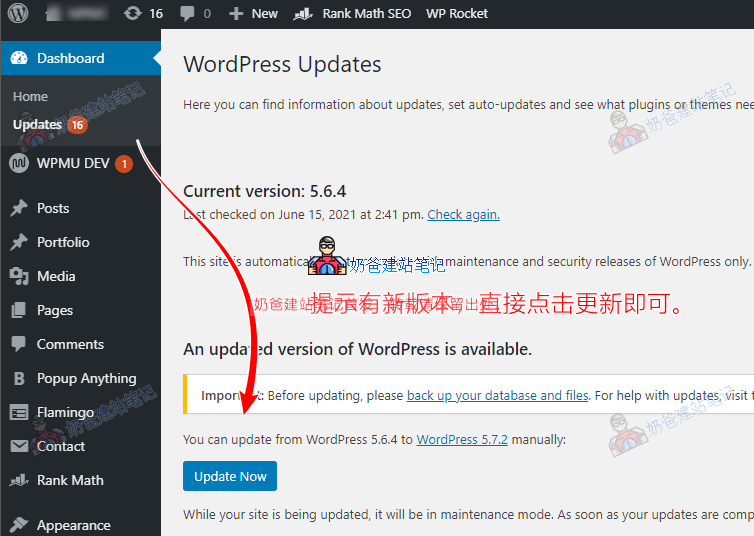
However, with domestic servers, due to network issues, update failures often occur. In such cases, we need to perform manual updates to resolve this problem.
WordPress update failed with the message „Another update is currently in progress“
If automatic WordPress update fails, then manual update is the only option. The most common WordPress update failure prompt is „Another update is currently in progress”
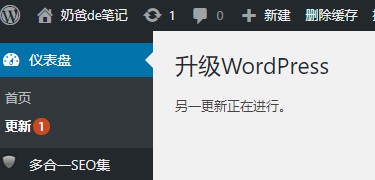
If you encounter this prompt, searching online will mostly suggest deleting a core_updater.lock table file from the database.
Most methods online tell you to access the website database (via phpMyAdmin or SSH commands).
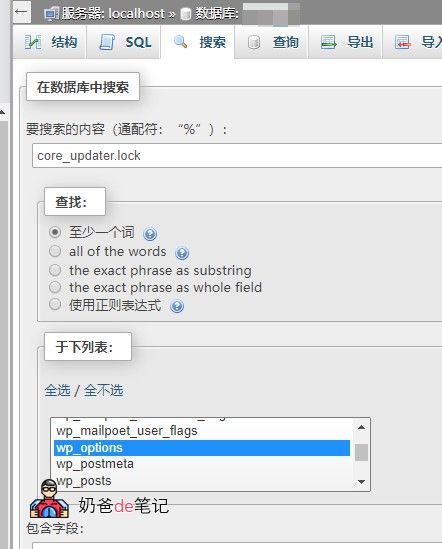
Search for core_updater.lock in the wp_options table; you can find an entry with a value. Then delete it and try updating again.
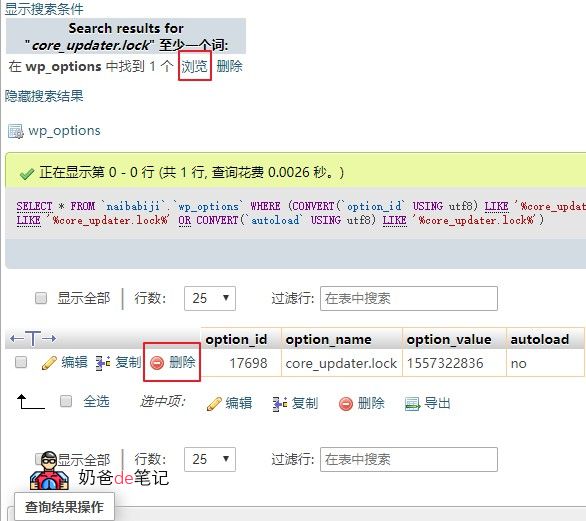
However, this method is not 100% effective for domestic hosting, because the connection speed from domestic hosting to WordPress servers is not stable.It's very likely the download will be unsuccessful, leading to upgrade failure.So at this point, you need to manually upgrade WordPress.
Additionallyautomatic update failures on domestic servers can also easily result in a white screen or error messages.。
At this point, you just need to manually update again to solve the problem.
Method for manually upgrading WordPress
Method 1: Download offline package for manual update
You can download the latest version of the WordPress installation package and manually update it yourself.
For downloading the latest version of the WordPress offline installation package, refer to this article:WordPress New Version Chinese Simplified Local Download
After downloading, the method for manually updating WordPress is::
- ①. Extract the downloaded installation package and delete the wp-content folder inside;
- ②. Use FTP to delete the wp-admin and wp-includes folders on the server;
- ③. Upload the remaining local files to the server, overwriting all files;
- ④. Log in to your WordPress website's Admin Dashboard to see if there is a request to update the database. If yes, update it; if not, the update is already complete.
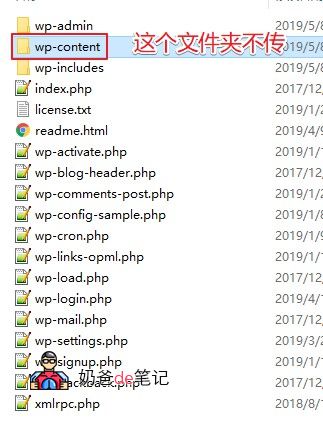
1. Extract the downloaded compressed package, then enter the WordPress folder, delete the wp-content folder。
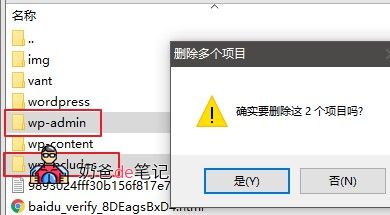
2. Then use FTP softwareconnect to the server, enter your website's root directory,delete the wp-admin and wp-includes folders。
3. Then upload all the remaining files to the server, overwriting the original files. Next, go to the WordPress Admin Dashboard. If a database update is required, you will be prompted; just click update. If no database update is needed, then this manual WordPress update is complete.
Method 2: Update using a Plugin
Due to poor network speed from domestic servers when accessing WordPress, automatic upgrades often fail. We can install the wp china yes plugin to help us achieve automatic WordPress upgrades.
First, download the plugin, then upload and install it via the WordPress admin panel's Plugins section. After installation, activate the plugin, then go to the update screen and click Update.
Additionally, if you need to install an older version of WordPress, you can useWP Downgrade。
Method 3: Update using Code + Compressed Package
This method comes from the Longxiao Tianxia blog. The specific usage is as follows:
- Download the WordPress installation package file and rename it to wordpress.zip
- Upload wordpress.zip to your website's root directory
- Copy the code below into the theme's functions file
- Click update in the Admin Dashboard
- After the update is complete, delete the function code
/**
 * 临时更改WordPress程序包地址以便WP在线更新成功 - 龙笑天下
 * https://www.ilxtx.com/how-to-update-wordpress-successfully.html
 */
function lxtx_site_transient_update_core( $value ){
    foreach ($value->updates as &$update) {
        $update->download = home_url( 'wordpress.zip' );
        $update->packages->full = home_url( 'wordpress.zip' );
    }
    return $value;
}
add_filter('site_transient_update_core', 'lxtx_site_transient_update_core');
If you don't know how to add code to the theme's functions file, you can use the following plugin for assistance.
Safe Method to Add Code to the functions.php File: Code Snippets
Method 4: Baota Panel Manual WordPress Update Tutorial
First, enter the Baota Panel backend (What to do if you forget the Baota Panel backend login URL)
From the left navigation bar, go to [Files] to enter your website root directory, then click Remote Download.download the new version of the WordPress installation package。
Just click OK.
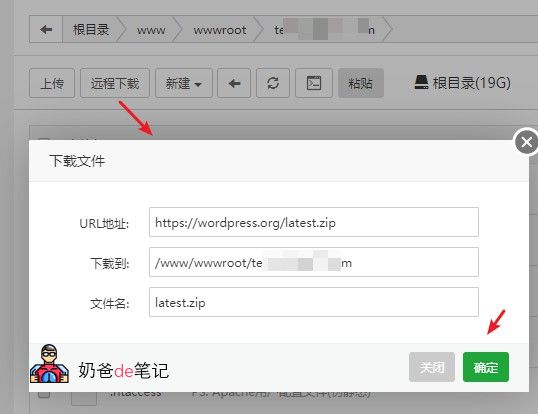
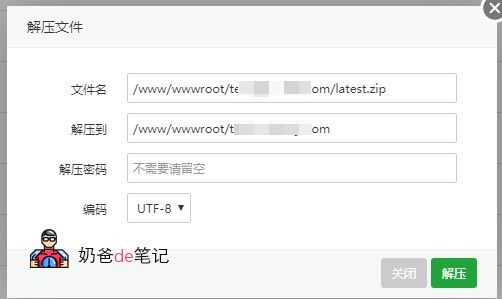
After the download is complete, click Extract on the downloaded compressed package.

Keep the extraction settings default and directly click the Extract button.
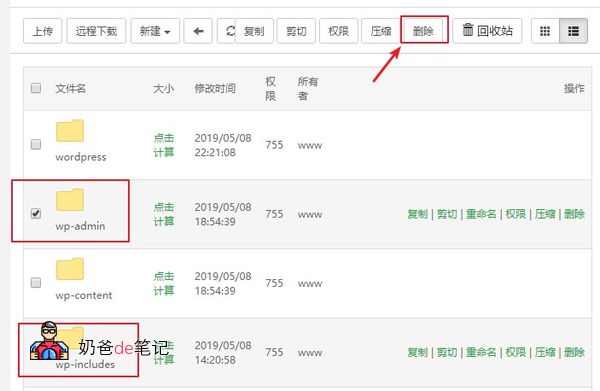
In the website's root directory, select the wp-admin and wp-includes folders, then delete them.
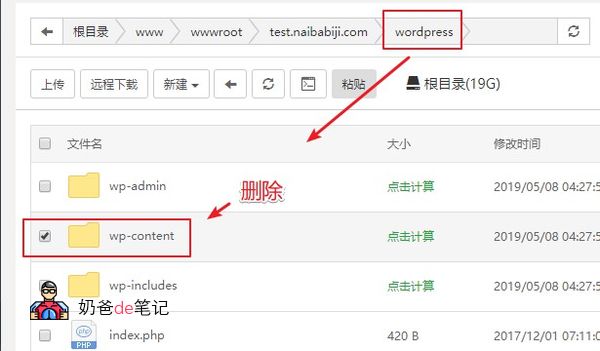
Click on the WordPreess folder to enter it, and delete the wp-content folder inside (actually, this folder contains just a few default themes and plugins; if you're not using the default theme, deleting this step doesn't matter much)
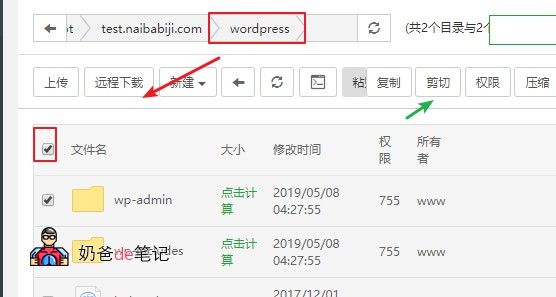
Then select allWordPressthe contents inside the folder, choose [Cut]
Return to your website's root directory and paste everything.
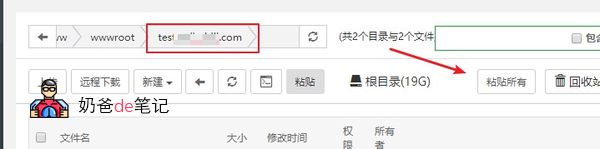
Then visit the Admin Dashboard to check. The tutorial for manually updating WordPress using Baota Panel is now complete.
Method 5: Manually Update WordPress via SSH Command
Operating via SSH commands is also simple, but beginners may not be very proficient and need to be cautious.
Below is a demonstration using the LNMP one-click package environment. The specific commands are as follows:
cd /home/wwwroot/website
Replace the 'website' above with your own website's folder.
wget https://wordpress.org/latest.zip
unzip latest.zip
rm -rf wp-admin
rm -rf wp-includes
cd wordpress
rm -rf wp-content
mv -f * ..
The above command upgrades WordPress. Just go to the backend to check the result.
However, you may encounter the issue shown in the image below during future use.
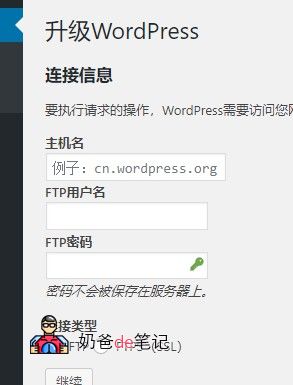
When automatically updating WordPress or installing plugins next time, you may see the prompt: „To perform the requested action, WordPress needs to access your web server. Please enter your FTP login credentials to continue. If you have forgotten your login credentials (such as username, password), please contact your web hosting provider.“
This is because when we upgraded WordPress via SSH, we used the root account, but the website runs under the www user. So we need to use the following command to change permissions. (The command follows the previous operation.)
cd ..
chomd -R 755 *
chown -R www:www *
Alright, this tutorial on manually upgrading WordPress concludes here. It should be the most comprehensive tutorial on WordPress upgrades available online.