Contact Form 7 is a well-known contact form plugin on WordPress. Almost every English corporate website has a Contact Me page, which uses plugins like Contact Form 7 to receive user inquiry emails.
Contact Form 7 can manage multiple contact forms, and you can customize the form and flexibly adjust email content. The form also supports AJAX, CAPTCHA, Akismet spam filtering, and more.
Next, Naiba Web Development will give you a detailed tutorial on using Contact Form 7, including the most critical email configuration part, to avoid the awkward situation where you run your website hard, get customer inquiries, but fail to receive the inquiry emails.
Without further ado, let's start the Contact Form 7 tutorial.
Install Contact Form 7
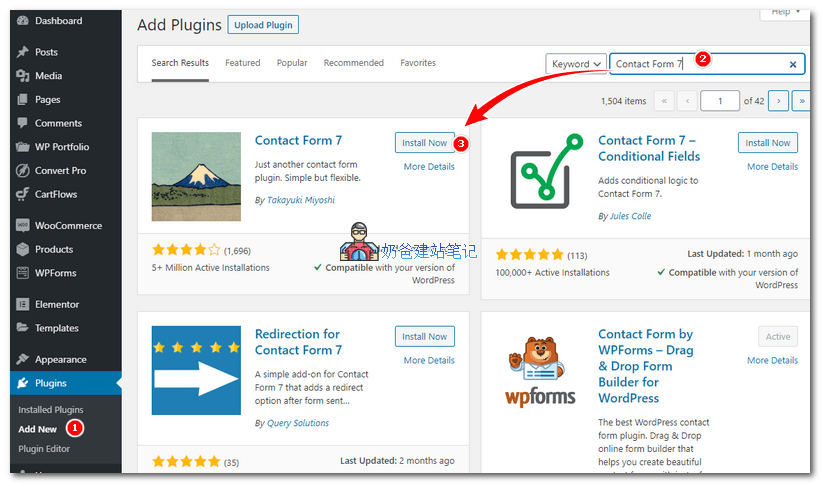
The method to install Contact Form 7 is very simple. Search for Contact Form 7 in the WordPress admin plugin section and install it, as shown in the figure below:
After installation, activate it.
Configure Contact Form 7
After activation, we enter the Contact Form 7 settings. You can directly click the settings button in the plugin list or click 'Contact' from the left menu to enter.
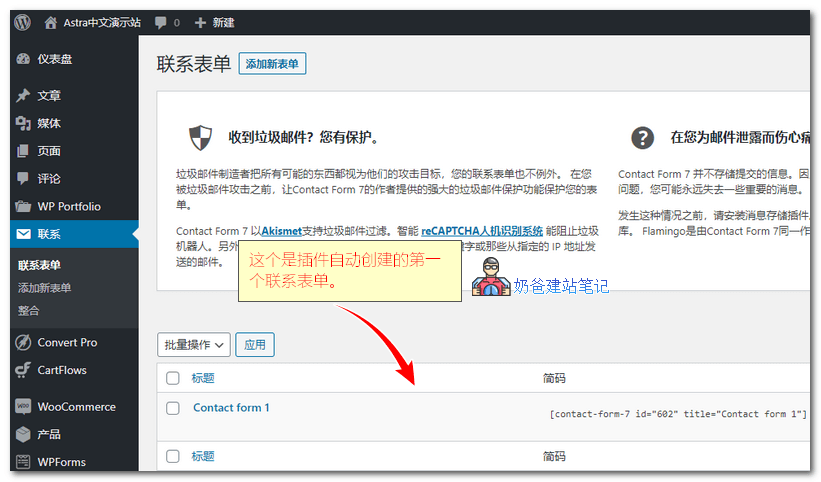
By default, a contact form named 'Contact form 1' is automatically created. We click the edit button.
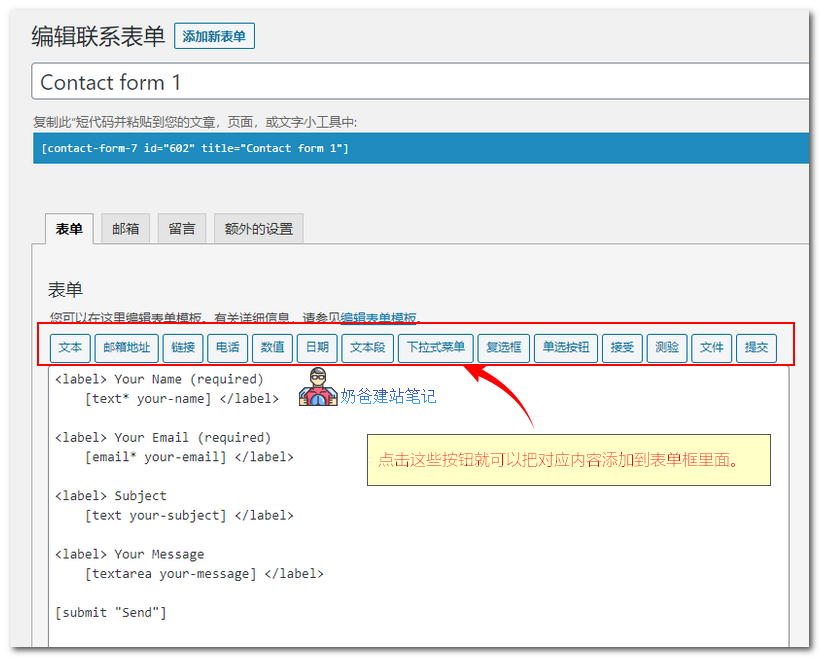
You can see that this default form has added for us
- Name Your Name
- Email Your Email
- Subject Subject
- Message Your Message
Fields marked with required are mandatory. You can modify the English descriptions yourself, but do not modify the content inside the square brackets.
If you want to add new features, you can directly click the buttons above to insert them.
For example, we add a CAPTCHA
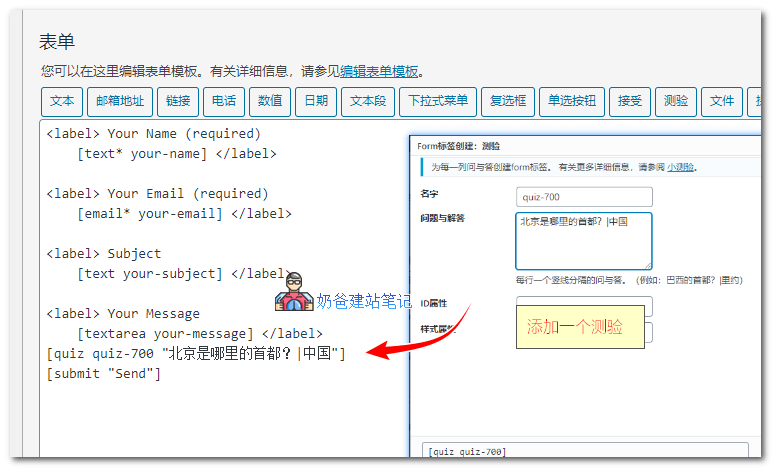
Click the Quiz button, enter the question and answer in the popup window, then insert it on the line above the submit button.
If the quiz cannot prevent spam, you can also integrate Akismet or reCAPTCHA human verification system, which is prompted in the plugin settings page.
However, it is recommended to use quiz to block bots. If the question is not answered correctly, the form will not be submitted to the database, which will not affect website performance.
Call the Contact Form 7 Form
After setting up the form, how do we display it on the frontend?
Simply copy the form shortcode and paste it into the post or page where you want it to appear.
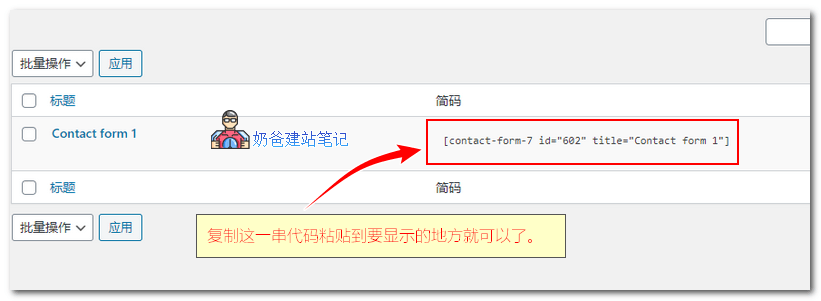
You can also add the shortcode to a widget. The final effect is as shown in the figure below:
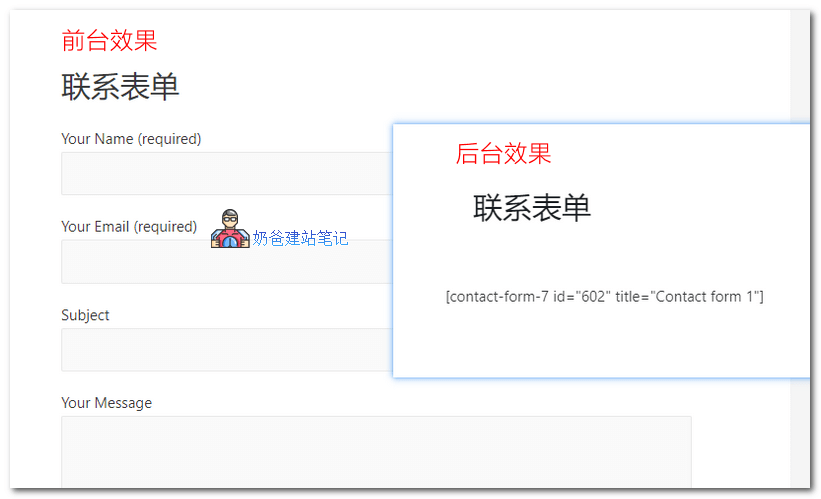
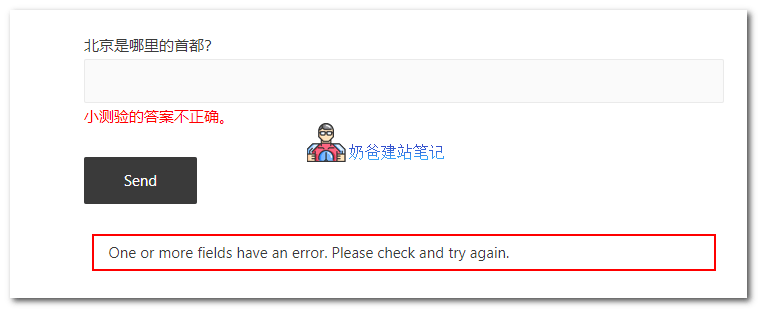
The quiz Q&A added above, if answered incorrectly, will not be submitted, which can block most bots.
If you are using a page builder plugin, it usually has a dedicated Contact Form 7 form widget with nicer styles, which you can also use.
If you want to customize the display style of Contact Form 7 yourself, you need to have some CSS skills.
Configure the Contact Form 7 Email System
If you are usingSiteGroundFor managed hosting, you can send emails directly without configuration.
If your server does not support direct email sending, or the built-in mail system fails, then we need to use third-party tools to implement SMTP sending.
There are many ways to configure SMTP. Naiba has written articles before, you can refer to the corresponding articles.
- Recommended WordPress SMTP Email Plugins I Have Used
- Tencent Enterprise Email Registration and SMTP Sending Setup Tutorial
- 6 Excellent Foreign SMTP Email Service Provider Platforms Recommended
Dual Local Backup Storage for Form Emails
In addition to sending emails, it is highly recommended to install a plugin that supports local storage of Contact Form 7 email information to avoid email sending failures or being marked as spam.
The official recommendation isFlamingo, after installation, you can see all form submissions via Contact Form 7 in the WordPress admin.
Any questions about Contact Form 7? You can contact Naiba for free consultation.