
In the QQ group of Naibabiji, a newbie girl bought a cloud virtual host for 28 yuan a year on Taobao, but didn't know how to install a WordPress site. So Naiba helped her install it and wrote this tutorial on using a Taobao-purchased virtual host to install a WordPress site.
Although Naiba strongly advises against using virtual hosts to build websites, especially one that costs only 28 yuan a year, can you believe its stability?
But since she already bought it, without further ado, let's start the main content of this article.
Virtual Host Configuration
 The girl purchased the three-mode host 100M plan, with a Taobao price of 28 yuan/year.
Independent web space 100M, database 20M. Other CPU, memory, and network are shared (meaning all websites on this server share these CPU, memory, and network resources).
What does 100M web space mean? After installing WordPress, only about 50M of space remains.
The 20M database should last until you run out of space.
Website Installation Process
1. Point the Domain to the Virtual Host
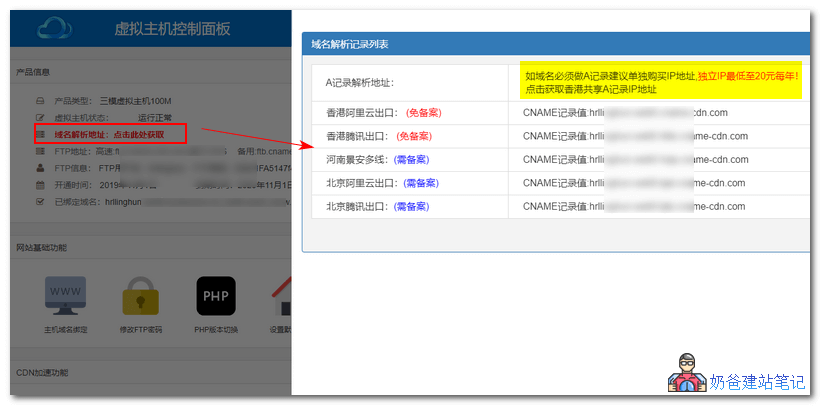
Log in to the virtual host management backend, click the domain resolution address, and a pop-up window tells Naiba that they recommend adding a CNAME record instead of using an A record. Also, if you want an independent IP address, you can purchase it separately, starting at 20 yuan/year.
So the method to resolve the domain is simple: go to your domain registration website, click domain resolution, add a resolution record, select CNAME, add two records, one for www and one for @, and fill in the CNAME record value provided by the virtual host.
2. Upload Website Files
从WordPress 5.2.4 New Version Simplified Chinese Local DownloadAfter downloading the WP installation file, unzip it.
Open the software XFTP6 (Download from here if you don't have it)
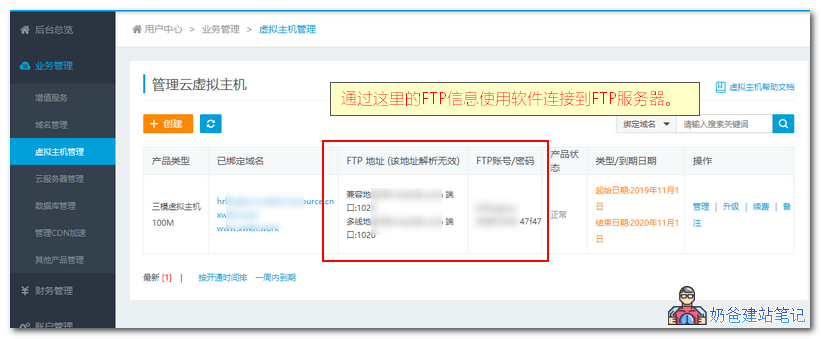
Then check the FTP account information provided by the hosting provider, as shown below:
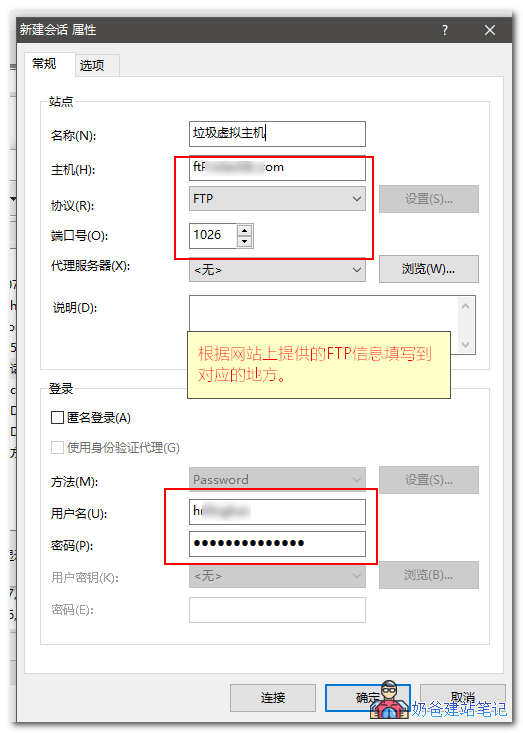
In XFTP6, click the New button, fill in the corresponding information, and connect, as shown below:
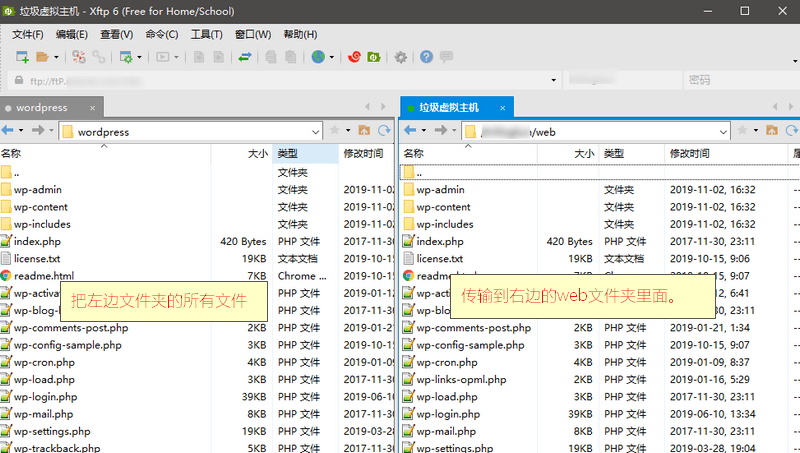
After successfully connecting to FTP, you will see something like the image below. On the left is your local computer's folder. Find the extracted WordPress folder.
On the right is the virtual host's folder, which contains 3 folders. We need to enter the web folder.
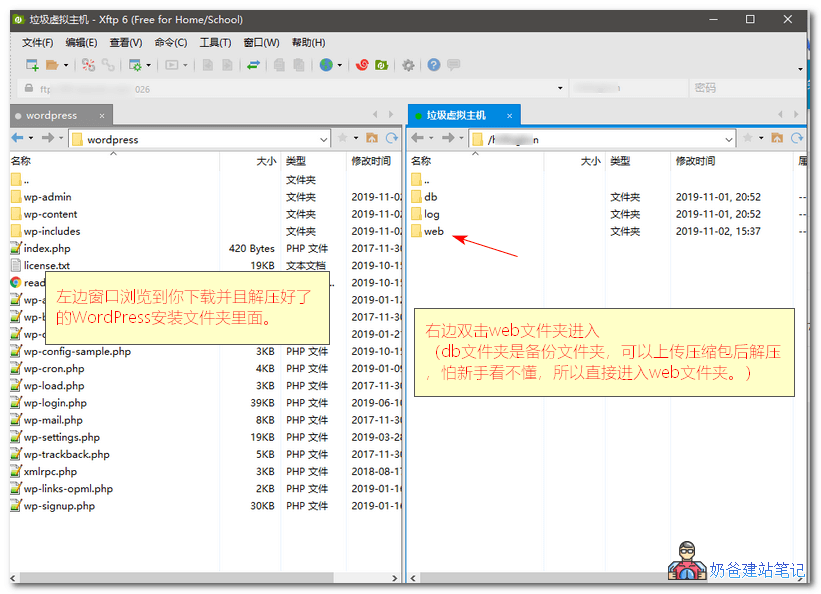
Delete all the default files inside the web folder, then transfer all the contents from the left WordPress folder to the virtual host (select all, right-click, and choose Transfer).
3. Install the WordPress Website
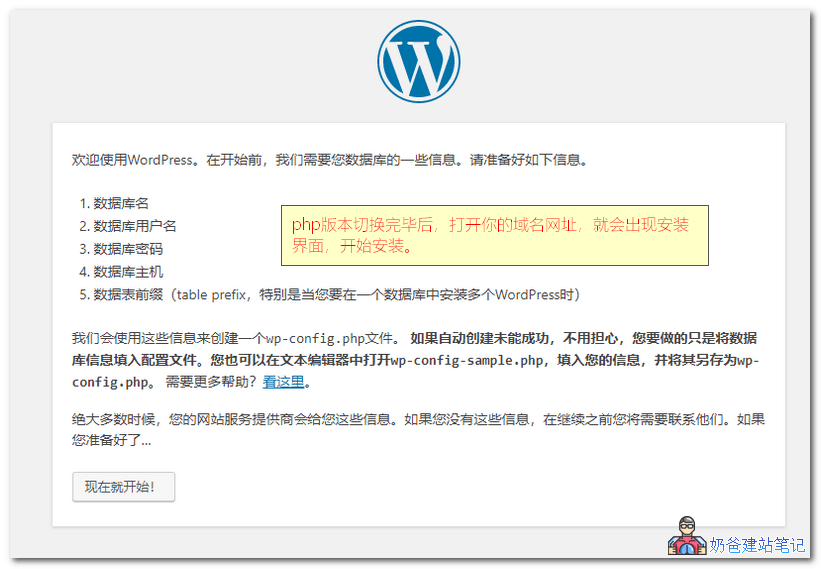
After all files are uploaded, open your domain in a browser and the installation interface will appear.
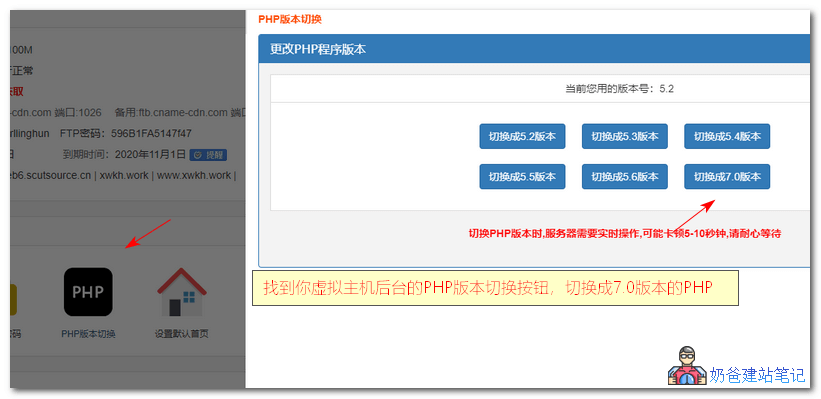
The default PHP version of this virtual host is relatively low. You need to switch the PHP version first.

Enter the virtual host management backend, find the PHP version switch, then switch to PHP 7.0, as shown in the figure below:
After the version switch is complete, open the website again to see the installation interface.
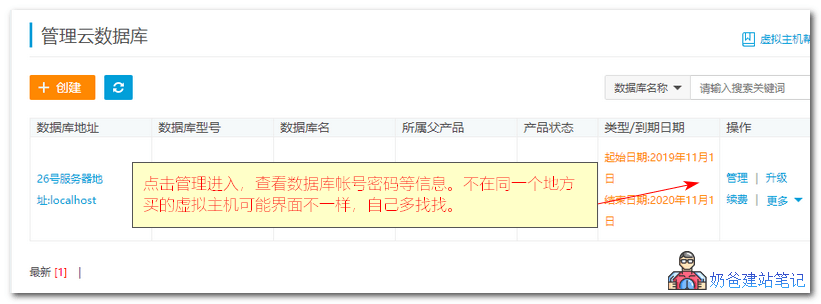
Find your database on the virtual host purchase website, click the database management button, and go in to view your database information.
Fill in the corresponding database information on the installation interface and submit.
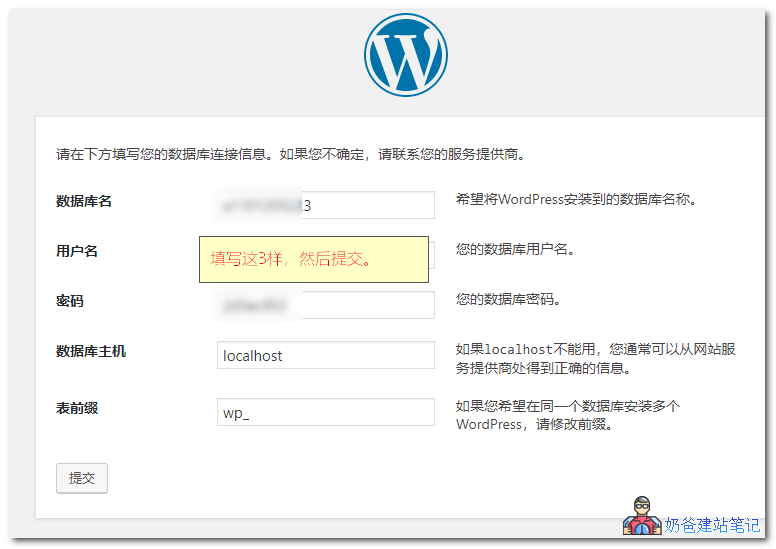
If an error occurs midway, try again (yes, an error occurred once midway, cheap virtual host).
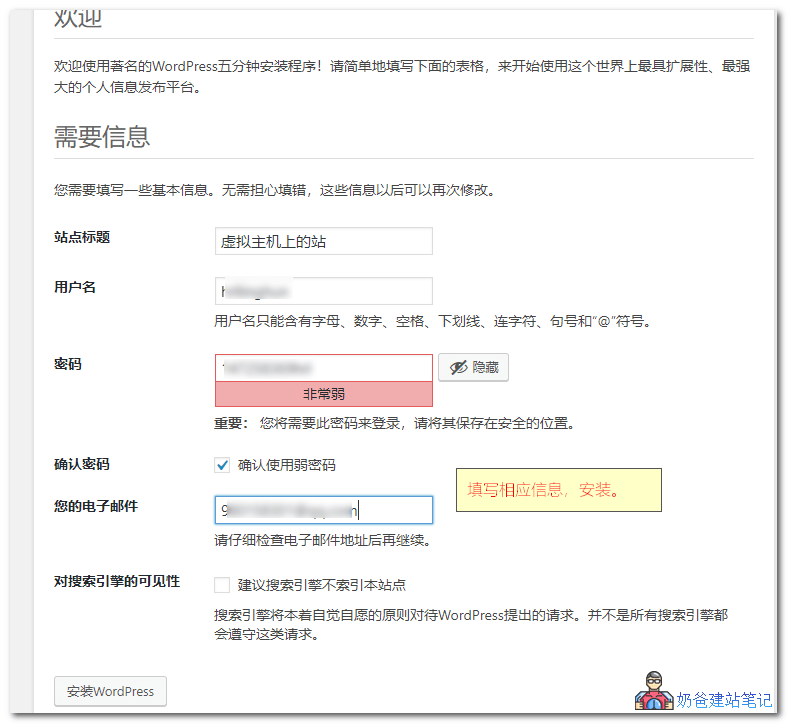
Finally, fill in your website title, account, and other information, then install WordPress.
4. Related Articles
After the website is installed, beginners might still be confused about what to do next. You can refer to the following articles.