
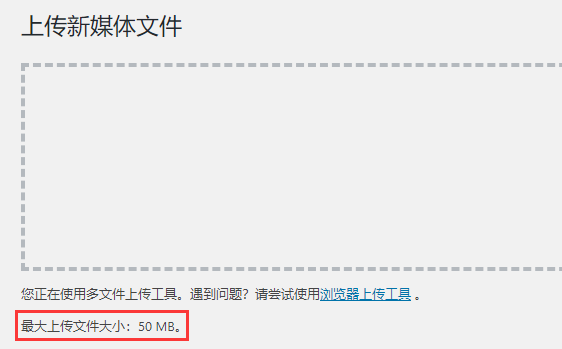
Hello everyone, I am Brother Lei Feng. Recently, Brother Lei Feng helped someone build a website that required uploading large video files. The upload limit for WordPress media files is typically within 50M, which is related to your installed environment configuration.
After searching for tutorials online, many are incorrect, and some even suggest adding @ini_set( ‚upload_max_size‘ , ‚64M‘ ); in functions.php, which is actually useless. The correct method is to modify the php.ini file + nginx/Apache configuration file. Below is how to modify it.
# Connect to the VPS server using SSH software
# Reference tutorial:#建站#Xshell 6 Basic Tutorial: Connecting to a VPS
If you are not comfortable modifying files directly via SSH, you can also usexftpor similar software to download the file to your local machine, modify it, and then upload it to the server to overwrite the original.
Modify upload file size in php.ini
Step 1:Enter php -i | grep ‚php.ini‘
Step 2:Copy the obtained php.ini path
Step 3:Enter sudo gedit /usr/local/php/etc/php.ini (or use your preferred editor, such as vim)
Step 4:Search for upload_max_filesize and change the following value to = 5000M (here, I changed it to 5G)
Step 5:Search for post_max_size and change the following value to = 5000M (here, I changed it to 5G)
Step 6:Save
Modify upload file size in nginx
Step 1:Enter sudo gedit /usr/local/nginx/conf/vhost/www.yourdomain.conf (or use your preferred editor, such as vim)
Note: Your website's configuration file may not be in the above location. Please adjust the command path according to your actual situation.
Step 2: In the opened .conf file, add the following content, then save it.
location ~ .php$ {
client_max_body_size 5000M;
}
Step 3: Reload the nginx configuration or restart nginx to make it effective.
Modify upload file size in apache
Open the .htaccess file in the website's root directory and add the following content:
php_value upload_max_filesize 5000M
php_value post_max_size 5000M
Then save it, and you will have successfully increased the attachment upload size.
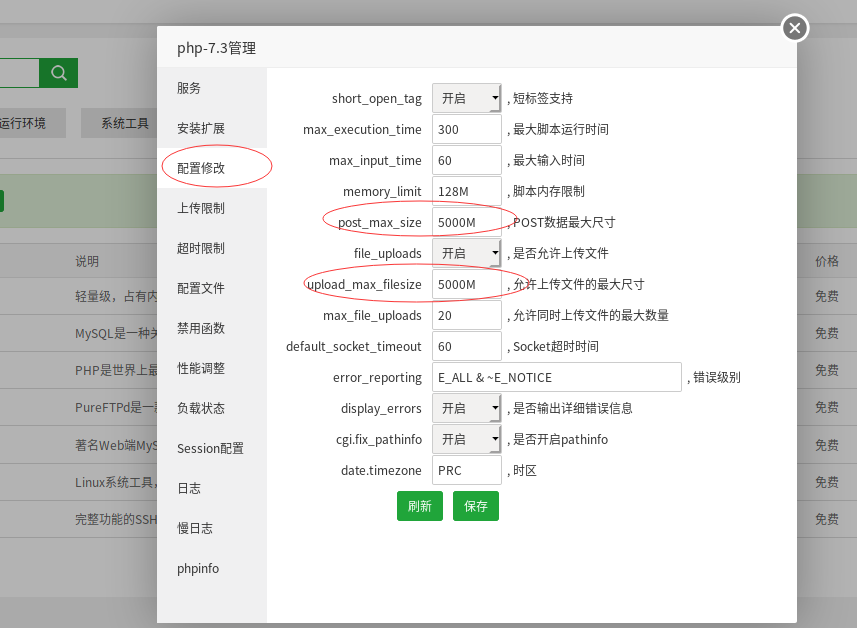
Increase/Modify WP attachment upload size in Baota Panel
# Baota Panel Installation Tutorial:Beginner-Friendly Baota Panel Illustrated Installation Tutorial for Building Your Own Website
Step 1:Software Store → Installed → php → Settings → Configuration Modification, change Post_max_size and upload_max_filesize to your desired upload capacity size.
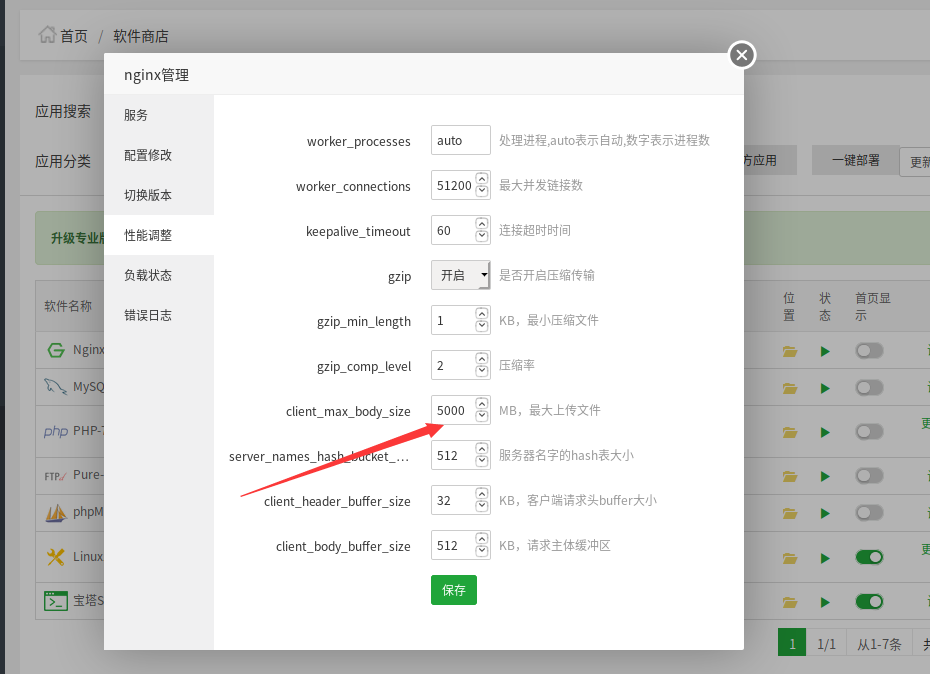
Step 2:Taking nginx as an example, open Software Store → Installed → nginx → Settings → Performance Tuning, find Client_max_body_size and change it to your desired upload capacity size.
Finally, you need to restart PHP and nginx/Apache for the changes to take effect.
Multisite WordPress Settings
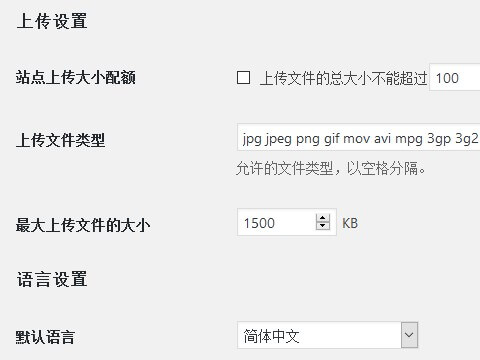
If you areWordPress MultisiteAfter the above settings, you also need to log in as a super admin → Settings → Network Settings, find „Upload Settings,“ and set the attachment size separately there.
That's the correct method to increase the upload attachment size in WordPress. If not necessary, it's better not to set the upload attachment size too large to avoid affecting performance due to uploading overly large attachments. For temporary upload needs, you can use FTP.