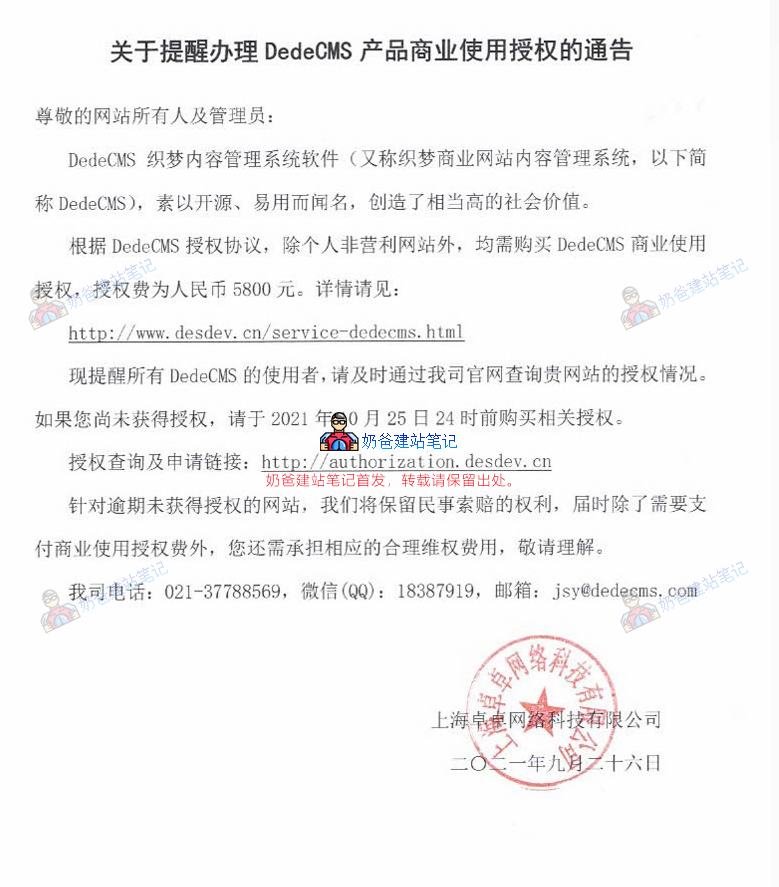
Dreamweaver DedeCMS is one of the domestic CMS systems used by many webmasters. Recently, the official DedeCMS issued a notice stating that commercial users need to purchase a license fee to use it, costing 5,800 yuan/year. Therefore, commercial webmasters are advised to switch to other free and open-source website building systems, such as WordPress, or purchase a commercial license, as copyright enforcement in China is becoming increasingly strict.
HereNaiba summarizes several methods for easily migrating DedeCMS to the WordPress system.。
Dreamweaver to WordPress Tutorial
Method 1 for Converting DedeCMS to WordPress: Export via RSS and Then Import
The principle of this method is very simple. First, export all content from the DedeCMS system in RSS format, then use WordPress's import function to import the RSS file, automatically copying the previous articles.
For details, you can refer to the following steps:
https://github.com/zyfcjtc/dedecms_to_wordpress
- In the dede folder (admin folder) of DedeCMS, find
makehtml_rss_action.phpfile, edit it, and locate the code:echo "完成所有文件更新!";
Add the following code below it:
echo "<a href='/rss.xml' target='_blank'>浏览…</a>";
Its function is to facilitate clicking to view the generation result after the rss.xml file is generated.
- In the
includefolder of DedeCMS, findarc.rssview.class.phpfile, edit it, and locate the code:$murl = $GLOBALS['cfg_cmspath']."/data/rss/".$this->TypeID.".xml";
Change it to:
$murl = $GLOBALS['cfg_cmspath']."/rss.xml";
Its function is to modify the generated
rss.xmlFile path, save the file in the website root directoryScroll down to find the following code and delete it:
$orwhere .= "And (arc.typeid in (".GetSonIds($this->TypeID,$this->TypeFields['channeltype']).") )";
Go to the Admin Dashboard -> Generate -> Update RSS File. Change the „Maximum Records per Single Category“ to the total number of articles on the entire site, then click „Start Update“. After the update is complete, a site-wide rss.xml file will be generated in the website root directory, accessible viahttp://网站域名/rss.xml. Note: If the generated rss.xml file has errors, find the rss.htm file in the plus folder within the templets folder under the root directory, edit it, and locate the code:
<description><![CDATA[[field:description function='html2text(@me)'/]]]></description>Change it to:
<description><![CDATA[[field:description/]]]></description>Note: WordPress uses UTF-8 encoding. If DedeCMS is not using UTF-8, please convert the encoding to UTF-8 before importing. How to check specifically: Find thecommon.inc.phpfile; the
$cfg_version = 'V57_UTF8_SP2';
$cfg_soft_lang = 'utf-8';
$cfg_soft_public = 'base';
inside will indicate the encoding.
Steps for Importing Dreamweaver (DedeCMS) RSS
- Importing basic data like Dreamweaver DedeCMS article titles into a WordPress site. Go to the WordPress Admin Dashboard (WP Admin) -> Tools -> Import -> RSS, and upload the generated site-wide Dreamweaver RSS file for import. The import process might time out; simply re-upload the RSS file, as it will not duplicate imports. Note: By modifying the
rss-import.phpinget_posts function, I achieved importing Dreamweaver article IDs into WordPress simultaneously. For details, please see here:https://github.com/zyfcjtc/dedecms_to_wordpress/blob/main/get_posts.php - Import full-text articles from DEDECMS to WordPress site. DEDECMS article data is stored in the 'body' field of the 'dede_addonarticle' database. Now, the content of the 'body' field needs to be transferred to the 'post_content' field of the 'wp_posts' database in WordPress. This conversion requires a bridge—the 'dede_archives' data table. That is, the content of 'body' from 'dede_addonarticle' is first transferred to 'dede_archives', and then from 'dede_archives' to 'post_content' in 'wp_posts'. The matching points for these two conversions are the article ID in DEDECMS and the article title already imported into WordPress (which is the same as the article title in DEDECMS). Specific steps are as follows: Enter phpMyAdmin, select the database used by the DEDECMS website, and execute the following SQL statement in the SQL input box to add a 'body' field to the 'dede_archives' table in the DEDECMS database.
ALTER TABLE dede_archives ADD body longtext NOT NULL
Then execute the following SQL statement to import the content of the 'body' field from the 'dede_addonarticle' data table into the 'body' field of 'dede_archives', using 'aid' from 'dede_addonarticle' and 'id' from 'dede_archives' as the matching points:
UPDATE dede_archives,dede_addonarticle
SET dede_archives.body = dede_addonarticle.body
WHERE dede_archives.id = dede_addonarticle.aid
Then use phpMyAdmin's export function to export the dede_archives data table, and then use the import function to import this data table into the database used by the WordPress website, so that it is in the same database as the wp_posts table.
Next, use SQL statements to import the body of dede_archives into the post_content of wp_posts.
Using article titles as the matching point (provided that all article titles are unique).Using ID as the matching point:UPDATE wp_posts,dede_archives SET wp_posts.post_content = dede_archives.body WHERE wp_posts.id = dede_archives.id
At this point, the article content conversion is complete!
Method 2 for Converting DedeCMS to WordPress: Database Conversion
The general idea is to import the DEDECMS database content into WordPress and, through some database command operations, transform the original DEDECMS database into a WordPress one. Tutorials for this method online are relatively old and not recommended to try.
Method 3 for Converting DedeCMS to WordPress: Copying or Crawling
This method is relatively recommended by Naiba for everyone to operate because it is the safest, but if the original website has a large amount of data, it can be very time-consuming.
Specific steps:
- First, set up a temporary WordPress website. Tutorial reference:WordPress Installation Tutorial。
- In the WordPress Admin Dashboard, under Posts > Categories, set up the categories from the original website (DEDECMS).
- Manually copy articles one by one or use scraping software (there are shops on Taobao that help write scraping rules) to scrape all articles over.
- Use builders like Elementor to design the homepage effect of the website.
- Switch the domain to the original DEDECMS website's domain.
- Set up pseudo-static and 301 redirect rules to allow redirection from the old website's URLs to the new ones, reducing SEO impact.
Method 4 for Converting DedeCMS to WordPress: PHP Migration Script
This method is a PHP script shared by '我爱水煮鱼' and requires SSH access to your own server. The specific method is as follows:
1. Download the PHP script file.
2. Open the script file and edit the content shown in the image below.
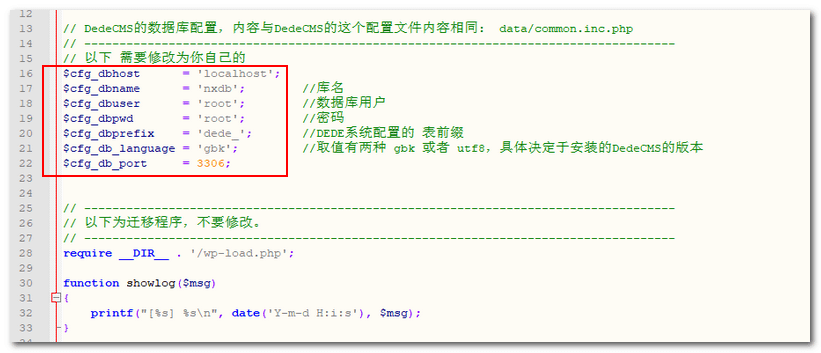
DEDECMS data configuration parameters can be obtained from DEDECMS's 'data/common.inc.php'.
3. Upload the modified PHP file to the root directory of a freshly installed WordPress website.
4. Use SSH commands to run it.php dedecms_to_wordpress.php
Using SSH requires having your own server or VPS; Shared Hosting does not have it. If you don't have a VPS, refer to:Recommendations for stable, reliable, and cost-effective VPS.
If you have a VPS but don't know how to use SSH, refer to:Tutorial on Connecting to VPS Using Xshell 6_How to Log into VPS from a Computer
After running, just wait for it to execute automatically.
Important Considerations After Converting Dreamweaver (DedeCMS) to WordPress
1. Pay attention to setting up pseudo-static and 301 redirects.
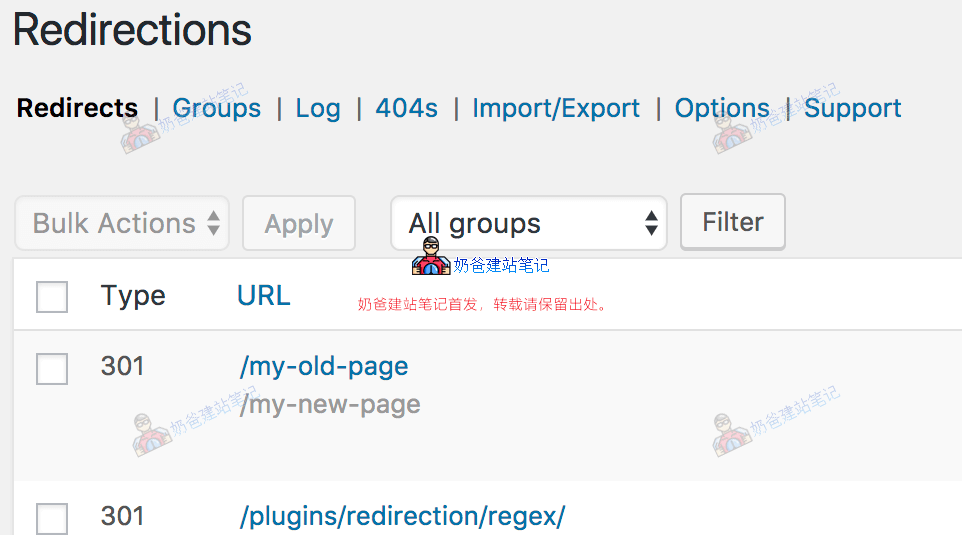
Although both DedeCMS and WordPress are PHP programs, their pseudo-static rules are different. So after migrating from DedeCMS to WordPress, the old DedeCMS article page links will report errors. This requires creating a 301 redirect rule to redirect the old DedeCMS article links to the new WordPress website links.
For WordPress 301 redirects, you can also use plugins to help, for example,Redirection
2. The website pages need to be redesigned.
Regardless of which method you use to migrate DEDECMS to WordPress, the website's page design will change. Therefore, after copying all the website articles, you also need to design the website pages from scratch. For beginners, it is recommended to useElementor builderfor operation, or directly pay someone to design it for you, which is a more reliable method.
Tutorial for Converting DedeCMS to Xunrui CMS
Xunrui CMS is also a domestic CMS system. Its official website states that it is released under the MIT open-source license, is free, and does not restrict commercial use. Therefore, webmasters who are not accustomed to WordPress can also consider it.
The Xunrui CMS framework is released under the MIT open-source license, free and without restrictions on commercial use. It is a free and open-source product that allows developers to freely modify copyright information in both the frontend and backend interfaces, including use, copying, modification, merging, publication, distribution, re-licensing, or sale.
1. Go to the official Xunrui CMS website to download the source code and install it on the web server.
2. Install the Dreamweaver DEDECMS data conversion extension in the backend.

3. Fill in the database information of the Dreamweaver website and proceed with the conversion.
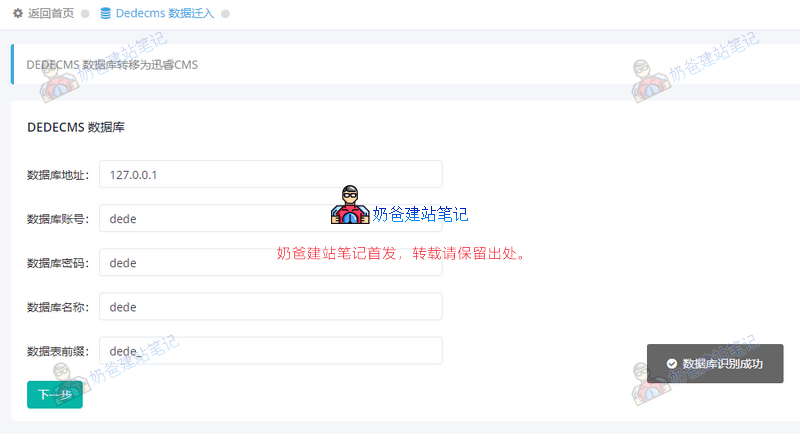
Once the database is successfully identified, follow the steps. After the conversion is complete, redesign the homepage and other pages, and then publish.