
TablePress is a Plugin that allows you to add tables to WordPress. In the article „Several Methods to Add Tables to WordPress", this Plugin was introduced. This article will introduce its specific usage methods.
Plugin Installation
First, we can install it via the WordPress Admin Dashboard, Plugins, Add New, and search for „TablePress“.
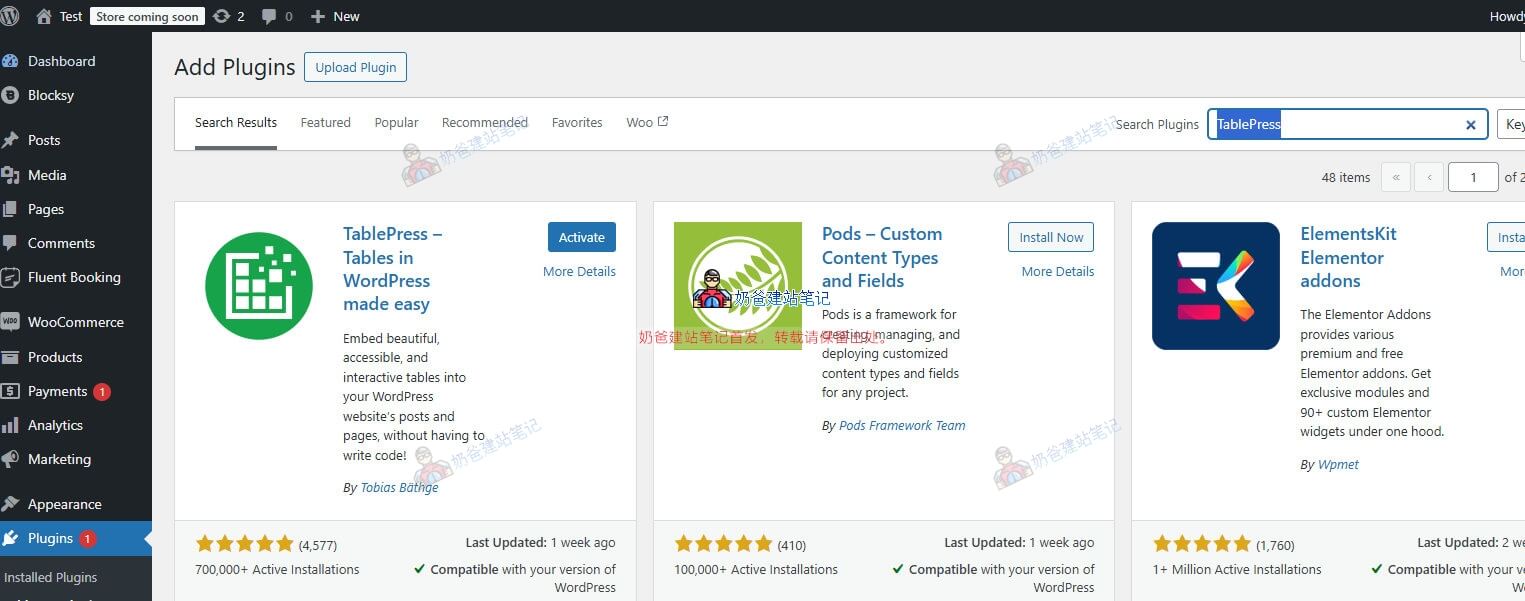
After installation, choose to activate the Plugin.
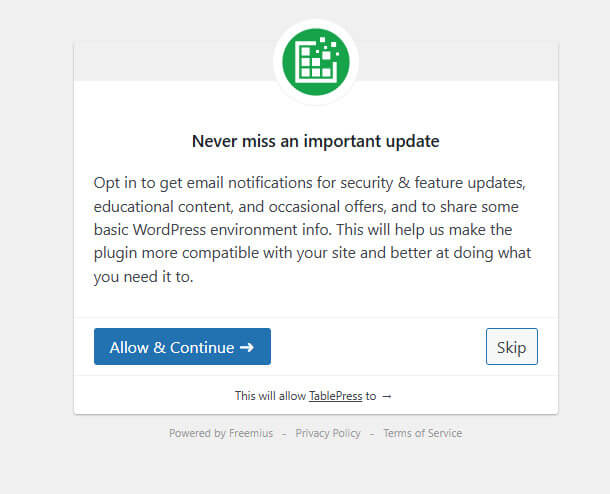
Next, for the prompt shown in the image above, you can either click the first button to agree or simply skip it.
Create a Table
Then, let's create our first table content.
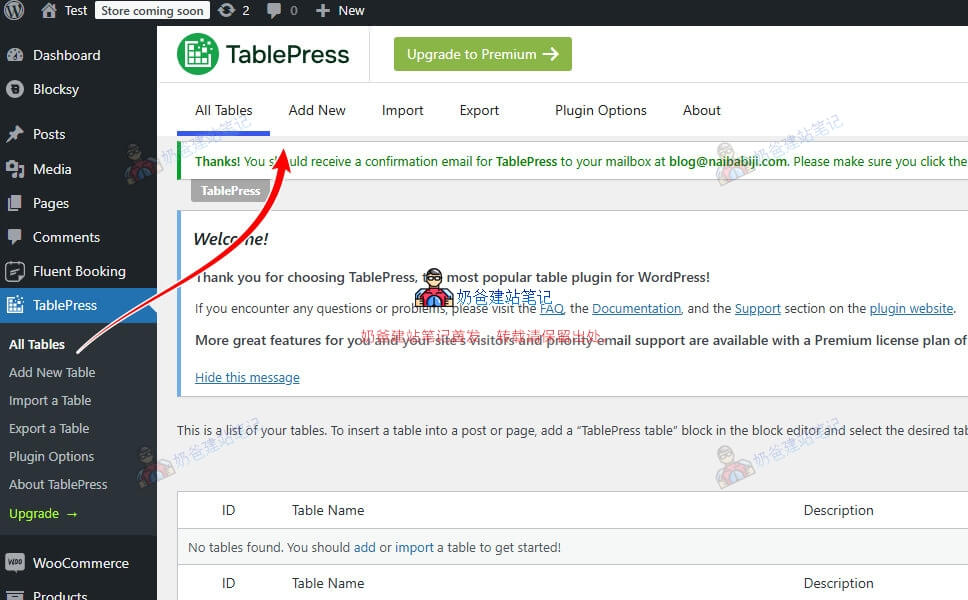
In the TablePress interface, select Add New to add a new table.
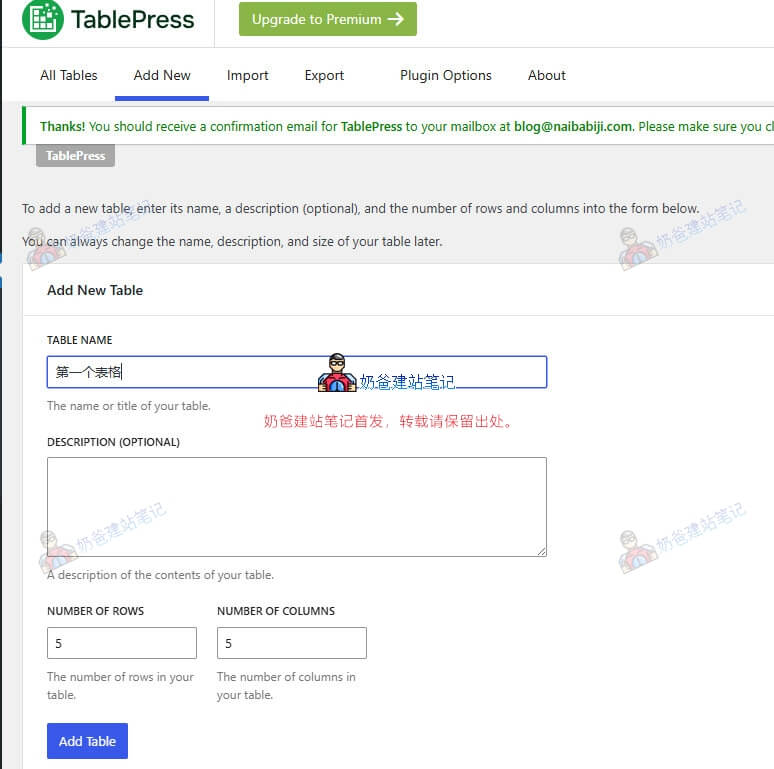
Enter your table name in the Table Name field. The DESCRIPTION below is optional content to fill in.
The NUMBER OF ROWS and COLUMNS below represent the number of rows and columns in the table, respectively.
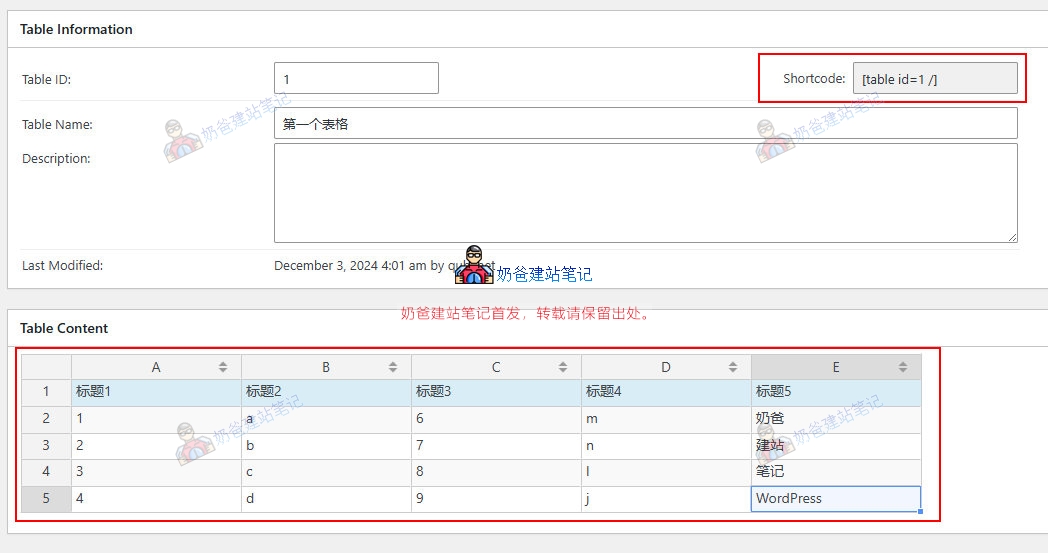
Then, you can enter your table content in the displayed table. The Shortcode in the upper right corner is the shortcode, which we need to use to insert into the Post.
After all settings are complete, click Save, and the creation of the first table is finished.
Insert Table into Post
Next, we insert this table into the Post.
If you are using the Gutenberg editor, then click the plus sign, search for „table“, and select TablePress.
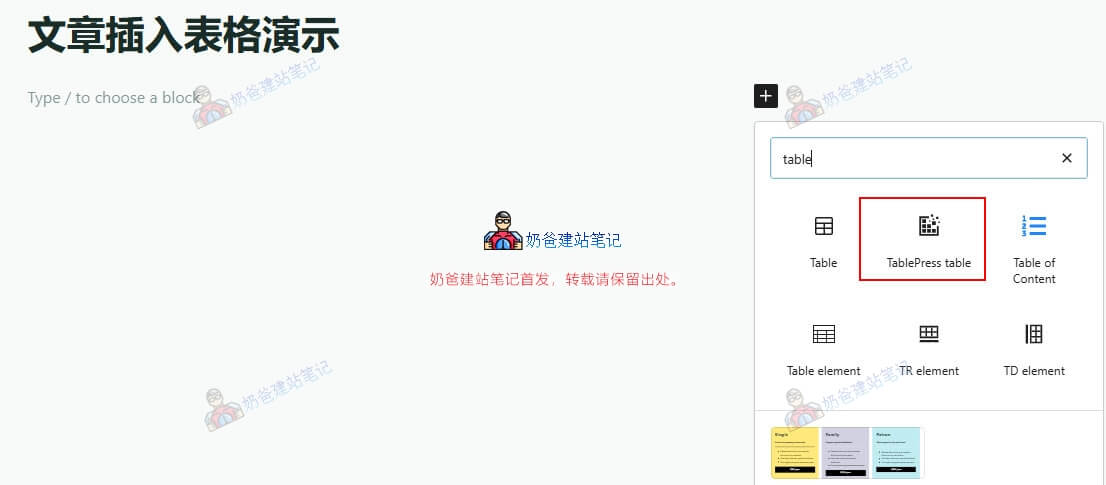
After insertion, select the specific table you need to insert on the right side.
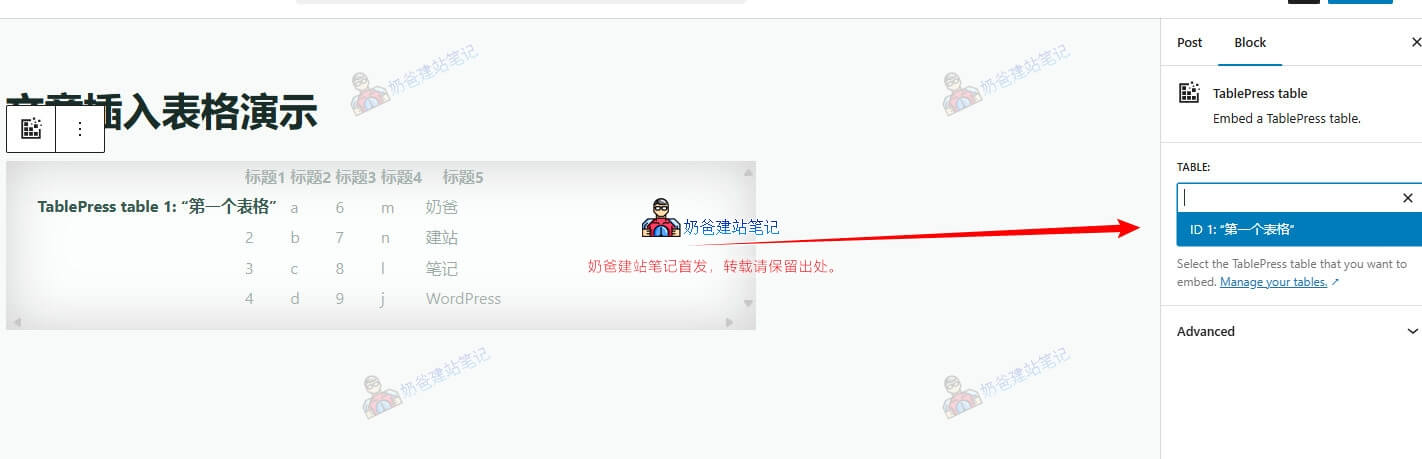
After publishing, the table we inserted can be seen on the website.
If you are using the Classic Editor, then you first need to obtain the table's shortcode, as shown in the image below:
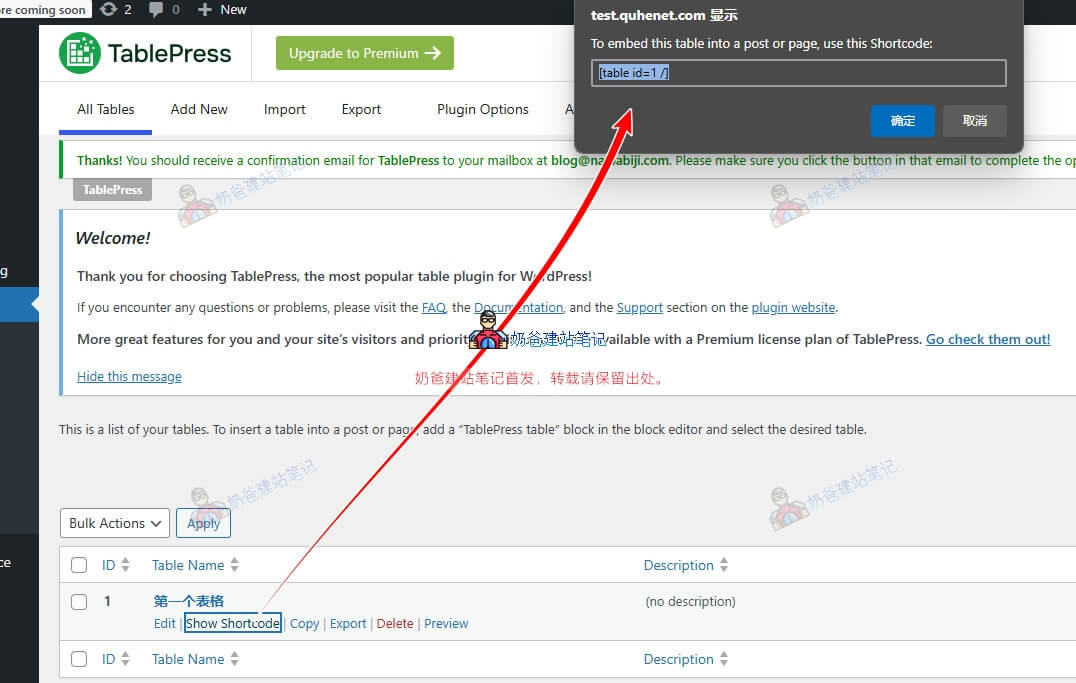
In the table list interface, select Show Shortcode, and then copy the shortcode.
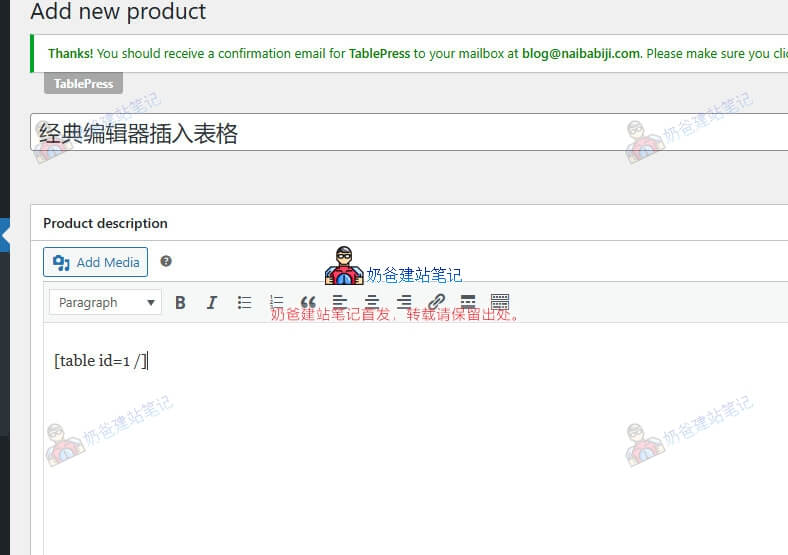
Return to the editor interface, directly paste the copied shortcode, and after publishing, you can see the inserted table information.
The above is the detailed usage tutorial for TablePress.