
More and more people are switching to using WordPress and WooCommerce to build foreign trade websites to sell their products. For most B2C users, there are usually dozens or hundreds of products that need to be added to the website. Manually adding products one by one from the backend is very time-consuming, and overseas servers often have slower network speeds. Here, Naiba teaches you how toUse WooCommerce's bulk upload product feature to quickly add products.。
Steps for WooCommerce Bulk Product Upload
Step 1: Create a sample product
To bulk upload products, we first need to create a sample product so you know what information needs to be filled in bulk.
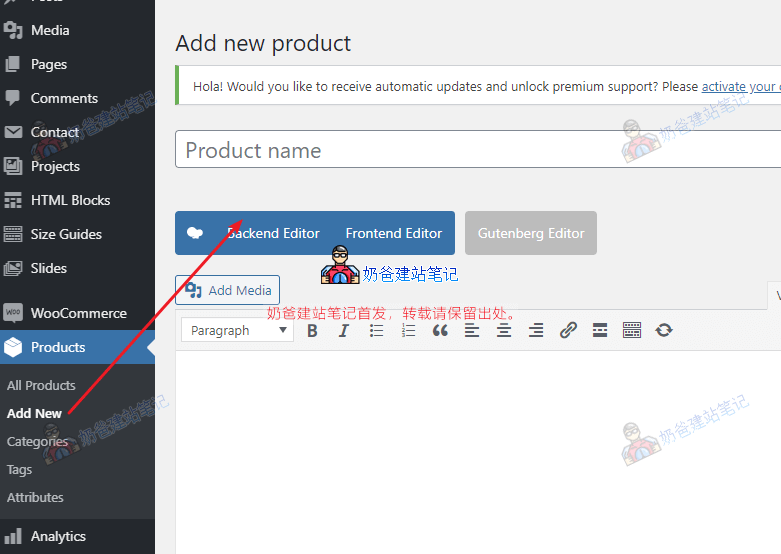
From the backend, go to Products > Add Product, and fill in all your product information, including product title, product short description, product featured image, product gallery, product categories, and any other product details you want to display on your website.
Step 2: Export the product information as a CSV file
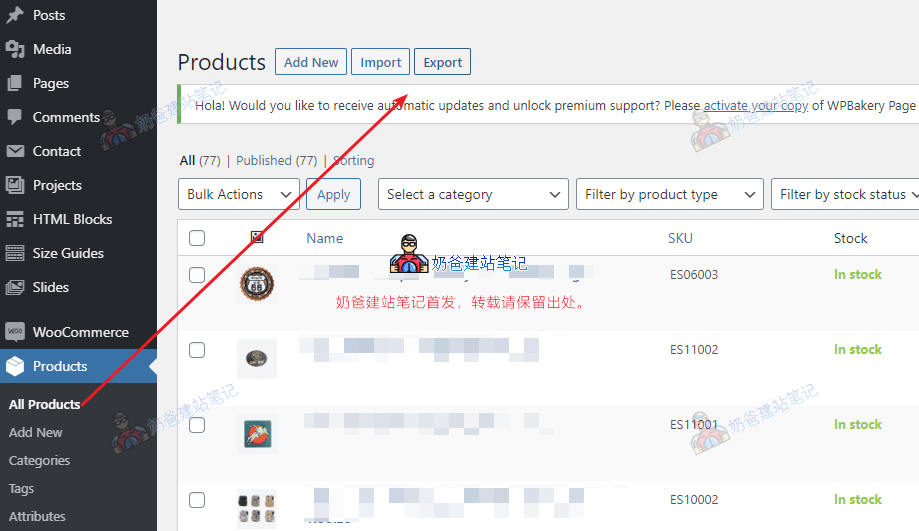
Go to Products, All Products, then click Export.
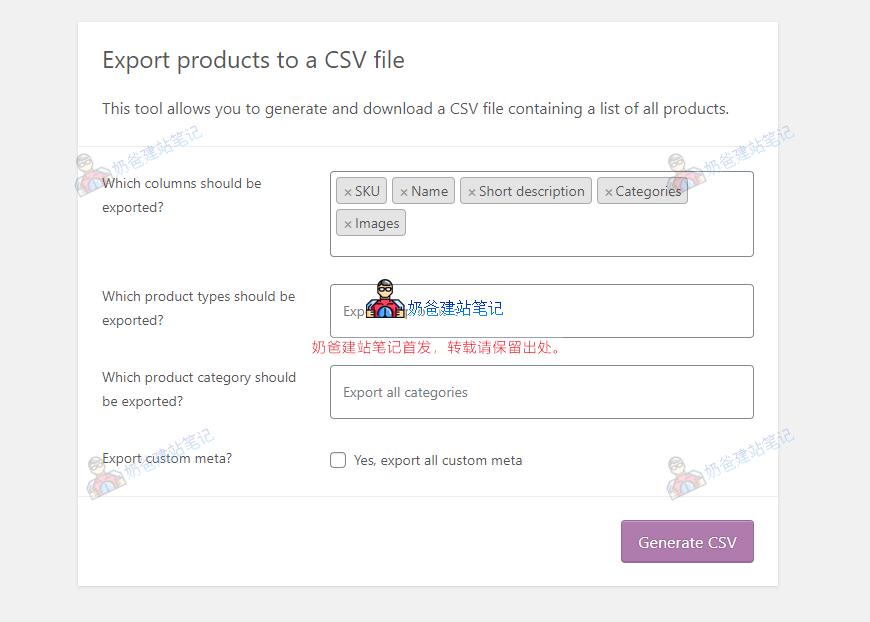
Then, on the export interface, select the content you need to export. SKU is recommended to be exported because in most cases, product SKUs are unique and convenient for identifying products.
After selection, click Generate CSV file, and all the selected data will be downloaded to a local CSV file.
Step 3: Complete the CSV product file
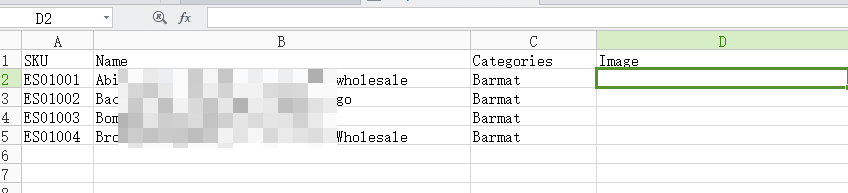
If your backend is in English, the exported CSV will also be in English; if in Chinese, it will be in Chinese. It doesn't affect.
In the image above, you can see that Naiba only exported SKU, Name, Categories, and Image.
Now, just fill in all the product information you need to batch upload.
If a product has multiple images, separate each image with an English comma. The image can be a server URL or an external URL.
If there are multiple categories, also separate them with English commas. For subcategories, fill in the format „Parent Category > Subcategory“.
After completing the CSV table file, save it.
Step 4: Bulk import via WordPress Admin Dashboard
Go to the WordPress Admin Dashboard, find Products, then select All Products, and choose Import.
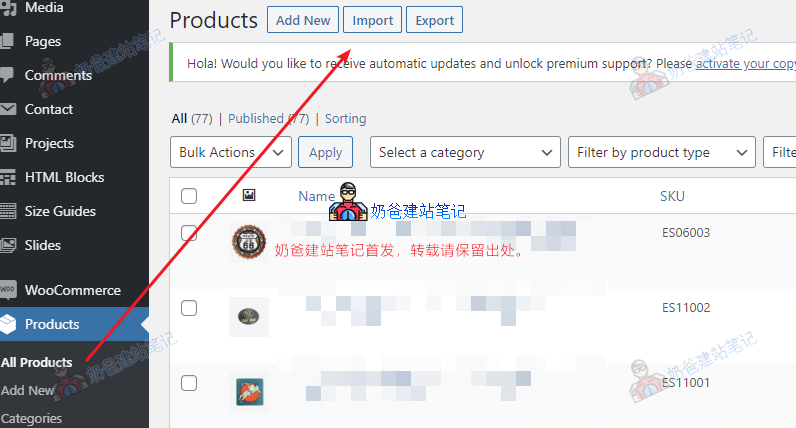
After running the import interface, select the CSV file you just saved, then click Continue.
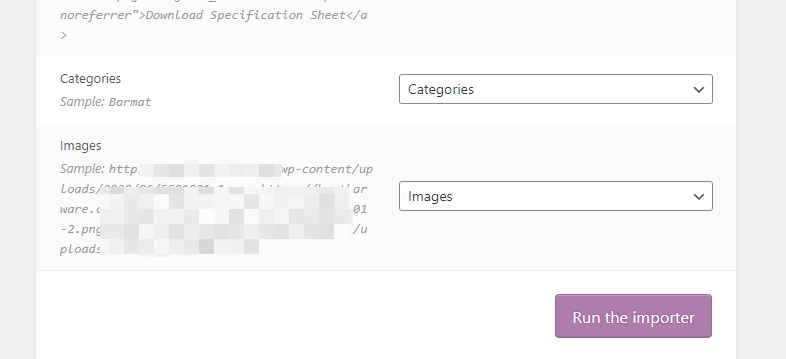
Next, a parameter mapping interface will appear. If you followed the method in this article, all parameters will be directly matched after uploading the CSV file, so you don't need to make any selections. Just click Start Import.
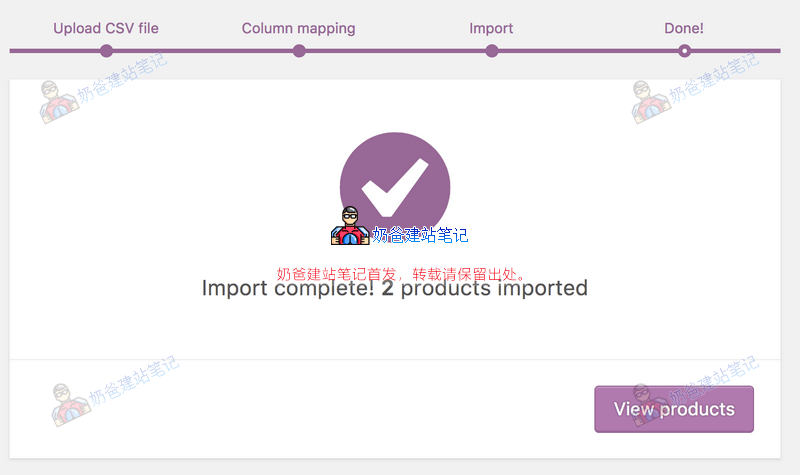
This completes the batch import of products. If you need to modify some product information later, you can simply go to the website backend and click Edit Product. This is much more efficient than manually uploading products one by one.
WooCommerce Bulk Add Product Categories
If you want to bulk add product categories to WooCommerce, you can do so by installing the Bulk WooCommerce Category Creator plugin. Simply search for Bulk WooCommerce Category Creator in your site backend, then install and activate it. The plugin's introduction page includes a video tutorial; those who are unfamiliar can follow the tutorial to operate.
The above is the method for bulk uploading products in WooCommerce. If you still have questions, you can communicate with Naiba; contact information is at the bottom of the website.
Other WooCommerce Related Tutorials
- WooCommerce Batch Import/Export Plugin Woo Import Export
- Method for Batch Ordering Products in WooCommerce
- For more WooCommerce tips and resources, please check:WooCommerce Tutorials