
How to add products after WooCommerce setup? Some foreign trade website building beginners may not be familiar with it, so Naiba teaches you how to add products to the WooCommerce store.
With WooCommerce, anyone can sell or display products on their own website. If you haven't installed WooCommerce yet, first seethis tutorialto learn.
How to Add Products in WooCommerce
After installing WooCommerce, go to the WP Admin Dashboard. You can find WooCommerce in the left menu bar, then select Add New under Products to add a new product.
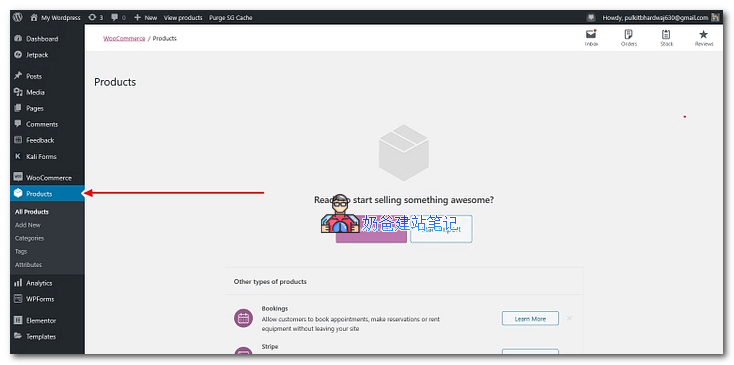
After clicking, you will see an interface similar to publishing a Post.
1. Add Product Title and Description
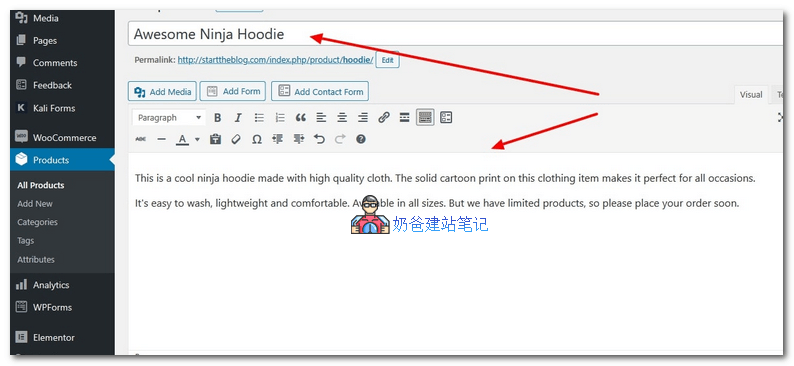
Fill in the product title and product description in the title and text box.
At the bottom of the page, there is also a short product description area, which you can fill in if needed.
When filling in the product title and description, you can appropriately include product keywords to facilitateGoogle SEO optimization。
2. Select Product Type
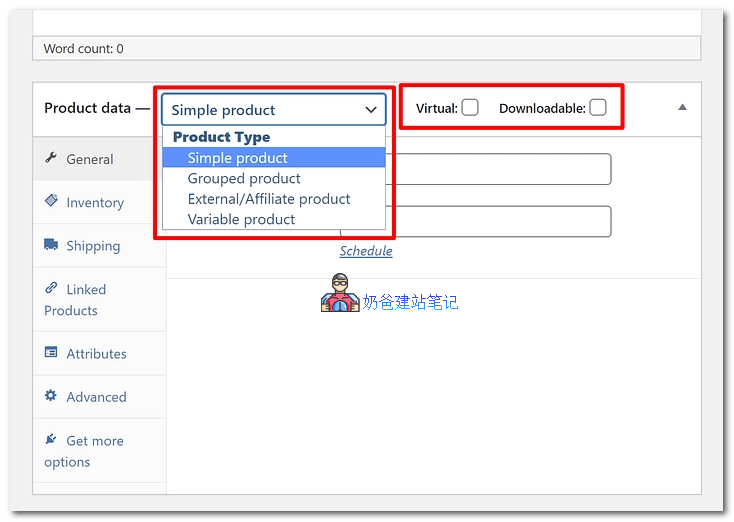
Below the text box, you will see the Product Data section, where you can set some parameters for the product.
WooCommerce by default supports 4 product types:
- Simple Product
- Grouped Product
- External/Affiliate Product
- Variable Product
If a product has multiple variations such as color or size, you can use a Variable Product. Previous tutorial:Tutorial on Adding Variable Products with Optional Color Packages in WooCommerce
It also includes two options: Virtual Product and Downloadable Product. Usually, when we add a product, we directly add a Simple Product.
3. Fill in Basic Product Information
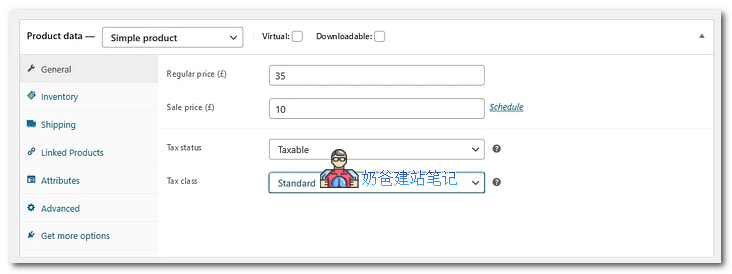
Product Data includes the following tabs. Fill them out according to your actual situation.
- General
- Inventory
- Shipping
- Linked Products
- Attributes
- Advanced
If you have installed some WooCommerce plugins, you may get more tabs here.
Linked Products can be used for product association, enabling cross-selling and recommendations.
4. Fill in Product Short Description
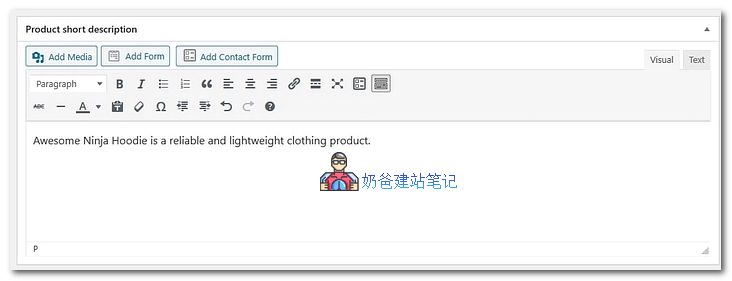
This description will appear in a prominent place at the very beginning of the product, so you can make good use of this feature. Also, Google search engine will crawl the information here for display (not 100% guaranteed).
5. Select Categories and Add Images
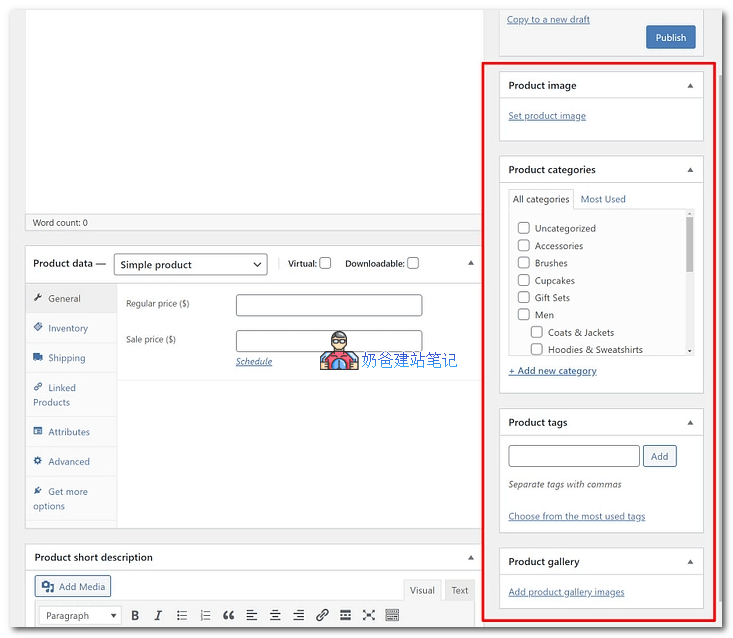
On the right side of the add product page, you can select product categories, product tags, featured images, and product galleries.
When adding product images, it is recommended to unify the product image size across the entire website for a better front-end display.
6. Click the Publish Button
After entering all the content, you can click the Publish button, and a product is added.
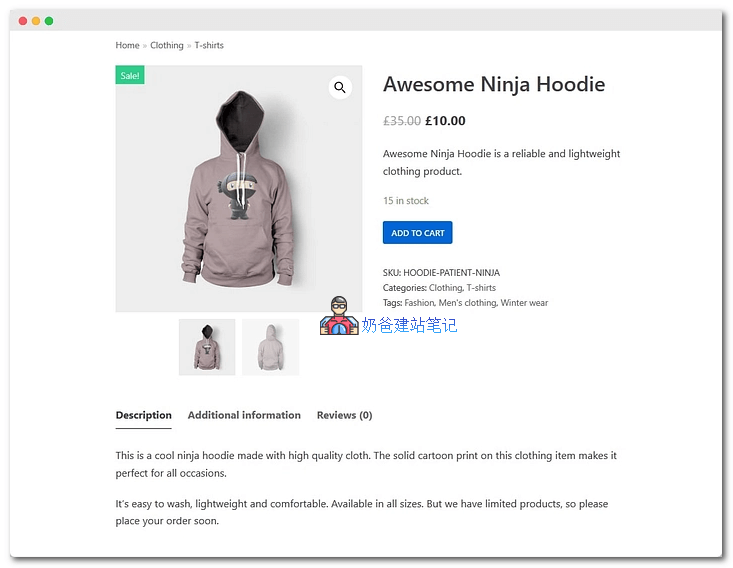
Visit the website front-end to see a basic WooCommerce product display page. The effect of this page will vary depending on the WP theme you choose.
Naiba previously shared:10 Best WordPress WooCommerce Theme Recommendations