The Menu is a very important feature in WordPress. It helps users customize the website's navigation menu, achieving better user experience and website navigation. In this article, Naiba will teach you how to customize WordPress menus and how to create mega menus.
Modifying WordPress Navigation Menu
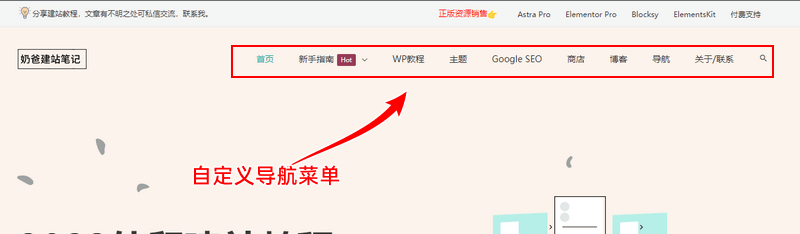
Modifying the navigation menu of a WordPress website is very simple. Just log in to the WordPress Admin Dashboard, find Appearance, then Menus.
Tip: If you cannot find the Menu entry under Appearance in the Admin Dashboard, it means the theme you have activated does not support setting menus in this way.
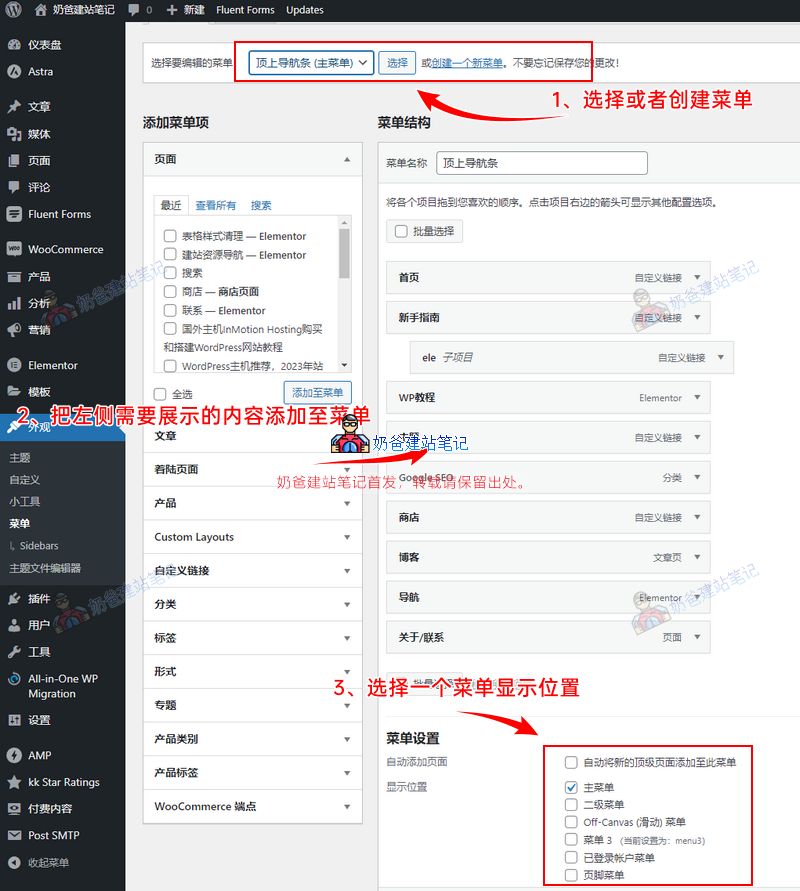
- Select a menu, or create a new one.
- Add the content you want to display from the left side to the menu. The amount of content that appears on the left may vary depending on the plugins and themes you have installed.
- For the menu items added on the right, you can hold and drag to reorder them.
- Choose a display location, then save. The number of menu locations also varies depending on the theme.
Using Mega Menu
Mega Menu, also known as Mega Menu, requires theme support or additional plugin installation to be enabled.
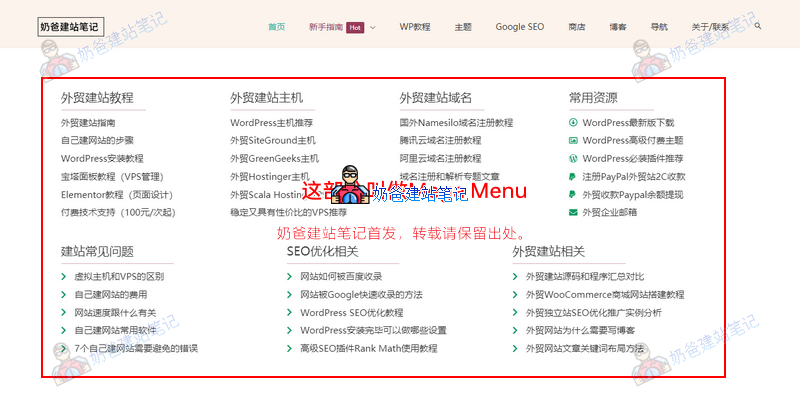
Like the one used by NaibabijiAstra Protheme, which supports Mega Menu functionality by default, so you can simply enable it in the settings to use it.
If your theme does not support Mega Menu, then you need to install an additional plugin to enable Mega Menu. If you are using the Elementor builder, you can install a free ElementsKit plugin to use Mega Menu.
The above is an introduction to WordPress menus by Naiba. If you have any questions, feel free to leave a comment for discussion.