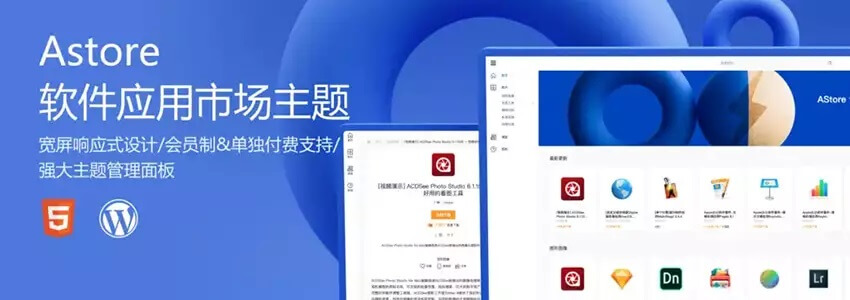
Previously, Naiba shareda tutorial on building a paid resource download site using Storeys Pro. Now, Lightning Blog has launched a new version of the paid resource site theme specifically for software app stores, giving everyone another option for resource site themes. In this article, Naiba will introduce how to use WordPress and the Astore theme to build a paid application resource download website.
Prerequisites for Building a Paid Application Resource Site
1. A properly installed WordPress website. If not installed yet, you can refer toWordPress TutorialsFirst, install one.
2. Purchase the Astore theme.For theme introduction and demo, click here。
Detailed Building Process
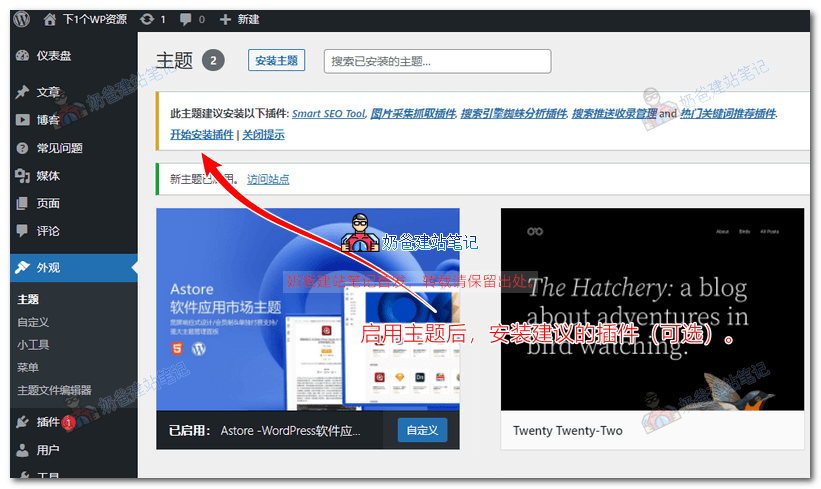
1. After downloading the Astore installation file, upload and install it via the backend theme menu, then activate it.
Then you will be prompted to install some plugins. Choose whether to install them based on your actual situation.
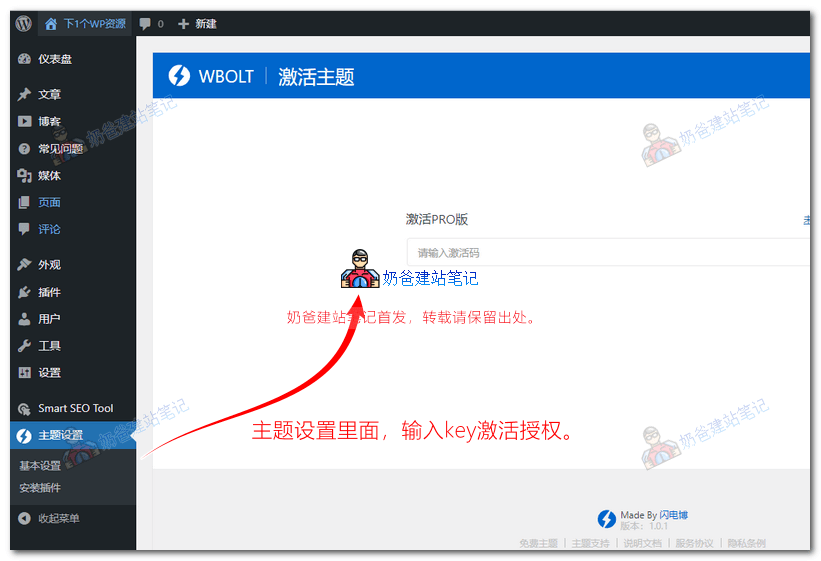
2. Click on Theme Settings, then enter the activation code to activate it.
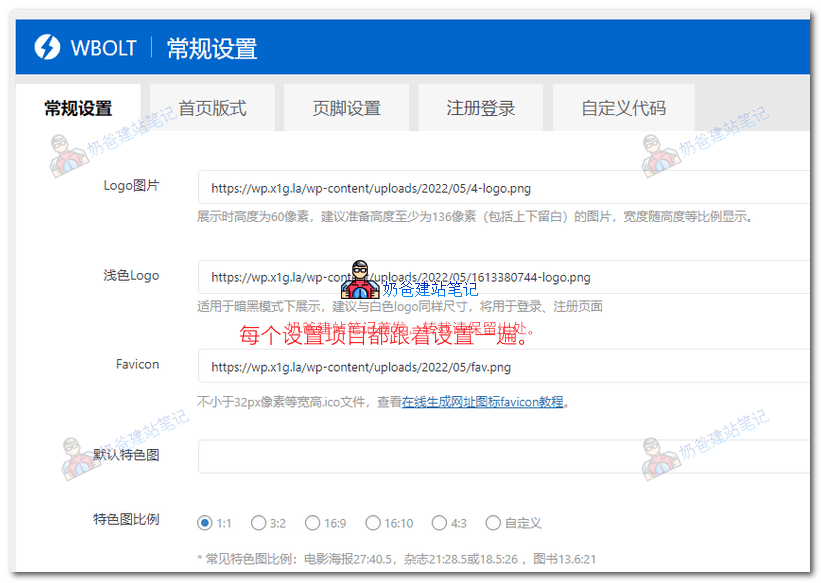
3. After activation, set the permissions to view normally. Review each setting and modify the ones that need to be changed.
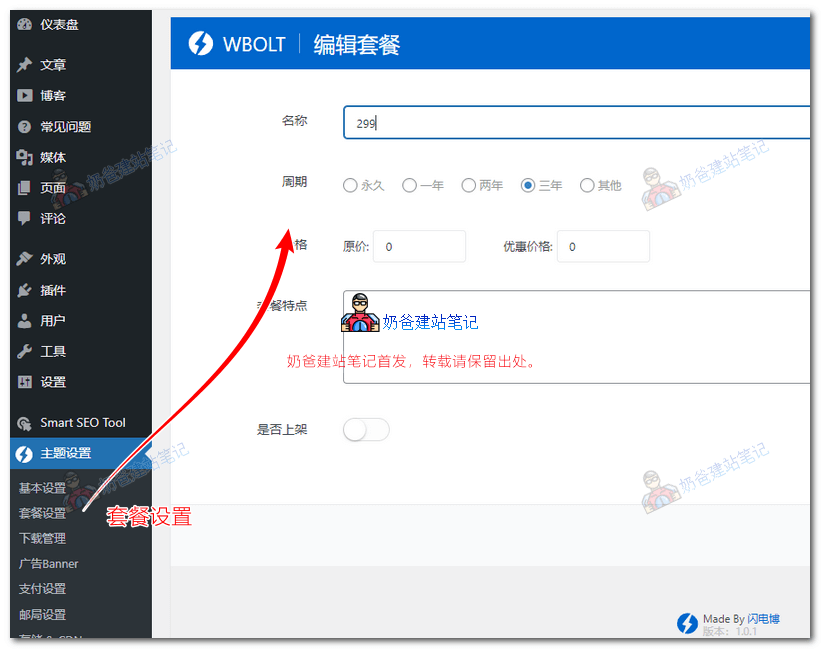
4. In the Package Settings, set the prices for website membership packages. Of course, the theme also supports one-time paid downloads.
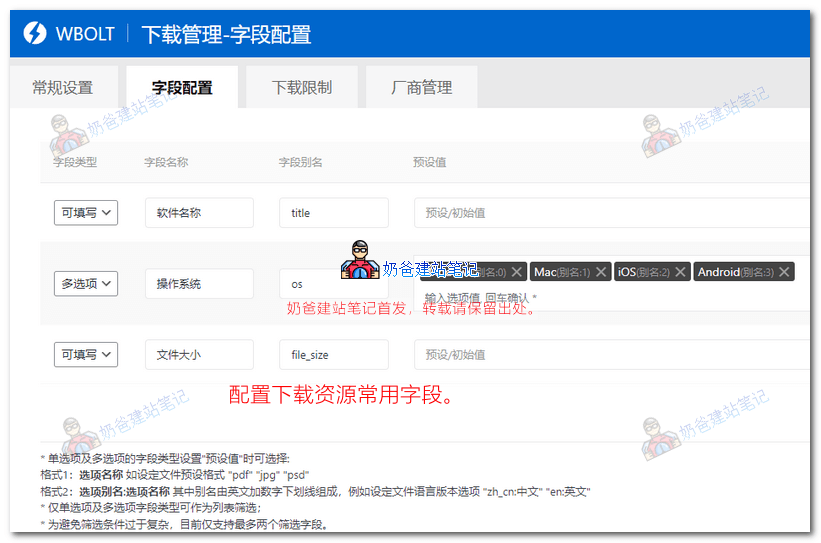
5. The field configuration for Download Management consists of some fixed display formats on resource pages. You can modify these fields according to your website's resource situation.
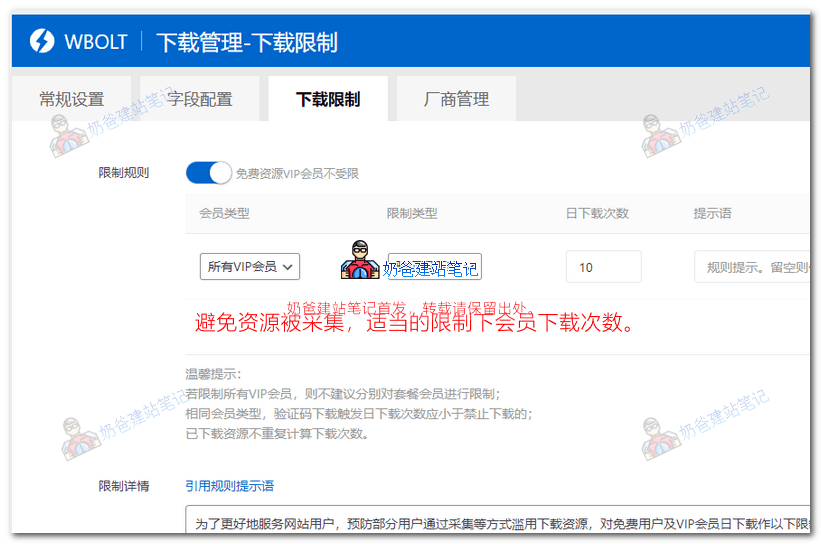
6. Set download limits. Especially for sites with monthly subscription packages, it's best to limit the number of resource downloads per day to prevent someone from downloading and collecting all your resources in a single day.
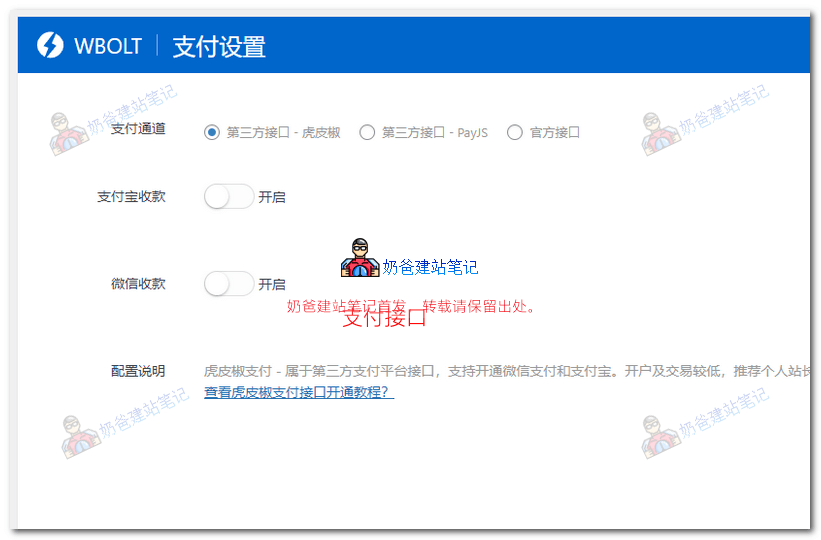
7. Integrate payment gateways. For third-party options, you can choose Hupijiao or PayJS. If your website is ICP licensed, you can directly apply for official payment gateways. Corresponding tutorials are provided on the theme settings page.
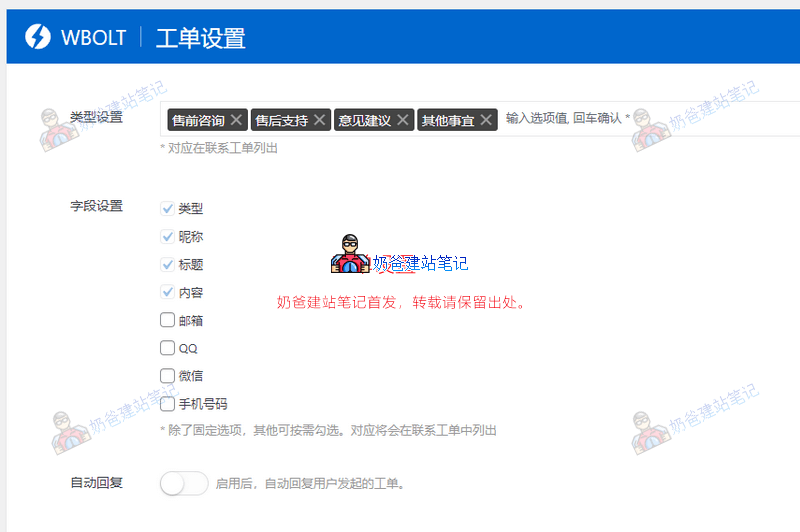
8. Ticket System Settings. For resource download sites, after-sales service is essential. If you don't want your WeChat or QQ to be bombarded with messages daily, using a ticket system for after-sales service is more convenient.
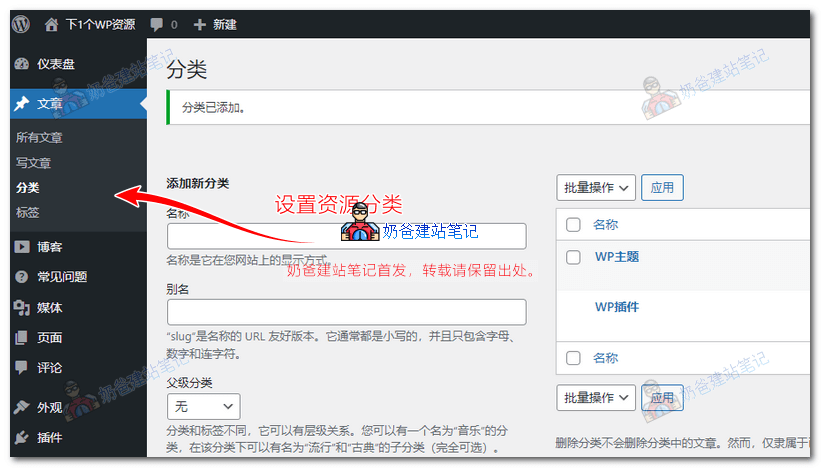
9. Set up resource categories. The Astore theme uses Posts for resource pages, so you can categorize resources by directly setting up Post Categories.
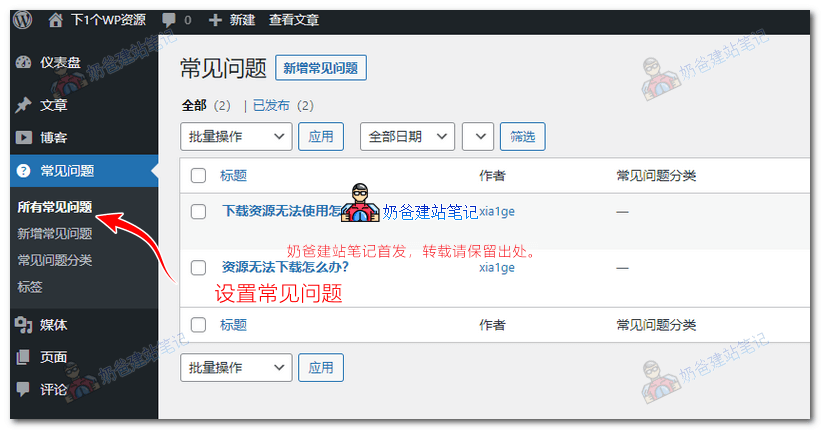
10. Set up Frequently Asked Questions (FAQ)
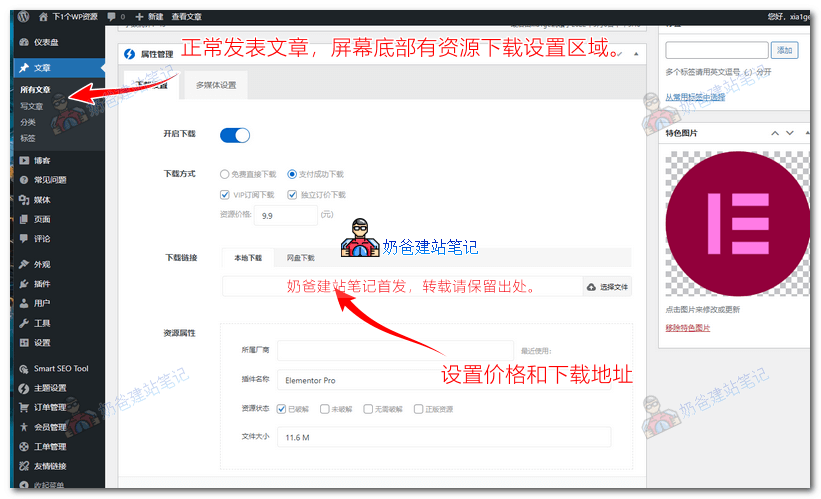
11. Publish resources and fill in download information.
12. Enable user registration.
In WordPress Settings, General, check „Anyone can register“ so that others can register accounts on your site.
Summary
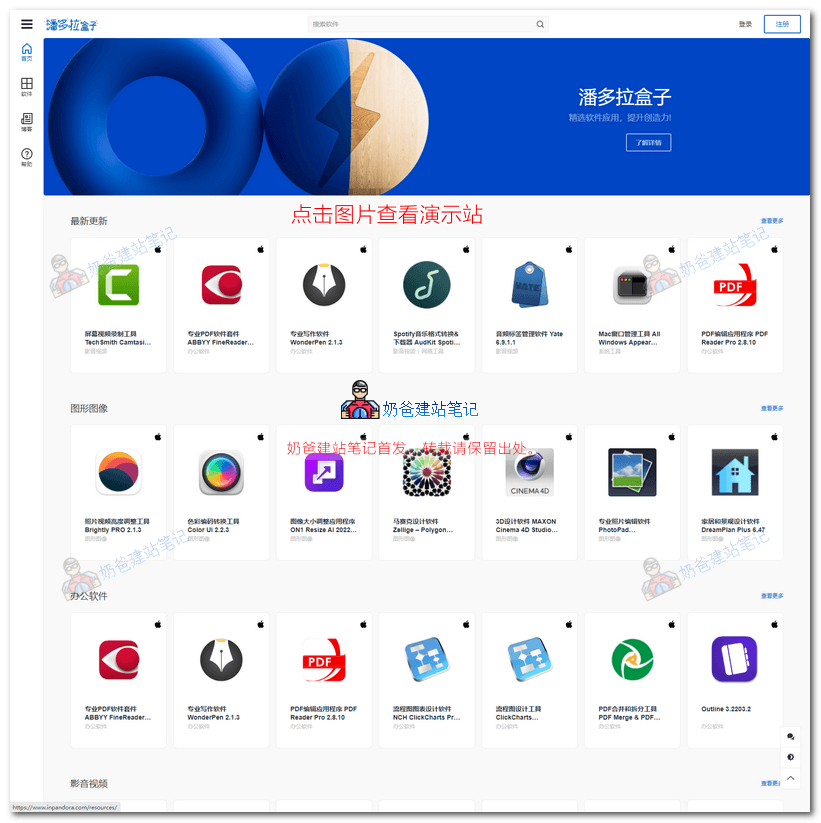
After completing the above settings, the website is basically configured. Next, you just need to enrich the website resources, promote it, and you can start selling resources. The website built by Naiba using this theme is available for viewing athttps://wp.x1g.la/