Some friends, while following theVultr WordPress Setup Tutorialarticle, might encounter some issues, such as installation failure, operational errors, or the configuration being too low to install. In such cases, we can reinstall the system or upgrade the configuration. This article provides a detailed, illustrated guide on how to reinstall the system and upgrade the configuration on Vultr.
Vultr System Reinstallation
First, log in to the Vultr website backend, find the VPS you need to reinstall the system for, and click to enter.

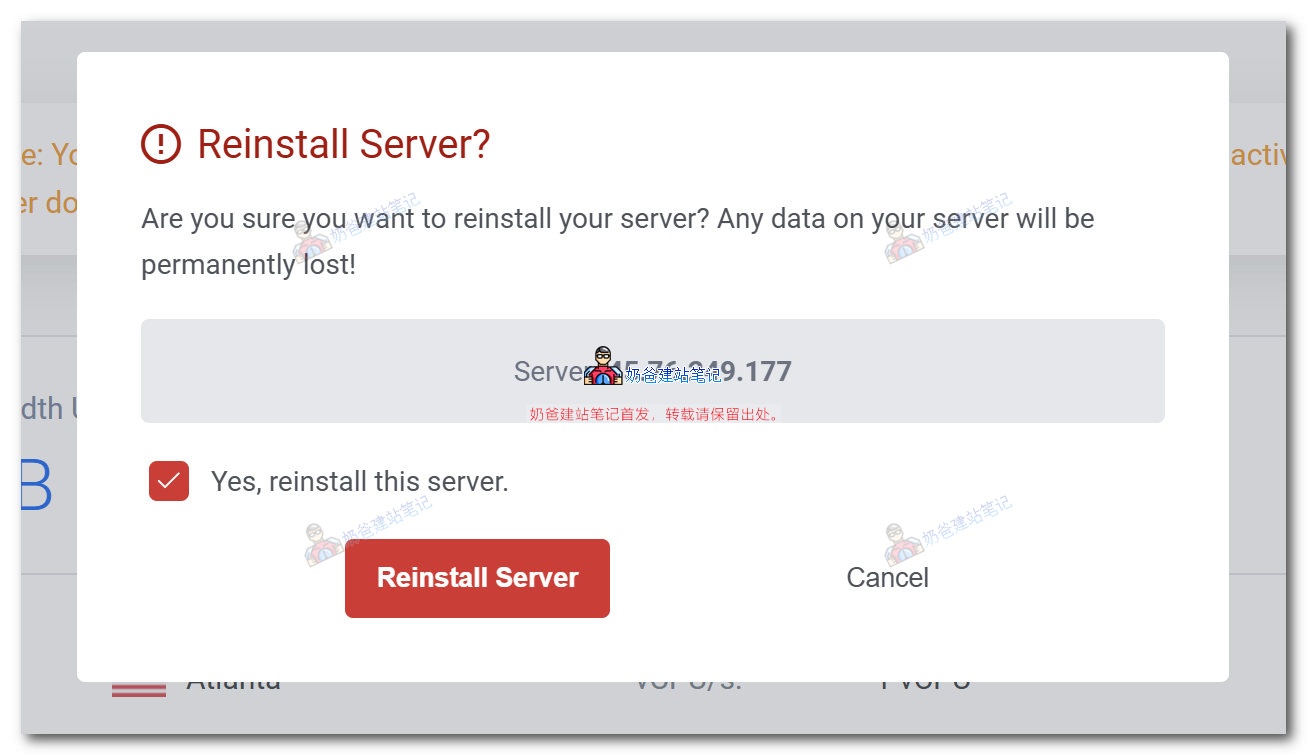
After entering the VPS details page, click the system reinstallation button in the upper right corner. A prompt as shown in the image below will appear. Click confirm, and the system will be reinstalled automatically.
Note: Reinstalling the system will result in the loss of all files on the server.
Vultr Operating System Replacement
The method above is for reinstalling the system. If you want to switch to a different system version, you can follow the steps below.
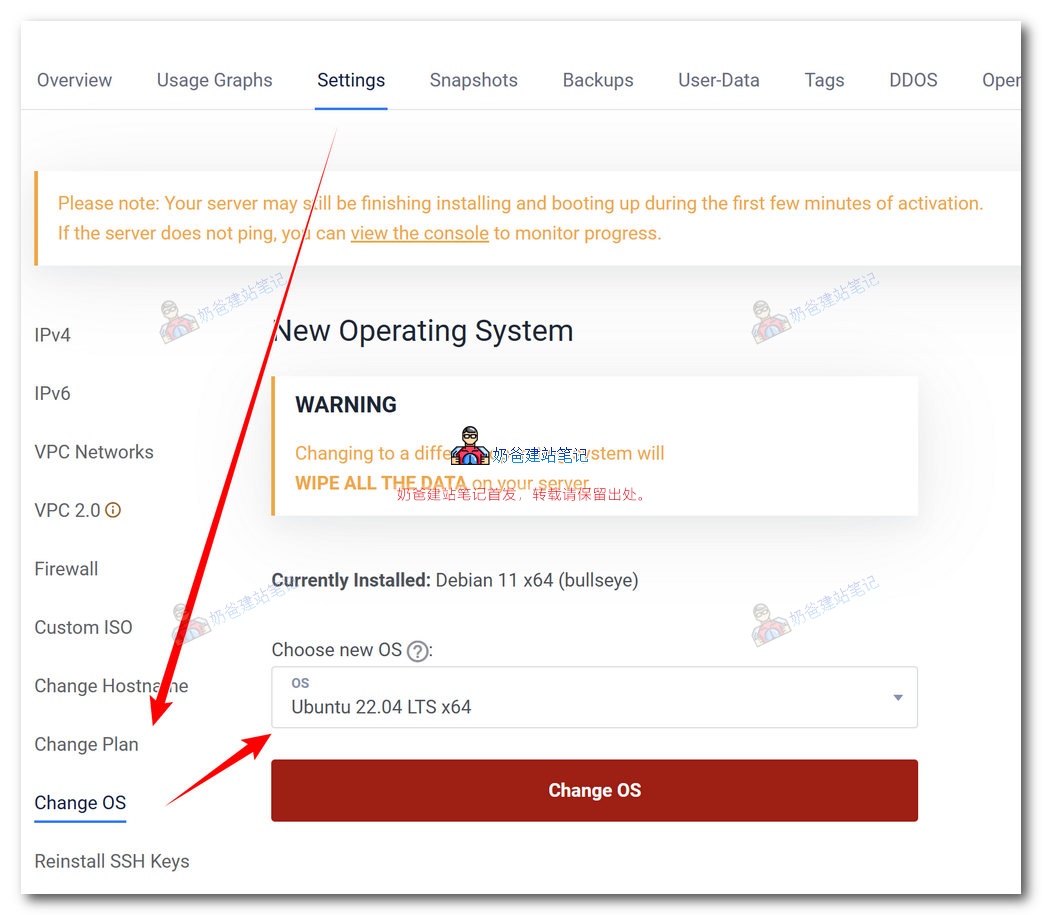
Similarly, enter the details page of the VPS for which you need to change the system. Click on the Settings tab at the top, find the 'Change OS' label, then select the operating system you want to switch to and click the button to proceed with the system change.
Vultr Configuration Upgrade
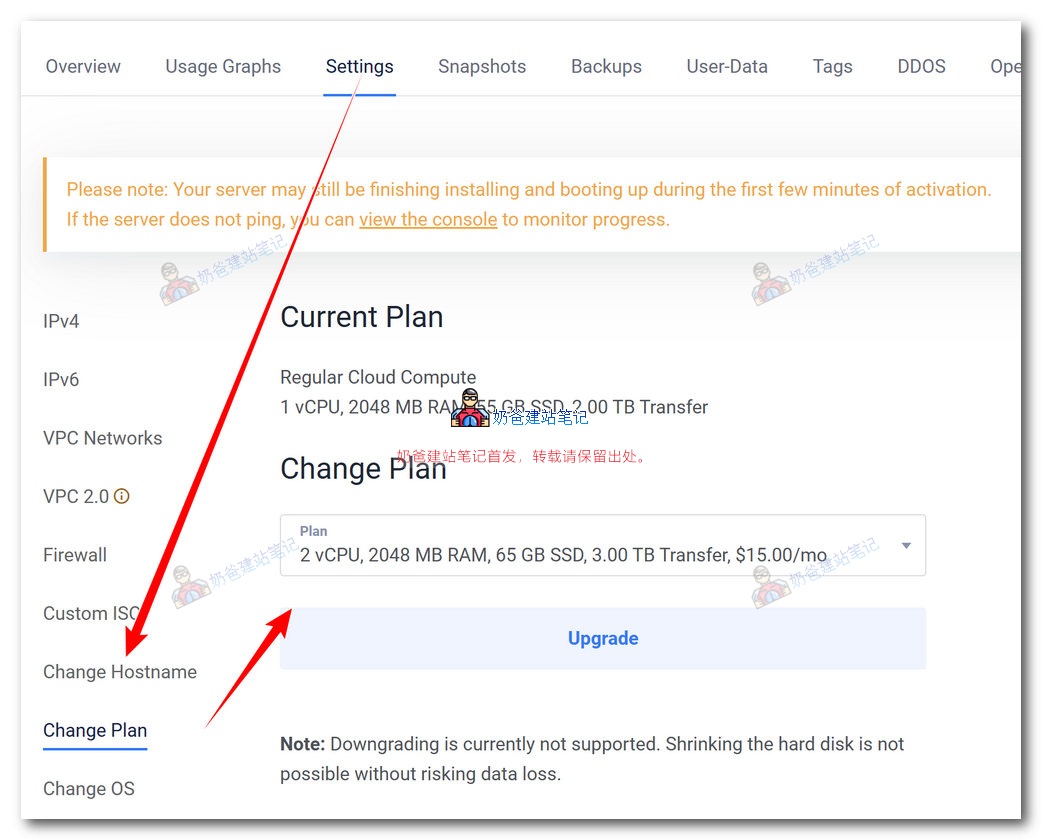
If the VPS configuration you initially purchased is too low and no longer meets your usage needs, you can upgrade the system configuration. The operation method is as follows:
Enter the details page of the VPS for which you need to upgrade the configuration. Click on the 'Change Plan' label under the Settings panel, then select the configuration you want to switch to and save.