If you have built an e-commerce website using WooCommerce, the default checkout page will require users to fill in tedious information such as name, city, region, email, company, etc. For some e-commerce websites, you may not need customers to fill in so much content, or you may need more than just this information and want to add some custom options for customers to fill in. Alternatively, you might want to add some display content on the checkout page. So, how should you do it? Let's go step by step.
Streamline Company Address Information on Checkout Page
If you only want to streamline the company and city address information on the checkout page, you can directly use the following code. Add it to your Theme's functions.php file. It is recommended to useCode Snippetsthis plugin to help you manage the code.
add_filter( 'woocommerce_checkout_fields' , 'custom_override_checkout_fields' );
function custom_override_checkout_fields( $fields ) {
//unset($fields['order']['order_comments']);
unset( $fields['billing']['billing_country'] );
//unset( $fields['billing']['billing_first_name'] );
//unset( $fields['billing']['billing_last_name'] );
unset( $fields['billing']['billing_company'] );
unset( $fields['billing']['billing_address_1'] );
unset( $fields['billing']['billing_address_2'] );
unset( $fields['billing']['billing_city'] );
unset( $fields['billing']['billing_state'] );
unset( $fields['billing']['billing_postcode'] );
//unset($fields['billing']['billing_email']);
unset( $fields['billing']['billing_phone'] );
return $fields;
}
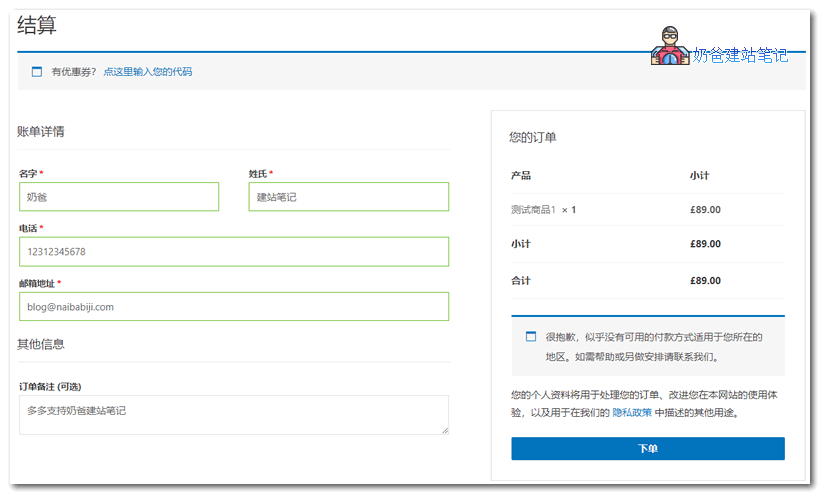
After adding it, the checkout interface on the website Frontend will look like this.
Manage Fields Using a Plugin
If simplifying this code does not meet your needs and you want to add some special fields to the checkout page, how to handle it? You can use plugins to help.
There are many plugins for customizing the WooCommerce checkout page. Here, we recommend those with a large user base.Checkout Field Editor (Checkout Manager) for WooCommerceplugin.
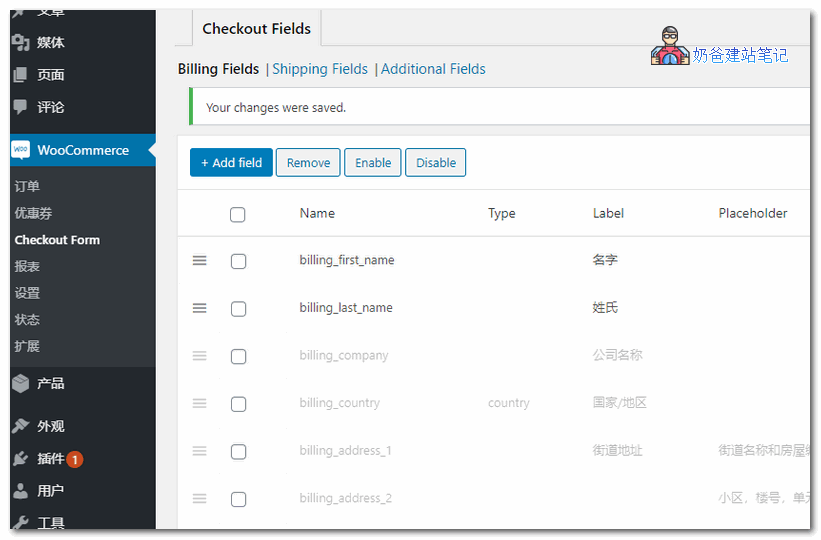
You can use this plugin to conveniently add, delete, enable, and disable fields.
If you want to use code to solve it, you can refer toofficial documentation.
Redesign the Checkout Page
Through the above two methods, you can modify and manage the fields on the Checkout Page, but the default checkout page style may not meet your website's customization needs. Therefore, you can also use plugins to redesign the checkout page.
Here are some well-known recommendations:CartFlowsPlugin.
After installing CartFlows from the WordPress backend, go to the plugin settings. This plugin can be used with a builder, so it is very easy to design the page yourself.
For beginners, it is convenient to choose a Flow Template from the plugin's built-in templates and modify it for use.
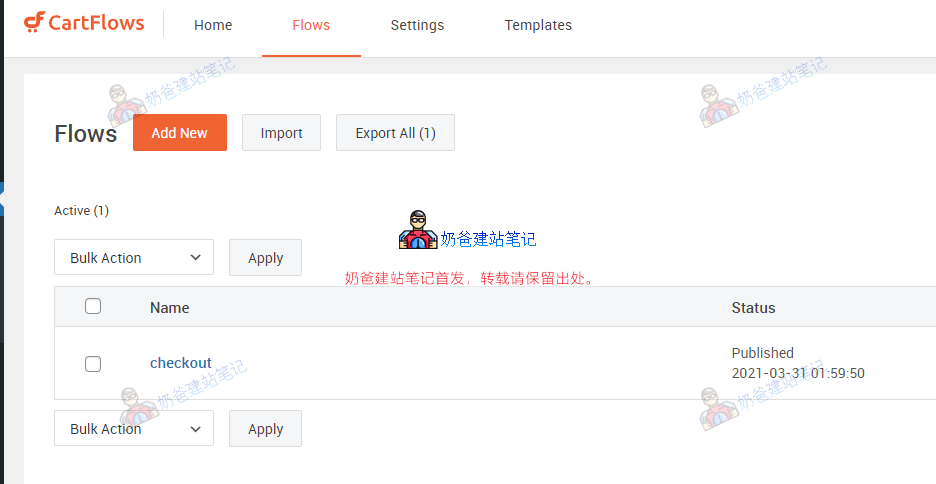
First, create or import a Checkout Page, then design the page and save it.
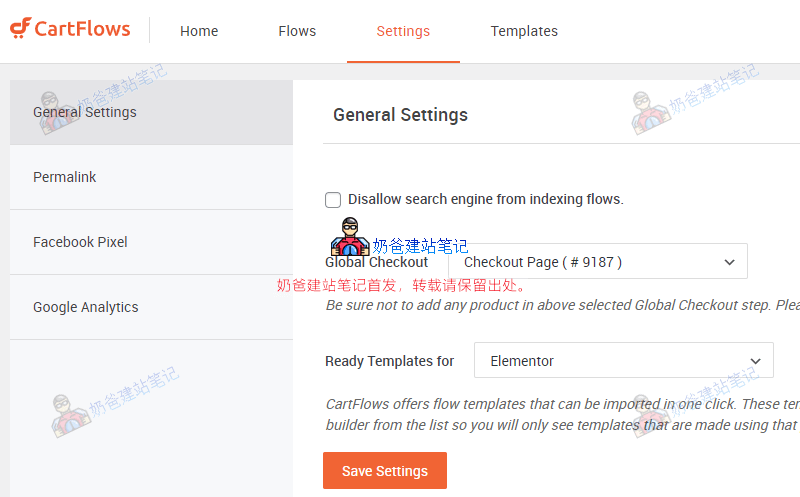
Next, in the plugin settings, set the Global Checkout to the checkout page you just created.
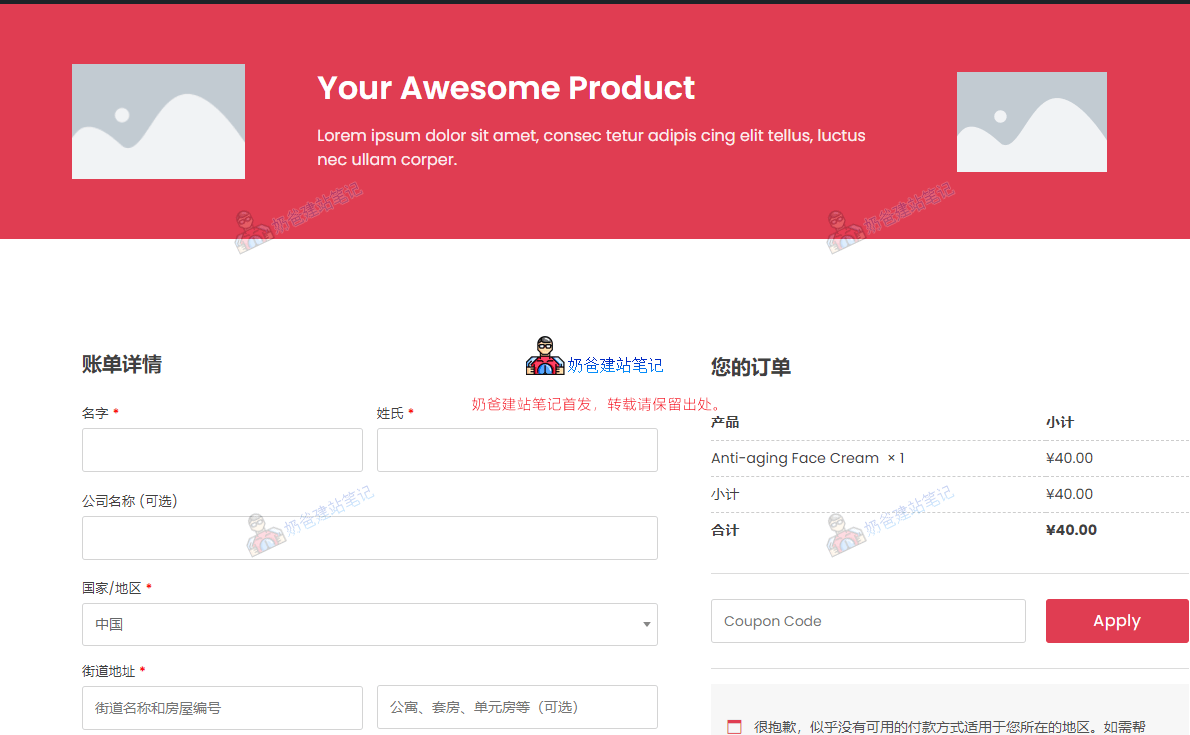
Finally, when the front-end user checks out, the checkout page will become the page you designed.
The above methods are the ways Naiba shares to customize the WooCommerce checkout page. Hope it helps you.