
Shopify supports binding your own domain, so we can register a domain ourselves and change the DNS records to access Shopify via our own domain. This article introduces the Shopify domain setup method.
Does Shopify require registering a domain?
By default, Shopify provides a subdomain through which you can access your Shopify store.
However, for branding purposes, we usually choose to point our own domain to Shopify.
You can register directly in the Shopify admin, or register from other domain registrars, such as those recommended by Naiba.NameSilo。
Shopify Domain Setup Tutorial
Let's set up accessing your Shopify store via your own domain step by step.
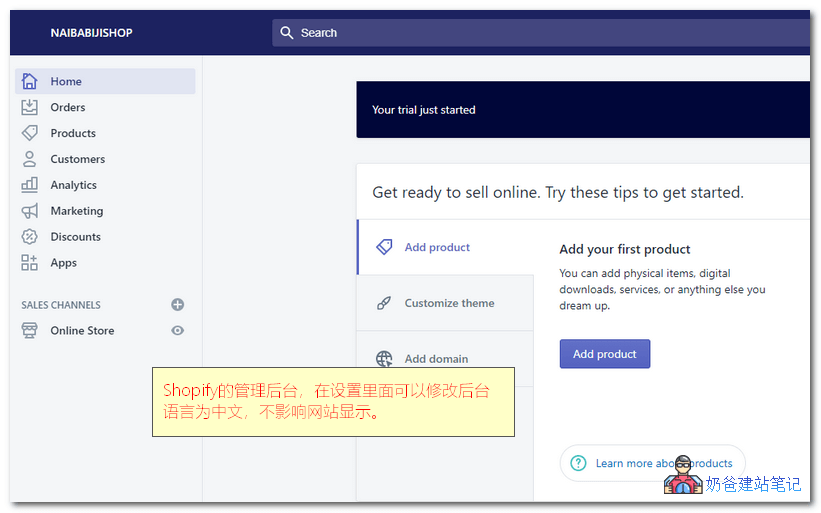
1. Log in to your Shopify store admin, click on Domains under Online Store, then select Connect existing domain.
(If your Shopify admin is in English, just follow the icons in the screenshot.You can set the Shopify admin to Chinese, which does not affect the English display of the front-end website)
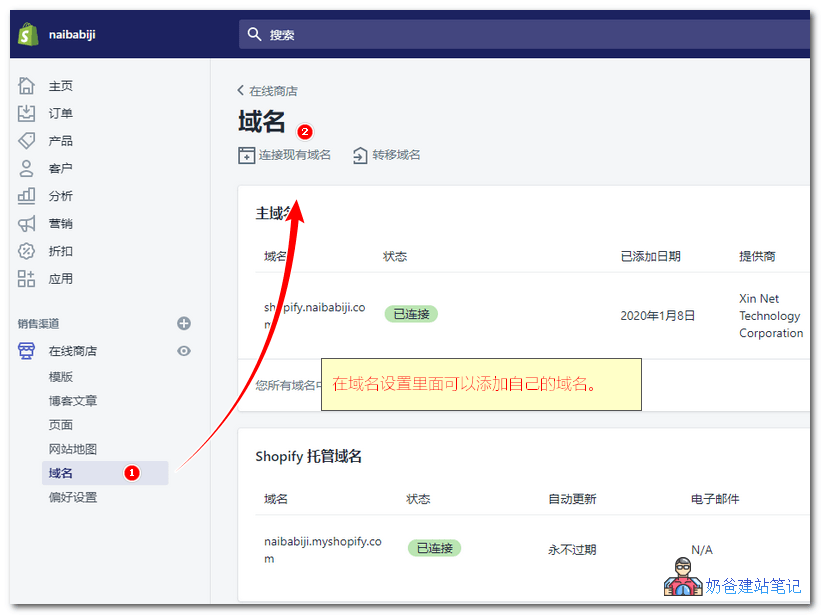
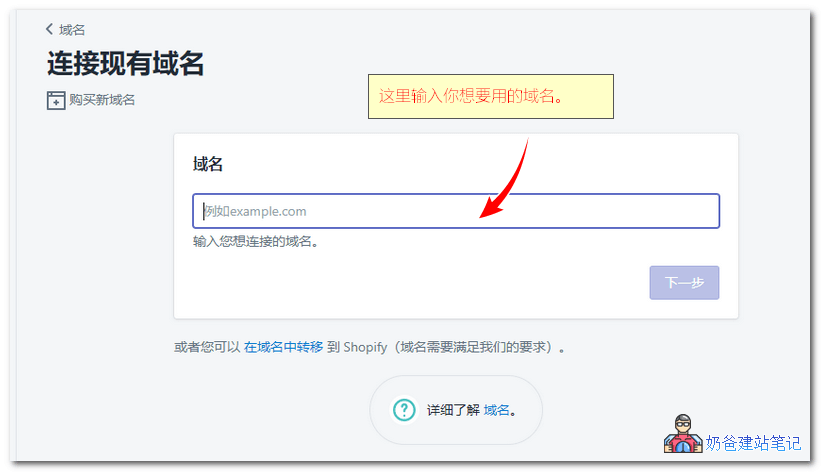
2. In the pop-up window, enter your own domain name.
There are two cases for adding a domain: you can directly enter a domain with or without www., or you can use a domain starting with shop.
If you already use a www. URLto build a corporate WordPress website, then it is recommended to enter a shop. domain here.
For example, the URL of Naiba Web Development's Shopify test site is: https://shopify.naibabiji.com/
3. Click View instructions to get the DNS record values.
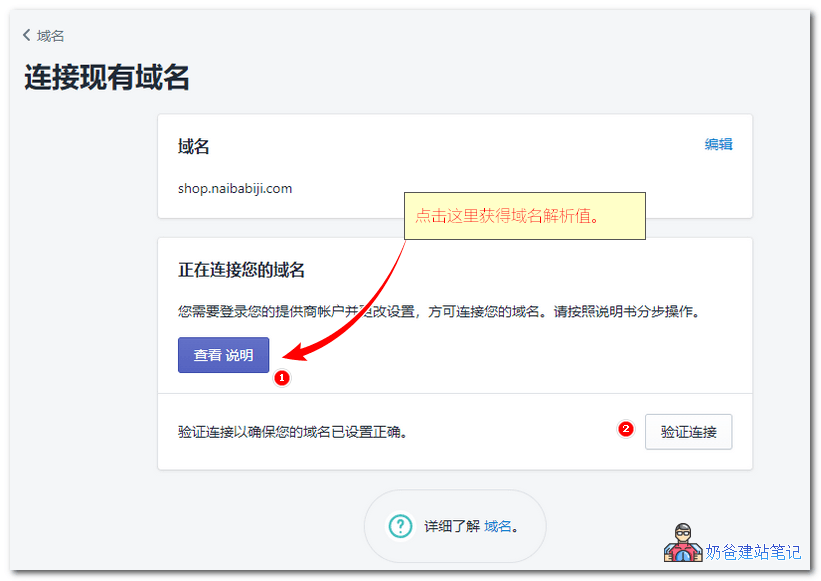
It's uncertain if the DNS record values are the same for everyone; please use the data you see as the standard. Just look at the section below.
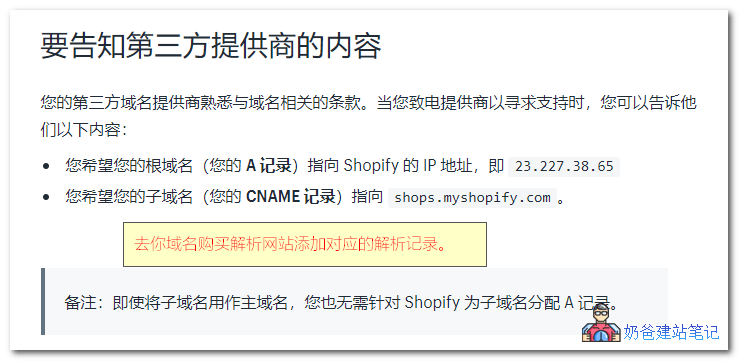
4. Go to your domain's DNS management website (usually where you registered the domain) and add the corresponding DNS records.
Since we are adding a subdomain (i.e., shop.), we only need to add a CNAME record. The method is as follows:
Method for namesilo (other domain registrars have similar methods; you can refer to Naiba Web Development's notesDomain Topicto view the corresponding article.)
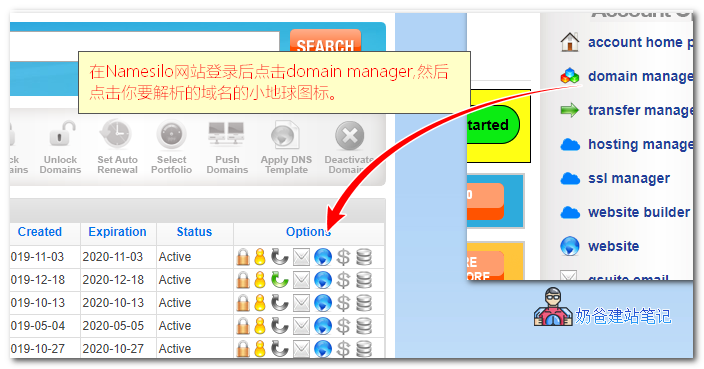
Log in to the Namesilo domain control panel, select Domain Manager, and then click the small map icon for the domain you want to resolve.
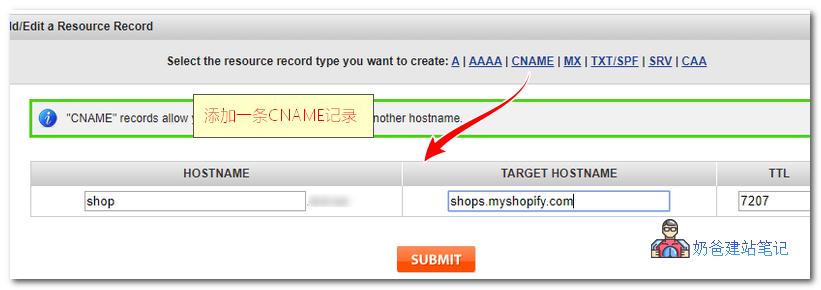
Then add a CNAME record.
If you are using a domain without www to access directly, then add an A record with the value being the IP provided by Shopify.
After setting it up, go back to the Shopify add domain interface and verify. If verification fails, wait a while and try again, because DNS resolution takes time to propagate and may not take effect immediately. (Usually, most changes take effect within a few tens of minutes.)
At this point, your custom domain resolution to Shopify is set up. You can add your Shopify store URL to your business website's navigation bar, so customers can access the store site from your business website.