KeePass is an open-source password management software. Compared to paid password managers like Lastpass, Naiba personally feels more assured with open-source software. Moreover, KeePass manages password storage through a database, key file, and password; as long as these three items are not lost together, there's no need to worry about security.
KeePass also supports multiple platforms and can be used for free on both computers and mobile devices. I believe friends who have found this article already have some understanding of KeePass.This article aims to share how toachieve automatic password filling for KeePass in the Chrome browser. This method is applicable to other browsers based on the Chromium kernel, such asBrave browser. (Actually, Naiba researched and wrote this article because he recently started using the Brave browser, and the current version of Brave does not yet support password synchronization.)
Essential Requirements for KeePass Auto-Fill Passwords in Chrome
Here we need two tools:
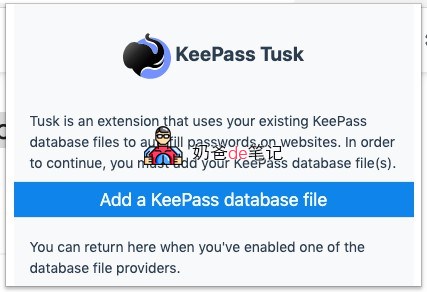
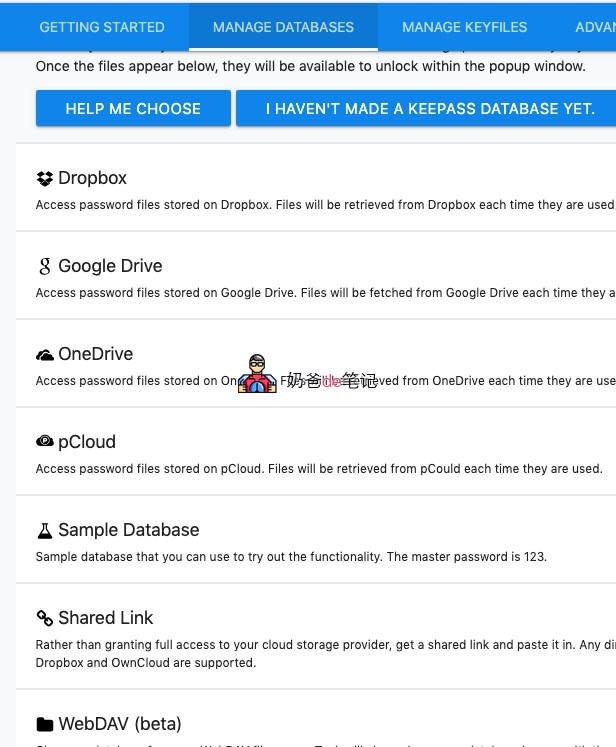
1.KeePass Tusk – Password Access and AutofillExtension (if you can't download it, leave a comment and I'll send it to you)
2. Any one of Dropbox/Google Drive/OneDrive/pCloud/WebDAV/Database URL
Naiba's tip: The previous cloud drives require a VPN to access. If you don't have a VPN, you can use Nutstore's WebDAV feature or simply put your database on a server or cloud drive that supports direct URL access.
Nutstore„s WebDAV can be added under “Account Info„ - “Security Options„ - “Third-party Application Management„. The personal version has a monthly traffic limit, but it is sufficient for syncing KeePass passwords.
KeePass with OneDrive Sync and Auto-Fill Passwords
First, upload your KeePass database file (the .kdbx file) to OneDrive. (If you are using Windows 10 and have OneDrive enabled by default, this will be very convenient.)
Then click the KeePass Tusk icon installed on Chrome (or other Chromium-based browsers, such as Brave browser).
1. Select Add a KeePass database file
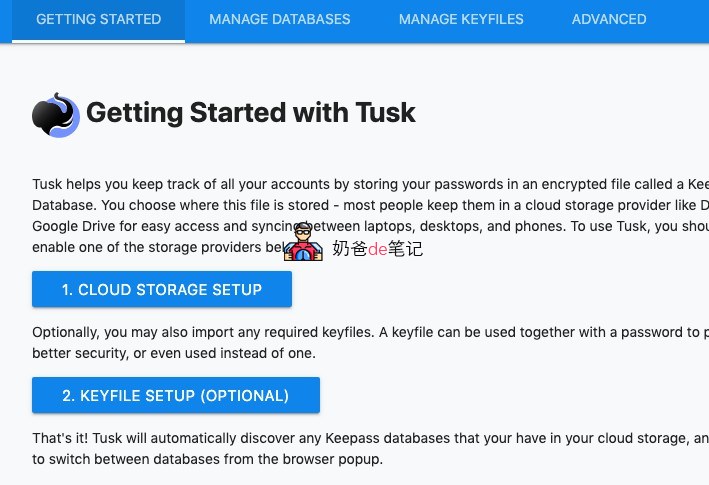
2. On the new page, select "Cloud Storage setup"
3. Here, choose OneDrive (select the one you are using)
4. An authorization prompt will appear; click "Allow"

Next, the Microsoft account login interface will appear; just log in. If everything is correct, it should automatically select the .kdbx database file you uploaded earlier.

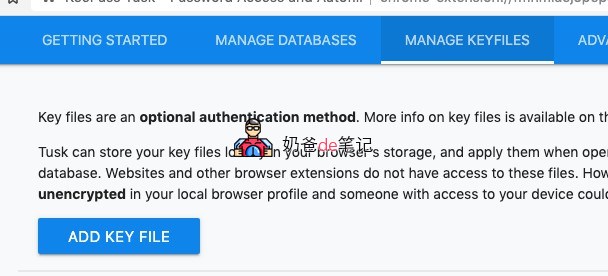
5. Then, click "MANAGE KEYFILES" on the navigation bar and select your key file. (Use the "ADD KEY FILE" button to add it.)
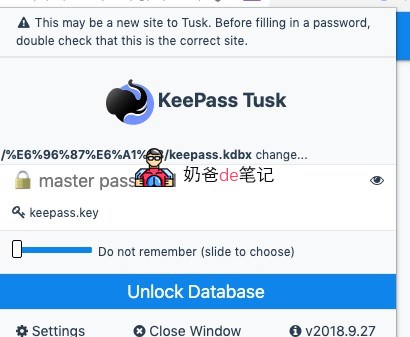
6. If everything is normal, clicking the KeePass Tusk icon in the top right corner will bring up the following interface, prompting you to enter the password.
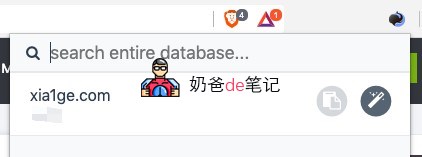
If the password is correct, the saved password information for the current website will be displayed. Clicking the magic wand icon at the end means automatic filling, while the one before it is the copy button.
KeePass with Nutstore Sync and Auto-Fill Passwords
To sync KeePass with Nutstore, first, you need to register aNutstoreAccount.
Then upload your KeePass database to Nutstore.
Then go to Nutstore „Account Info“ - „Security Options“ - „Third-party Application Management“, create a WebDAV application, and get the password.
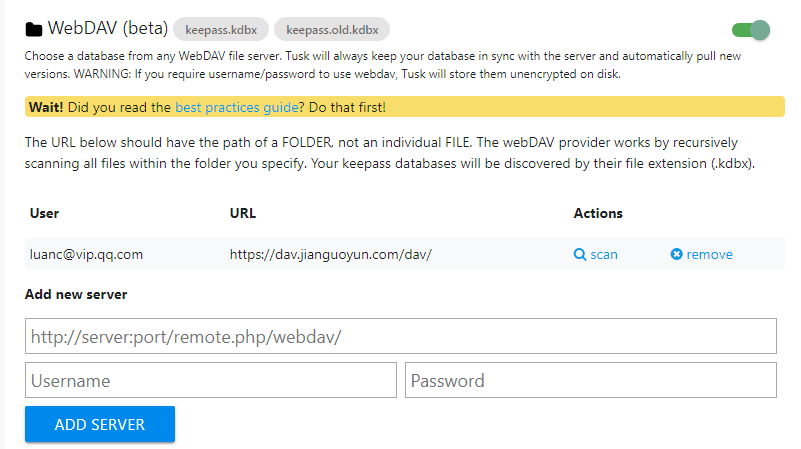
The method for using Nutstore sync to enable Chrome autofill for KeePass passwords is similar to the OneDrive method above, except that when selecting the space, choose WEBDAV mode. The specific steps are as follows:
Click the KeePass Tusk icon installed on Chrome (or other Chromium-based browsers, such as Brave browser).
1. Select Add a KeePass database file
2. On the new page, select "Cloud Storage setup"
3. Select WebDAV mode. Then enter your Nutstore account information, and it will scan the KeePass databases on your Nutstore. Just choose one.
4. Then click MANAGE KEYFILES in the navigation bar above and select your key file. (Use the ADD KEY FILE button to add.)
If everything is normal, click the KeePass Tusk icon in the upper right corner, and it will prompt you to enter your password. Then you can use the autofill feature.
It is important to note that filling passwords via the KeePass Tusk plugin does not require you to install the KeePass software on every computer, because the plugin reads information directly from your online database. This means it can only read your saved passwords and cannot add or modify your password content.
If you want to achieve real-time addition and modification of password content, please refer to Naiba's second article on KeePass automatic fillingMethod Two for KeePass to Automatically Fill Passwords in Chrome Browser
Online KeePass Management: KeeWeb
KeeWeb is an online tool shared by commenter cwz for managing KeePass. It is also open source. You can open your KeePass database and key file directly through a browser, and then add, modify, or delete passwords.
For online use, just visithttps://app.keeweb.info/(You can set the Chinese language in the settings; if not available, install the Chinese language pack in the plugin.)
KeeWeb can also be installed on your own server. Tutorial and source code address:https://github.com/keeweb/keeweb
The above is the first method for achieving automatic password filling for KeePass in the Chrome browser as shared in this article. If you are not satisfied, you can also refer to:Method Two for KeePass to Automatically Fill Passwords in Chrome Browser