Previously shared
Method 1: Implementing KeePass for Automatic Password Filling in Chrome Browser, now let's continue sharing the second method to achieve KeePass auto-filling passwords in the Chrome browser, which also supports adding and modifying passwords.

KeePass Method Two for Implementing Automatic Password Filling in Chrome Browser
Required Software:
KeePassXC, also known as KeePass Community Edition, which also supports Mac and Linux, and is open-source, so security is assured. Required Plugin:
KeePassXC-Browser(Offline Download)
Why use KeePassXC instead of the official KeePass client?Because KeePassXC is more powerful, and more importantly, it conveniently enables the Chrome browser KeePass auto-fill we want, and allows modification of the KeePass database. Many online tutorials using the original KeePass require a plugin called KeePassHttp.plgx, which hasn't been updated for a long time and needs other plugins to work. KeePassXC itself can integrate with
Chrome Plugin functionality without needing KeePassHttp.plgx, so we use it.
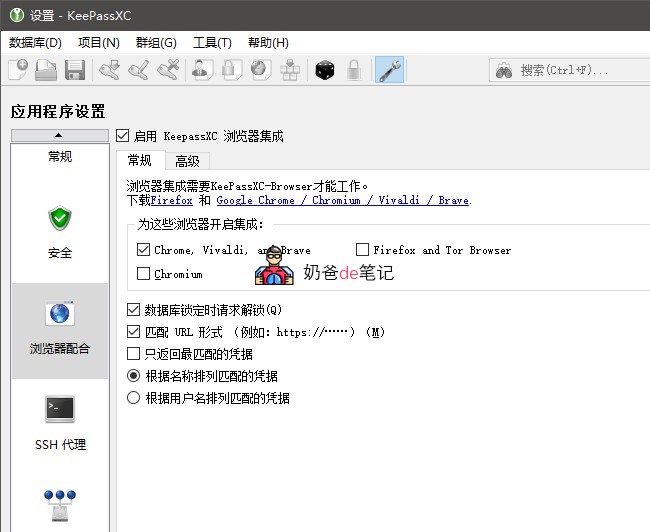
Specific steps:The installation of KeePassXC and importing your previous KeePass database won„t be covered here; it has built-in Chinese language, so you can understand how to operate it. After installing KeePassXC, go to the settings interface, check “Enable KeePassXC Browser Integration,„ and then check the browsers you want to integrate below.
Brave Browser also just check Chrome.
Then click the KeePassXC-Browser icon in the upper right corner of the browser, and click the link button below.
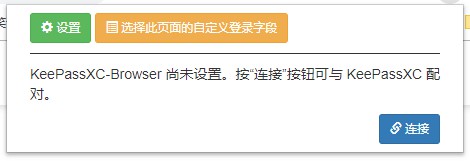
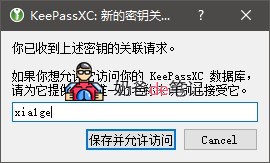
If connected, it will prompt you to enter an identifier; just enter anything. (If this dialog doesn't pop up, please run KeePassXC first and log into the database.)
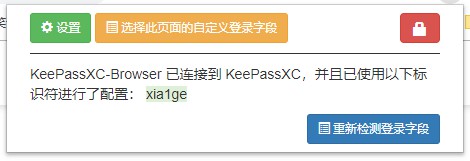
Then it will prompt you that the connection was successful.
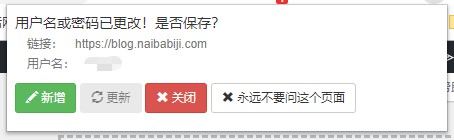
When you create a new account on a website or an account changes, a prompt like the one below will appear, and the data will be directly written into your KeePass database.
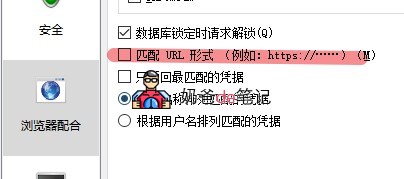
In KeePassXC settings, you can set the database to save automatically after external modifications to prevent data loss from unexpected computer shutdowns. If you encounter a website where you„ve saved a password but don“t get an auto-fill prompt, please uncheck „Match URL scheme“ in the settings. This is because when you saved the password, the site was accessed via http, but in recent years https has become widespread, and the previous site now forcibly redirects to https, so the software can„t match it.
Alright, this is the second method to achieve Chrome auto-filling of account and password information saved in KeePass.
The first methodThe advantage of this method is that it does not require installing and running the KeePass client to read and automatically fill in your account passwords, but it cannot add or modify entries. The second method introduced in this article has the advantage of allowing you to add or modify your account password information at any time, but the drawback is that you need to run the KeePassXC software. Currently, Naiba uses both methods simultaneously: usually using KeePass Tusk from method one, and switching to method two when needing to add or modify the database. If you have a better method, feel free to share it with me.

Comments are closed
The comment function for this article is closed. If you have any questions, please feel free to contact us through other channels.