SiteGround Shared Hosting supports using free Let’s Encrypt certificates directly. Since SiteGround has upgraded its Admin Dashboard interface, new users have the new version. This article updates the tutorial for installing SSL certificates in the new SiteGround Admin Dashboard.
Steps for installing SSL certificates in the old Admin Dashboard
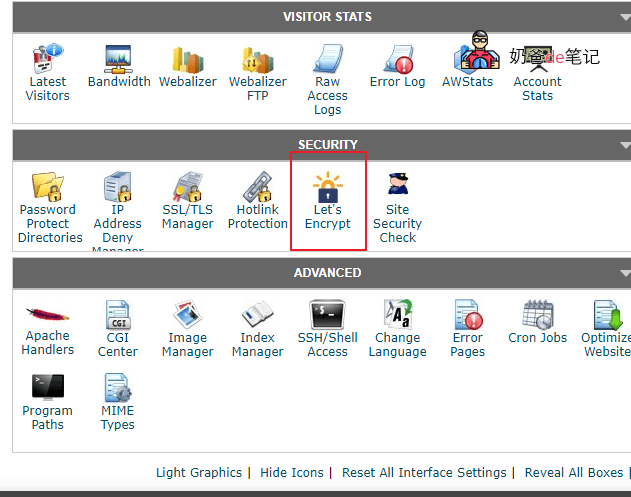
Step 1: Enter the cPanel panel and find Let's Encrypt
First, log in to your SiteGround cPanel management panel, then find Let's Encrypt.
Step 2: Click Get wildcard
Then click Get wildcard on the list of domains you want to apply for an SSL certificate, as shown below:
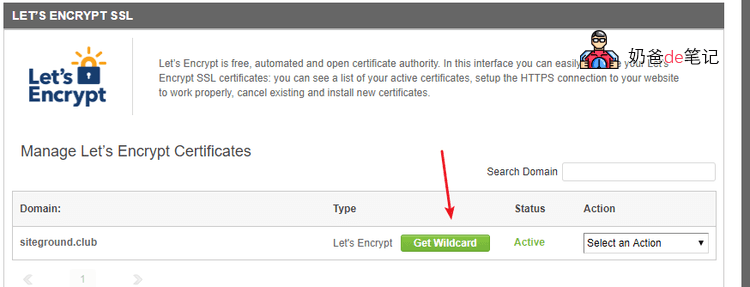
Note: It is recommended to change the DNS servers to SiteGround's DNS servers here; it will automatically handle these DNS verification records for you.Domain Resolution and DNS Server Modification Tutorial
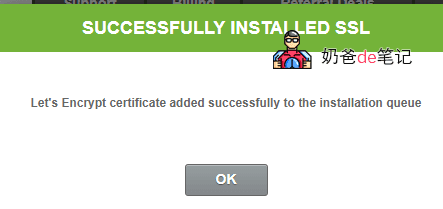
Next, it will tell you that the domain you added, including subdomains, can use SSL. Click OK to confirm.
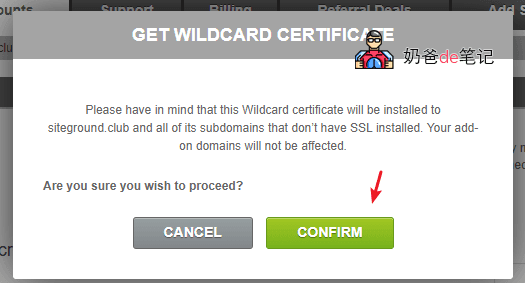
Once installed, click OK.
Step 3: Set up HTTPS forced redirect
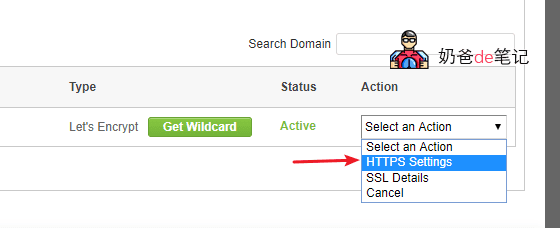
Then, in the domain list, under Action, select HTTPS Settings.
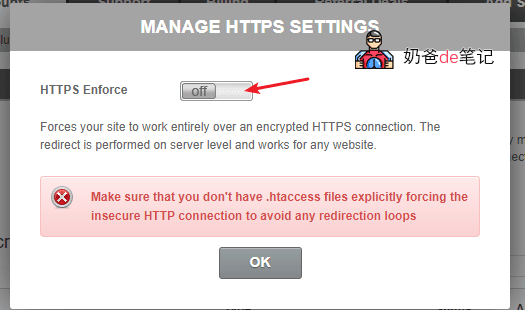
In the pop-up interface, enable HTTPS Enforce, which forces redirect to HTTPS access. It is recommended to enable it.
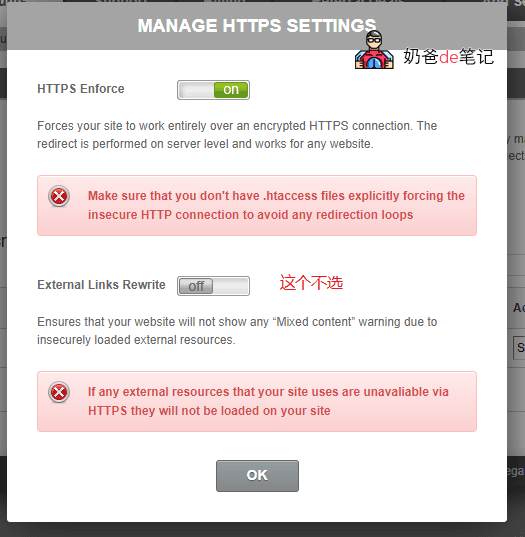
After enabling the above HTTPS, the following External Links Rewrite option will appear. It is not recommended to enable it, as it will forcibly change all HTTP links on your site to HTTPS. Some resources may not support HTTPS access, so it is not necessary to enable it.
At this point, your site's SSL certificate is set up. You can visit the site to see the effect.
Steps for setting up SSL certificates in the new Admin Dashboard
The steps to enable an SSL certificate in the new version of the SiteGround backend are simpler. The specific method is as follows:
Step 1: Access the SSL Manager management interface
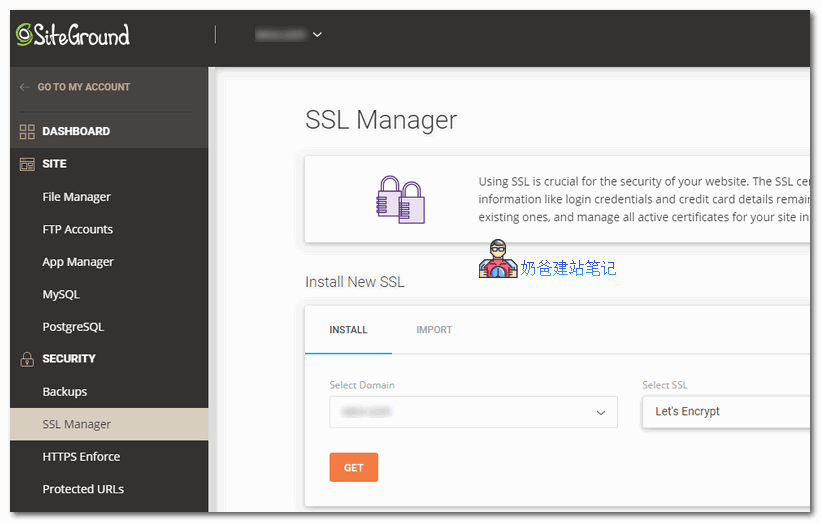
After logging into the new version of SiteGround backend, select SITE TOOLS to enter the control panel interface, then select SSL Manager under SECURITY in the left menu.
Then click the GET button under the domain name for which you want to obtain an SSL certificate.
Step 2: SSL certificate generation successful
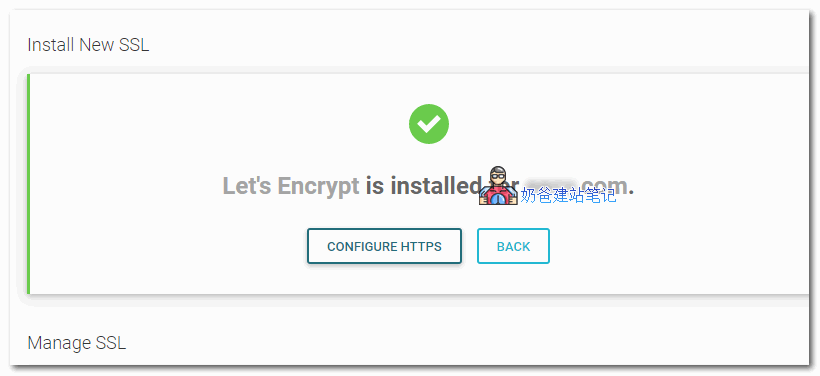
Under normal circumstances, you will be notified shortly that the certificate has been installed successfully.
Step 3: Enable HTTPS redirect
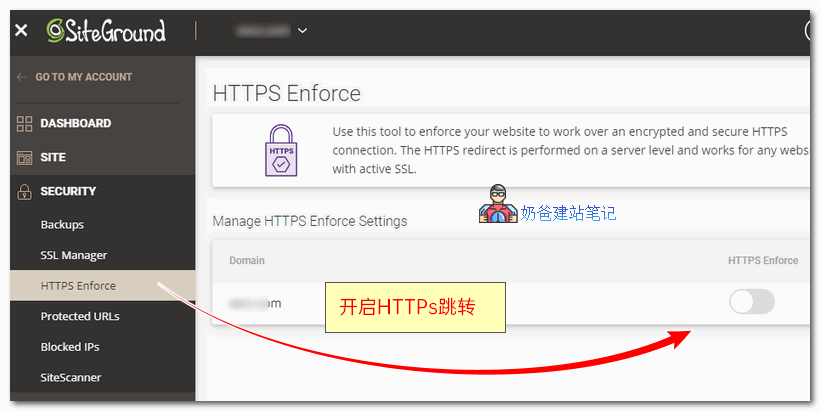
Go to HTTPS Enforce under SECURITY, then turn on the button next to it.
SSL Certificate FAQ
Q: What should I do if SSL certificate generation fails?
A: SiteGround defaults to applying for a free Let's Encrypt SSL certificate, verified through domain resolution. If your application fails, it is recommended to change the domain's NS server to SiteGround, or manually add resolution records.
Q: Does SiteGround's SSL certificate cost money?
A: No, SiteGround uses Let's Encrypt certificates by default, no need to pay. Of course, you can also purchase a paid SSL certificate yourself.