
After installing WordPress by default, uploaded images are stored on the server in a year/month folder structure. However, if many images are uploaded in a particular month, along with automatically generated thumbnails, the folder can contain tens of thousands of images, affecting server efficiency. Therefore, we need to customize the WordPress upload path.
Method 1: Customizing the WordPress Upload Folder
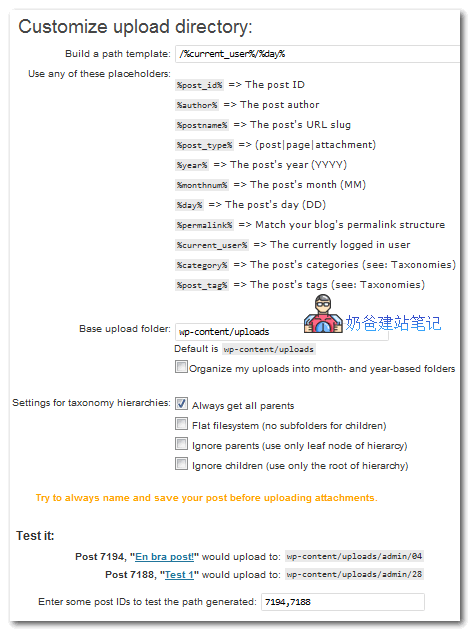
We can install the Custom Upload Dir plugin to achieve this.
This plugin allows you to customize the upload path.You can construct variable paths from elements like the Post title, Category, Post author, and Publication date.etc.。
Method 2: Customizing the WordPress Upload Folder
This is a plugin-free method using code. Insert the following code into your website Theme's functions.php file to upload to a specified folder.
add_filter('upload_dir', 'awesome_wallpaper_dir');

function awesome_wallpaper_dir( $param ){
    $mydir = '/awesome';

    $param['path'] = $param['path'] . $mydir;
    $param['url'] = $param['url'] . $mydir;

    return $param;
}
/awesome is the path location you set.
For details, please see: https://codex.wordpress.org/Plugin_API/Filter_Reference/upload_dir