
By default, SiteGround provides a shared IP after purchasing a service. Some friends, while reading SEO tutorials, may have heard that a dedicated IP is more beneficial forSEO Optimization, so in this article, Naiba will explainHow to Order a Dedicated IP on SiteGround。
What is a Dedicated IP?
A dedicated IP, also called a dedicated IP, Dedicated IP.
A dedicated IP is an IP address exclusively assigned to your account and will be used for the websites you host on it. This is beneficial for your business image. It also provides you with an alternative way to access your website, as you can simply use the dedicated IP in your browser instead of the domain name. Similarly, some third-party services may require a dedicated IP to function properly.
Simply put, a dedicated IP means that the IP is used only by you, while the default shared IP is used by many people together.
In terms of SEO, the main issue with shared IPs is that because many people use them, if some users engage in activities that search engines dislike, your website may also be affected. Additionally, if a website on the same IP is attacked, your website could be impacted as well.
How to Order a Dedicated IP on SiteGround?
To order a dedicated IP on SiteGround, follow the steps below:
Ordering Method for the Old Interface
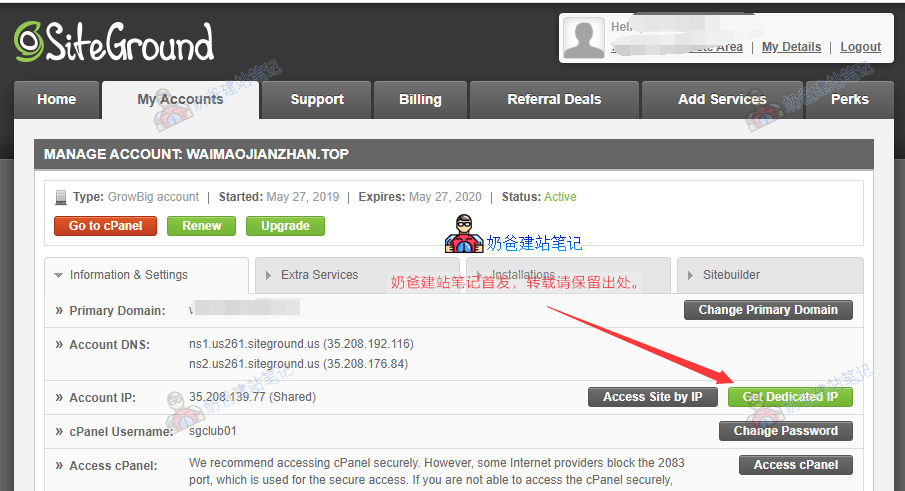
After logging into the SiteGround backend, select My Accounts, then click Get Dedicated IP next to the IP address.
Then proceed to the payment page. The price is $4.5/month.
Ordering Method for the New Interface
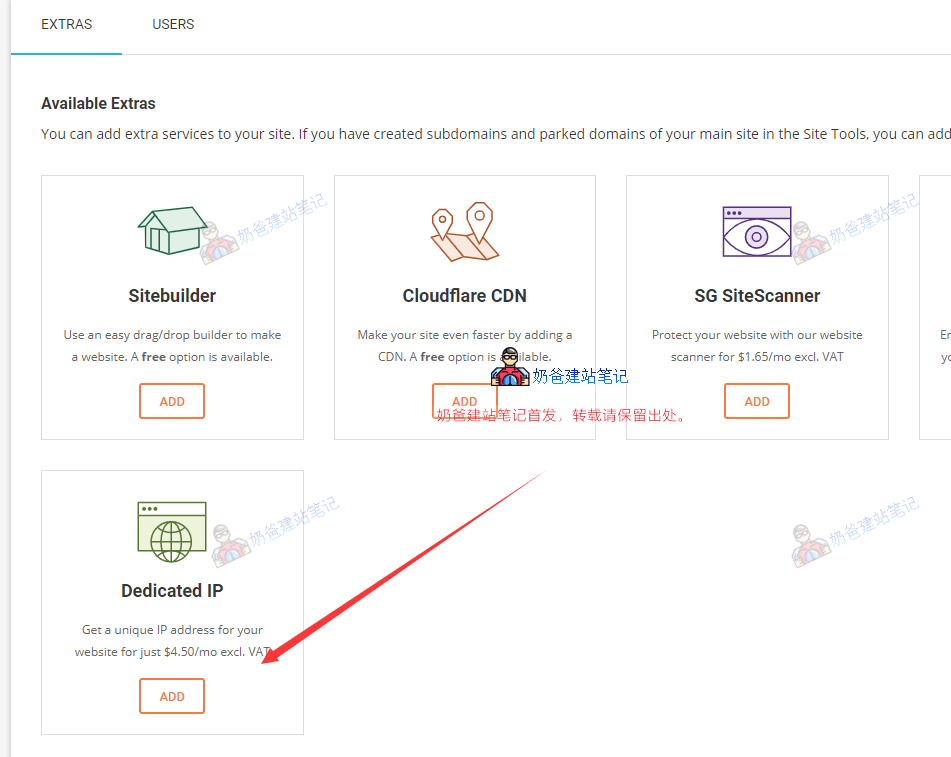
If you are using the new version of the SiteGround backend, the button to order a dedicated IP is at the bottom of the homepage. Simply click the ADD button to add it.
Once your dedicated IP is activated, you need to modify the IP in your domain DNS settings to the dedicated IP so that it is used for your website.